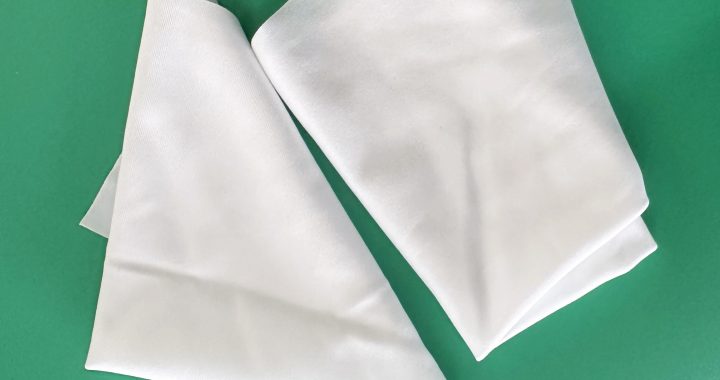
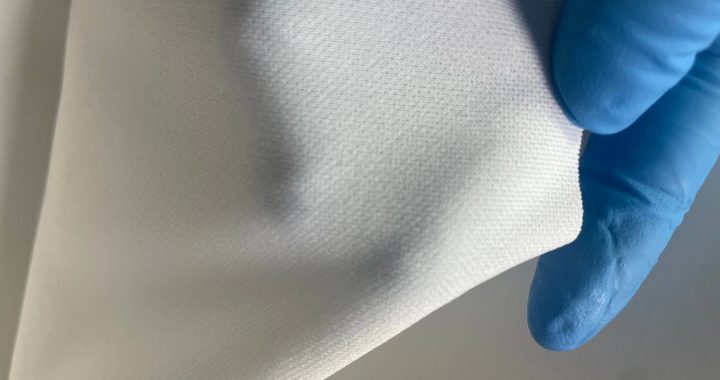
Key points for using IPA wipes to clean optical instruments

Optical instruments—such as microscopes, spectrometers, laser systems, and camera lenses—rely on pristine surfaces to transmit light accurately. Stains like fingerprint oils, dust-embedded grime, or mild organic residues can distort imaging and damage delicate coatings (e.g., anti-reflective/AR layers). IPA wipes (pre-moistened with isopropyl alcohol) are safe and effective for 去污 (stain removal) when used correctly, but improper handling risks scratches or coating degradation. Below are the critical operational points to ensure thorough, damage-free stain removal for optical instruments.

1. Pre-Operation: Verify Compatibility and Prepare Safely

Before using IPA wipes, lay the groundwork to avoid instrument harm:
  • Confirm Coating Compatibility: Check the instrument manufacturer’s manual to ensure IPA is safe for its surfaces. Most glass, SiO₂, and MgF₂ AR coatings tolerate IPA, but soft plastics (e.g., some lens housings) or specialty IR coatings may swell or discolor. Test a small, hidden area (e.g., the edge of a lens cap) with a damp wipe—if no clouding or peeling occurs, proceed.
  • Select the Right IPA Wipe: Choose lint-free, lab-grade wipes made from polyester or microfiber (avoid cotton, which sheds fibers). Opt for 70% IPA wipes for oil-based stains (water content enhances oil dissolution) or 99% IPA wipes for residue-free cleaning (ideal for precision optics like laser focusing lenses). Ensure wipes meet ISO 14644-1 Class 5 standards to avoid introducing new particles.
  • Power Down and Stabilize the Instrument: Turn off the optical instrument and secure moving parts (e.g., lock microscope stages, cover adjacent optics with a clean cloth). This prevents accidental movement during cleaning and protects sensitive internal components from excess moisture.

2. Stain Removal Technique: Gentle, Targeted Action

The wiping method directly impacts stain removal efficacy and instrument safety—follow these precision steps:
  • Remove Loose Dust First: Use a bulb blower (not compressed air, which forces dust into coatings) to gently blow away loose particles from the stained surface. This avoids rubbing dry dust into the stain, which can cause micro-scratches.
  • Fold the Wipe for Precision: Fold the IPA wipe into a 4-layer pad (e.g., fold an 8”x8” wipe twice to make a 4”x4” pad). Folding concentrates moisture (prevents drips), creates a smooth cleaning surface, and provides multiple usable layers (rotate to a fresh layer as one gets soiled).
  • Wipe in Stain-Trapping Patterns:
    • For flat optics (e.g., spectrometer windows): Wipe in single, straight strokes (horizontal or vertical) with 50% overlap between strokes. Circular motions spread residue and increase friction (risking scratches).
    • For curved lenses (e.g., camera objectives): Use a radial pattern (from the lens center to the edge) to ensure even stain coverage. Apply light pressure—just enough to make contact with the surface. Excessive pressure can deform soft coatings or push residue into lens crevices.
  • Treat Stubborn Stains Carefully: For dried or thick stains (e.g., old fingerprint oil), hold the damp IPA wipe against the stain for 5–10 seconds to let the alcohol dissolve the residue. Do not scrub—this abrades coatings. Wipe once gently to lift the loosened stain; repeat with a fresh wipe if needed.

3. Post-Cleaning: Ensure Residue-Free Drying and Inspection

Proper post-cleaning steps prevent streaks and confirm stain removal:
  • Dry to Avoid Streaks: After removing the stain, use a dry, lint-free cloth (or an unused corner of the IPA wipe) to blot excess moisture from the optical surface. This ensures IPA evaporates evenly—avoid air-drying alone, as it can leave water spots or solvent rings on sensitive optics.
  • Inspect Under Angled Light: Check the cleaned surface under bright, angled light (e.g., a flashlight) to confirm no stains, streaks, or fibers remain. For high-magnification optics (e.g., microscope objectives), use the instrument itself to verify clarity—blurred images indicate remaining residue.
  • Store the Instrument Properly: Place the cleaned instrument in a dust-free case or cover. Avoid storing near plastic or synthetic materials (which generate static and attract dust), as this can recontaminate the optics.

4. Safety and Compliance: Protect Operators and Instruments

  • Work in Well-Ventilated Areas: IPA vapors can cause dizziness or respiratory irritation—use wipes under a fume hood or near an open window. Avoid using IPA wipes in confined spaces with ignition sources (e.g., Bunsen burners, heat plates), as IPA is flammable.
  • Wear Protective Gear: Use nitrile gloves (latex degrades in IPA) to protect skin from dryness. For large-scale cleaning (e.g., multiple lenses), wear safety glasses to prevent accidental splashes.
  • Dispose of Wipes Correctly: Place used IPA wipes in fire-resistant waste bins (not regular trash) to avoid fire risks. Empty bins daily to prevent vapor buildup.
By following these operational points, IPA wipes safely and effectively remove stains from optical instruments—preserving their performance, extending coating lifespan, and ensuring accurate results in labs, medical facilities, or industrial settings.

Efficiency in Lab Operations with Pre-Wetted Wipes.

Laboratories—whether in research, biotech, or electronics—face constant pressure to streamline workflows while maintaining strict contamination control. Pre-wet cleanroom wipes (pre-impregnated with high-purity solutions like IPA, deionized water, or mild surfactants) have emerged as a key tool to boost efficiency: they eliminate time-consuming manual solvent mixing, ensure consistent cleaning, and reduce waste compared to dry wipes paired with bulk solvents. Below are actionable practices to leverage pre-wet wipes for improved lab efficiency, supported by real-world use cases and measurable benefits.

1. Standardize Cleaning Protocols to Cut Downtime

Inconsistent cleaning—caused by varying solvent concentrations, wipe dampness, or technician technique—leads to rework and delayed experiments. Pre-wet wipes enable standardization by:
  • Predefined Solution Concentrations: Wipes come pre-moistened with lab-grade solutions (e.g., 70% IPA for disinfection, 99.9% IPA for flux removal) that meet ISO 14644-1 Class 5 standards. This eliminates the need for technicians to mix solvents (a 5–10 minute task per cleaning session) and ensures every wipe delivers the same cleaning power.
  • Simplified Training: With pre-wet wipes, training new staff on cleaning tasks (e.g., wiping HPLC detectors or PCR workstations) is reduced from 1 hour to 15 minutes. Technicians only need to learn basic folding and wiping techniques—no solvent handling safety training is required for routine use.
  • Case Example: A biotech lab reduced PCR workstation cleaning time by 40% after switching to pre-wet deionized water wipes. Standardization also cut cross-contamination incidents (from inconsistent solvent use) by 60%, eliminating costly experiment reruns.

2. Optimize Wipe Selection for Task-Specific Efficiency

Using the right pre-wet wipe for each lab task avoids over-cleaning (wasting time) or under-cleaning (causing rework). Key selection practices include:
  • Match Solution to Contaminant:
    • Use IPA-based pre-wet wipes for oil-based residues (e.g., fingerprint oils on optical lenses, flux on PCBs) – they dissolve contaminants in 1–2 passes, vs. 3–4 passes with dry wipes + bulk solvent.
    • Choose deionized water-based wipes for aqueous spills (e.g., buffer solutions, cell culture media) – they absorb liquid faster and leave no residues, reducing post-cleaning drying time.
  • Select Size for Surface Area:
    • Use small 4”x4” pre-wet wipes for precision tasks (e.g., cleaning pipette tips, sensor heads) – they reduce waste and avoid over-saturating small surfaces.
    • Opt for large 12”x12” wipes for broad surfaces (e.g., lab benches, fume hood interiors) – one wipe covers the area, vs. 2–3 dry wipes + solvent.
  • Benefit: An electronics lab specializing in PCB testing cut cleaning time per board by 25% by using task-specific pre-wet wipes—70% IPA wipes for flux removal and anti-static pre-wet wipes for connector cleaning.

3. Reduce Waste and Inventory Management Burden

Pre-wet wipes minimize waste from solvent spills, expired bulk solvents, and unused dry wipes. Efficiency-focused practices include:
  • Single-Use, Pre-Portioned Design: Each pre-wet wipe contains exactly the right amount of solution for one task—no excess solvent to spill or discard. This reduces solvent waste by 50% compared to bulk bottles (where 10–15% of solvent is wasted via spills or evaporation).
  • Extended Shelf Life: Sealed pre-wet wipe packaging preserves solution potency for 12–24 months, vs. bulk solvents (which expire in 6–8 months once opened). This cuts inventory turnover and eliminates the cost of discarding expired solvents.
  • Simplified Stocking: Pre-wet wipes are stored in compact dispensers that take up 70% less space than bulk solvent bottles + dry wipe containers. A research lab reduced storage space for cleaning supplies by 60% and cut inventory checks from weekly to monthly.

4. Enhance Safety to Avoid Operational Interruptions

Solvent-related accidents (spills, inhalation, skin contact) cause lab downtime and safety incidents. Pre-wet wipes mitigate these risks by:
  • Minimizing Solvent Exposure: Sealed packaging reduces IPA or chemical vapor release by 80% compared to open bulk bottles, improving air quality and reducing technician discomfort (which can slow workflow).
  • Eliminating Spills: Pre-wet wipes are pre-moistened—no pouring solvent onto dry wipes, a common cause of spills (which take 10–15 minutes to clean up). A pharmaceutical lab eliminated 90% of solvent spills after adopting pre-wet wipes, avoiding 3–4 hours of monthly downtime from spill cleanup.

5. Integrate Wipes into Workflow Scheduling

Incorporating pre-wet wipes into routine lab workflows ensures cleaning is not an afterthought (which leads to rushed, ineffective cleaning). Practices include:
  • Pre-Cleaning Setup: Place pre-wet wipe dispensers near frequently used equipment (e.g., next to microscopes, centrifuges) – technicians clean surfaces immediately after use, avoiding buildup that takes longer to remove later.
  • Batch Cleaning Optimization: For high-volume tasks (e.g., cleaning 20+ sample vials), use a stack of pre-wet wipes to clean sequentially—no stopping to rewet dry wipes or refill solvent bottles. A clinical lab reduced sample vial cleaning time by 30% with this approach.
By implementing these practices, labs can leverage pre-wet cleanroom wipes to cut cleaning time by 30–50%, reduce waste by 40–60%, and minimize safety incidents—freeing up technician time for core research or testing tasks. Pre-wet wipes transform cleaning from a time-consuming chore into an efficient, reliable step in lab operations.

Comparative Analysis: High-Density and Dry Wipes

In contamination-controlled environments like cleanrooms, labs, and electronics facilities, choosing the right wipe—high-density cleanroom wipes (thick, tightly woven variants) or dry cleanroom wipes (basic low-linting dry options)—depends on task-specific needs for particle trapping, durability, and versatility. While both serve to remove contaminants without introducing new debris, their structural differences lead to distinct performance tradeoffs. Below is a detailed comparative analysis of their key attributes, use cases, and limitations to guide informed selection.

1. Core Performance Metrics: Side-by-Side Comparison

The table below contrasts the two wipe types across critical metrics that define cleanroom effectiveness:
Performance Metric High-Density Cleanroom Wipes Dry Cleanroom Wipes
Material & Structure – Thick, tightly woven fibers (250–400 gsm) – often polyester/microfiber blends

– Continuous-filament construction with reinforced edges

– May be pre-moistened (with IPA/deionized water) or dry

– Thin, lightweight weave (100–180 gsm) – typically pure polyester or cellulose

– Basic continuous-filament or fine staple-fiber construction

– Exclusively dry (no pre-moistened variants)

Particle Trapping Capacity – Traps sub-micron particles (0.05–0.1μm) via dense capillary networks

– Ultra-low linting (≤1 fiber shed per use)

– Ideal for ISO Class 1–5 cleanrooms

– Traps larger particles (≥0.5μm) – misses fine debris

– Moderate linting (3–5 fibers shed per use)

– Limited to ISO Class 6–9 cleanrooms

Durability & Reusability – Resists tearing/fraying even with 8–10 passes on textured surfaces (e.g., equipment seams)

– Heat-sealed edges prevent fiber breakdown

– Reusable (if approved) with proper sterilization (e.g., gamma irradiation)

– Thin, non-reinforced edges tear after 2–3 passes

– Degrades quickly when used with rough surfaces

– Single-use only (high waste generation)

Liquid Handling (If Dry) – Dry variants absorb 10–15x their weight in liquids (water/solvents) via capillary action

– Prevents liquid breakthrough (no leaking)

– Suitable for spill cleanup and residue removal

– Absorbs 5–8x their weight in liquids

– Prone to leaking when saturated

– Only for light spills (not heavy or viscous liquids)

Versatility – Performs dry particle removal, liquid absorption, and pre-moistened residue cleaning

– Safe for delicate surfaces (e.g., optical lenses, semiconductors)

– Compatible with solvents (IPA, acetone)

– Limited to dry particle removal only

– Risk of scratching delicate surfaces (e.g., anti-reflective coatings) if used with pressure

– Not compatible with solvents (degrades fibers)

2. Use Case Suitability: Which Wipe to Choose?

High-Density Cleanroom Wipes: Ideal For

Environments requiring ultra-clean, multi-functional performance:
  • Semiconductor Manufacturing: Cleaning wafer chucks, lithography optics, and ESD-sensitive IC chips (traps sub-micron silicon dust, resists solvent damage).
  • Precision Optical Labs: Wiping laser lenses, spectrometer windows, and microscope objectives (low linting, safe for anti-reflective coatings).
  • Heavy Spill Cleanup: Absorbing large volumes of solvents (e.g., IPA) or aqueous reagents in biotech labs (high liquid retention, no leaking).
  • ISO Class 1–5 Cleanrooms: Meeting strict particle limits for medical implant production or microelectronics assembly.

Dry Cleanroom Wipes: Ideal For

Low-risk, basic cleaning tasks where cost and simplicity are priorities:
  • General Lab Bench Dusting: Removing loose dust from non-sensitive surfaces (e.g., plastic lab equipment, glassware exteriors).
  • ISO Class 6–9 Cleanrooms: Basic contamination control for less precise manufacturing (e.g., plastic component assembly, packaging).
  • Temporary Cleanup: Quick dust removal in drafty areas (e.g., cleanroom entryways) where frequent wipe replacement is acceptable.
  • Low-Budget Operations: Reducing costs for non-critical cleaning (dry wipes are 30–50% cheaper than high-density variants).

3. Cost & Efficiency Tradeoffs

  • High-Density Wipes: Higher upfront cost ($0.20–$0.50 per wipe) but lower long-term expenses—fewer wipes are needed per task (reduces waste by 40–60%), and reusability (for approved applications) cuts replacement frequency.
  • Dry Wipes: Lower upfront cost ($0.05–$0.15 per wipe) but higher long-term waste—single-use requirement means more wipes are consumed, and their limited functionality may require supplementary tools (e.g., separate spill absorbents), increasing overall costs.

4. Compliance Considerations

  • High-Density Wipes: Meet industry standards like ISO 14644-1 (Class 1–5), ANSI/ESD S20.20 (for anti-static variants), and SEMI F21 (semiconductor compatibility)—critical for regulated sectors (aerospace, medical devices).
  • Dry Wipes: Only meet basic ISO 14644-1 (Class 6–9) standards—insufficient for applications requiring strict particle or lint control (e.g., pharmaceutical manufacturing).
This analysis confirms that high-density cleanroom wipes are a strategic choice for precision, high-stakes environments, while dry cleanroom wipes serve as a cost-effective solution for basic, low-risk cleaning. Selecting the right type ensures optimal contamination control, cost efficiency, and compliance with industry standards.

Tips for optimizing the absorbent performance of cleaning wipes

Cleaning wipes are indispensable for spills, residue removal, and surface sanitization in labs, electronics factories, and cleanrooms—but their effectiveness hinges on liquid absorption. Subpar absorption leads to excessive wipe usage, streaky surfaces, and contamination risks. Optimizing cleaning wipes’吸液性能 (liquid absorption performance) involves targeted adjustments to material selection, usage techniques, and storage—ensuring wipes trap and retain liquids efficiently. Below are actionable tips to boost absorption, tailored to different wipe types and applications.

1. Select Wipe Materials for Maximum Absorption

The foundation of strong absorption is the wipe’s fiber composition and structure—choose materials that leverage capillary action and high retention:
  • Prioritize Hydrophilic Fibers for Aqueous Liquids: For water, buffers, or aqueous reagents, select wipes made from hydrophilic fibers like cellulose, modified polyester, or microfiber blends. These fibers attract water molecules, accelerating liquid uptake. For example, a 50% cellulose + 50% polyester wipe absorbs 30% more water than pure polyester wipes.
  • Opt for Lipophilic Fibers for Solvents/Oils: For non-aqueous liquids (e.g., IPA, acetone, machine oils), use lipophilic-treated wipes (e.g., siloxane-coated polyester). These fibers enhance affinity for oil-based liquids, preventing “beading” and ensuring full absorption—critical for cleaning grease on equipment parts.
  • Choose High-Density Weaves (200–350 gsm): Dense, non-woven or microfiber weaves create more capillary channels to trap liquid. Avoid overly thin wipes (<150 gsm), which saturate quickly and leak. A 300 gsm high-density wipe can hold 12–15x its weight in liquid, vs. 5–8x for low-density alternatives.

2. Optimize Wipe Folding and Application Technique

How you use the wipe directly impacts absorption efficiency—small adjustments can significantly boost performance:
  • Fold to Increase Absorbent Layers: Instead of using a wipe flat, fold it into a 4–6 layer pad. This creates multiple absorbent surfaces, distributes liquid evenly across the wipe, and prevents premature saturation. For large spills, fold the wipe into a triangle—use the pointed end to target small pools, then unfold to cover broader areas.
  • Apply Gentle, Even Pressure: Contrary to popular belief, firm pressure compresses the wipe’s fibers, closing capillary channels and reducing absorption. Apply light, consistent pressure (just enough to make contact with the liquid) to let capillary action draw liquid into the wipe. For vertical surfaces (e.g., spilled liquid on lab bench legs), hold the wipe against the surface for 2–3 seconds to allow absorption before wiping downward.
  • Wipe in “Liquid-Directing” Patterns: For flat surfaces, wipe in single, overlapping strokes (horizontal or vertical) to guide liquid into the wipe’s core. Avoid circular motions, which spread liquid and reduce the wipe’s ability to trap it. For textured surfaces (e.g., grooved equipment), wipe along the grooves to ensure liquid in crevices is absorbed.

3. Match Wipe Size and Format to the Task

Using the right-sized wipe prevents waste and ensures full absorption capacity is used:
  • Small Wipes (4”x4”) for Precision Tasks: Use compact wipes for small spills (e.g., reagent drops on a PCB) or tight spaces (e.g., between instrument knobs). Smaller wipes avoid over-saturating unused areas, ensuring the entire wipe is used for absorption.
  • Large Wipes (12”x12”) for Bulk Spills: For large spills (e.g., >100mL of water or solvent), use large, high-density wipes. Their larger surface area and higher capacity reduce the number of wipes needed, and their thickness prevents liquid breakthrough (leaking through the wipe).
  • Perforated Wipes for Controlled Usage: Choose perforated wipe rolls to tear off custom sizes—this avoids using a full large wipe for small tasks, reducing waste while ensuring the wipe’s absorption capacity matches the spill size.

4. Preserve Absorption Efficacy Through Proper Storage

Poor storage degrades a wipe’s ability to absorb—follow these guidelines to maintain performance:
  • Store in Airtight, Moisture-Free Containers: Unused wipes absorb ambient moisture or dry out (for pre-moistened variants) if left exposed. Use sealed dispensers with one-wipe-at-a-time openings to protect wipes from humidity, dust, or solvent evaporation (for pre-moistened wipes).
  • Avoid Extreme Temperatures: Store wipes in a cool (15–25°C) area. High temperatures cause pre-moistened wipes to dry out, while freezing temperatures can damage fiber structures, reducing capillary action.
  • Rotate Stock by Expiry Date: Pre-moistened wipes have a 12–24-month shelf life—use older stock first (FIFO system) to avoid using expired wipes, which may have degraded absorption or solvent potency.
By implementing these tips, cleaning wipes deliver maximum liquid absorption—reducing wipe usage by 40–50%, cutting spill cleanup time by 30%, and minimizing the risk of cross-contamination from leaked liquids. This optimization ensures wipes are a cost-effective, reliable tool for any liquid-handling task.

Anti-Static Wipes in Semiconductor Cleanroom Cleaning

Semiconductor cleanrooms (ISO Class 1–5) operate in an ultra-sensitive environment where even sub-micron particles or electrostatic discharge (ESD) can ruin 3nm–7nm wafers, damage lithography tools, or halt production lines. Anti-static cleanroom wipes—engineered with static-dissipative materials and ultra-low linting properties—are a cornerstone of contamination control here, addressing both particle buildup and ESD risks that generic wipes cannot. Below is a detailed breakdown of their critical applications across semiconductor cleanroom workflows, from wafer handling to equipment maintenance.

1. Wafer Surface Cleaning: Protecting Critical Substrates

Wafers are the core of semiconductor manufacturing, and their surfaces must remain free of particles, oils, and static to ensure successful etching, deposition, and packaging. Anti-static wipes play a pivotal role in:
  • Pre-Process Wafer Cleaning: Before lithography or thin-film deposition, anti-static dry wipes (surface resistance: 10⁶–10¹¹ Ω, per ANSI/ESD S20.20) gently remove ambient dust from wafer backsides and edges. The wipes’ continuous-filament polyester construction traps particles as small as 0.05μm without scratching the wafer’s delicate oxide layer.
  • Post-Soldering Residue Removal: For wafer-level packaging (WLP), pre-moistened anti-static wipes (impregnated with 99.9% high-purity IPA) dissolve flux residues and solder splatters from bond pads. The static-dissipative material prevents charge buildup that could attract floating particles to the wafer’s active areas.
  • Edge Bead Cleaning: Wafers often have “edge beads” (excess photoresist) along their rims. Anti-static wipes, folded into narrow strips, target these beads without contacting the wafer’s central processing area—ensuring no residue or fibers interfere with pattern transfer.

2. Equipment Maintenance: Safeguarding High-Value Tools

Semiconductor tools like lithography scanners, wafer chucks, and transfer robots require regular cleaning to maintain precision. Anti-static wipes protect these tools by:
  • Lithography Tool Optics Cleaning: The laser lenses and reticle masks in lithography tools are prone to static-attracted dust, which distorts light patterns and causes print defects. Anti-static pre-wet wipes (with deionized water + 5% IPA) clean these optics without generating static, while their low-linting design avoids fiber deposits on lens surfaces.
  • Wafer Chuck Decontamination: Wafer chucks use vacuum suction to hold wafers during processing, and residue buildup here causes wafer misalignment. Anti-static dry wipes remove dust and oxide films from chuck grooves, while their static-dissipative properties prevent the chuck from attracting new particles post-cleaning.
  • Transfer Robot Arm Cleaning: Robot arms that move wafers between tools accumulate silicon dust and lubricant residues. Anti-static wipes (resistant to mild solvents) clean arm grippers and rails, ensuring smooth, particle-free wafer handling—critical for avoiding wafer scratches or drops.

3. Workbench and Surface Sanitization: Controlling Cross-Contamination

Semiconductor cleanroom workbenches, fume hoods, and storage surfaces are common sources of particle and static transfer. Anti-static wipes address this by:
  • Daily Workbench Cleaning: Technicians use anti-static dry wipes to dust workbenches before and after wafer handling. The wipes’ static-dissipative properties neutralize charge on the bench surface, preventing it from attracting dust that could transfer to wafers.
  • Spill Response for Solvents: Accidental spills of IPA or photoresist require fast, safe cleanup. Anti-static pre-wet wipes (chemically compatible with semiconductor solvents) absorb spills without generating static, while their high density prevents solvent breakthrough that could damage bench underlayers.
  • Storage Container Cleaning: Wafer cassettes and transport containers are cleaned with anti-static wipes to remove dust and static before loading wafers. This ensures no contaminants are introduced during wafer storage or transport between cleanroom bays.

4. ESD-Sensitive Component Handling: Protecting ICs and Sensors

Semiconductor cleanrooms also assemble ESD-sensitive components like IC chips, sensors, and microcontrollers. Anti-static wipes support this by:
  • Component Lead Cleaning: IC chip leads are prone to oxidation and oil buildup, which disrupt solder joints. Anti-static pre-wet wipes (70% IPA) clean leads without generating static, ensuring reliable electrical contact during assembly.
  • Sensor Surface Protection: MEMS sensors and image sensors have ultra-delicate surfaces that static can damage. Anti-static dry wipes gently remove dust from these components, while their soft texture avoids scratching sensor diaphragms or pixel arrays.

Key Benefits of Anti-Static Wipes in Semiconductor Cleanrooms

  • Defect Reduction: By eliminating static and particles, anti-static wipes reduce wafer defects by 40–60% compared to generic wipes.
  • Tool Longevity: Gentle, static-free cleaning extends the lifespan of lithography tools, chucks, and robots by 2–3 years.
  • Compliance Assurance: Wipes meet ISO 14644-1 Class 1–5 standards and SEMI F21 guidelines, ensuring adherence to semiconductor industry regulations.
In semiconductor cleanrooms, where precision and contamination control are non-negotiable, anti-static cleanroom wipes are more than a cleaning tool—they are a critical enabler of high-yield, reliable chip manufacturing.

IPA alcohol wipes cleaning process standardization case

In high-volume electronics manufacturing—where consistent cleaning of PCBs (printed circuit boards), semiconductors, and connectors directly impacts product yield—standardized IPA wipe cleaning processes eliminate variability, reduce defects, and ensure compliance with industry standards (e.g., IPC-A-610). Below is a real-world case study of how a global electronics contract manufacturer (CM) implemented a standardized IPA wipe workflow to address inconsistent flux removal, ESD risks, and cross-contamination—resulting in a 35% reduction in cleaning-related defects.

Background: The Challenge of Unstandardized Cleaning

Before implementation, the CM relied on ad-hoc IPA wipe use by technicians, leading to three critical issues:
  1. Inconsistent Flux Removal: Technicians used varying IPA concentrations (70% vs. 99%) and wipe pressures, leaving 15–20% of PCBs with residual flux (a leading cause of electrical leakage in finished devices).
  2. ESD Damage: Ungrounded technicians and non-ESD-safe wipes generated static charges (200–500V), causing 8% of semiconductor chips to fail post-cleaning.
  3. Cross-Contamination: Reused IPA wipes transferred solder debris between PCBs, resulting in 10% of boards requiring rework.

Step 1: Define Standardized Process Parameters

The CM collaborated with IPA wipe manufacturers and IPC experts to establish strict process parameters, tailored to their two core cleaning tasks: post-soldering flux removal and connector pin cleaning.
Process Step Post-Soldering Flux Removal (PCBs) Connector Pin Cleaning (Semiconductor Modules)
IPA Wipe Specification Pre-moistened, 99% high-purity IPA, ESD-safe (10⁶–10¹¹ Ω), ISO Class 5 lint-free (polyester microfiber) Pre-moistened, 70% IPA (for oil dissolution), ESD-safe, 4”x4” size (for precision access)
Operator Prep Wear ESD wrist strap + nitrile gloves; ground workbench to <100V static charge Same as above; add anti-static shoe covers for module assembly areas
Wiping Technique Fold wipe into 4-layer pad; wipe PCB in single horizontal strokes (50% overlap); 1–2 psi pressure Fold wipe into strip; gently drag along pin rows (1 stroke per row); avoid bending pins
Post-Clean Check Inspect under 10x magnification for flux residues; test static charge with ESD meter (<100V) Inspect pins for oil/debris with 20x magnification; use continuity tester to confirm no pin damage
Waste Disposal Discard used wipes in fire-resistant, ESD-safe bins; empty after each shift Same as above; separate connector wipes from PCB wipes to avoid cross-contamination

Step 2: Technician Training & Documentation

To ensure adherence, the CM implemented:
  • Hands-On Training: 2-hour sessions where technicians practiced the standardized workflow on dummy PCBs/modules, with real-time feedback from IPC-certified trainers.
  • Visual Work Instructions (VWIs): Posters at each cleaning station showing wipe folding techniques, pressure guides, and inspection checklists (with photos of “good vs. bad” cleaning results).
  • Digital Logging: Technicians logged each cleaning task (PCB lot number, wipe lot number, post-clean check results) in a cloud-based system for traceability.

Step 3: Process Validation & Continuous Improvement

After 4 weeks of implementation, the CM validated the process with key metrics:
  • Flux Residue Rate: Dropped from 18% to 3% (meeting IPC-A-610 Class 3 requirements for high-reliability electronics).
  • ESD-Related Failures: Reduced from 8% to 0.5% (thanks to ESD-safe wipes and grounded operators).
  • Rework Rate: Fell from 10% to 2% (eliminated cross-contamination via single-use wipes and separate waste bins).
To sustain improvements, the CM conducts monthly audits:
  • Randomly test 5% of cleaned PCBs/modules for residues and static.
  • Survey technicians for workflow pain points (e.g., wipe size, packaging) and adjust parameters (e.g., switching to 6”x6” wipes for larger PCBs based on feedback).

Key Takeaways from the Case Study

This standardized IPA wipe process demonstrates that:
  • Parameter Consistency (IPA concentration, wipe type, technique) eliminates human error as a source of defects.
  • ESD Integration (safe wipes + operator grounding) protects sensitive components from static damage.
  • Traceability (digital logging) enables rapid root-cause analysis if issues arise.
For electronics manufacturers, medical device makers, or any facility relying on precision cleaning, this case study provides a scalable blueprint for implementing a standardized IPA wipe process—turning a variable task into a repeatable, high-quality step in production.

Using Pre-Wetted Wipes to Clean Precision Components

Precision components—such as semiconductor chips, PCB connectors, optical sensors, and microelectromechanical systems (MEMS)—have ultra-delicate surfaces where even sub-micron dust particles can cause electrical shorts, signal interference, or mechanical failure. Unlike dry wipes (which may push dust into crevices or generate static), pre-wet cleanroom wipes (impregnated with high-purity solutions like deionized water or 70% IPA) dissolve dust adhesions, trap particles, and leave no residues—making them ideal for dust removal on sensitive components. Below is a step-by-step method to safely and effectively eliminate dust, paired with key best practices to protect component integrity.

1. Pre-Method Preparation: Ensure Compatibility and Safety

Before cleaning, proper prep prevents accidental damage and ensures dust removal efficacy:
  • Select the Right Pre-Wet Wipe:
    • For non-conductive components (e.g., optical lenses, plastic MEMS housings): Choose wipes pre-moistened with deionized water—this avoids chemical damage to coatings or plastics.
    • For conductive/electronic components (e.g., PCB traces, semiconductor wafers): Opt for 70% high-purity IPA wipes (99.9% IPA purity) to dissolve oil-based dust binders (e.g., fingerprint oils) and ensure fast evaporation.
    • Verify wipes meet ISO 14644-1 Class 5 standards (ultra-low linting, ≤1 particle ≥0.1μm per wipe) to avoid introducing new contaminants.
  • Inspect the Component: Check for visible damage (e.g., cracked coatings, bent pins) and confirm the component is powered off (for electronics) to prevent short circuits from excess moisture.
  • Control the Workspace: Clean in a low-dust environment (e.g., a laminar flow hood or Class 100 cleanroom). Avoid drafty areas—airflow can spread dust or cause the wipe’s solution to evaporate too quickly.

2. Step-by-Step Dust Removal Process

Follow this gentle, targeted workflow to remove dust without scratching or contaminating the component:

Step 1: Loosen Surface Dust (Optional Pre-Clean)

For components with loose, dry dust (e.g., unused sensors), first use a clean, dry anti-static bulb blower to gently dislodge particles. Hold the blower 2–3 inches from the component and direct air in a sweeping motion—never use compressed air (it can force dust into component crevices or damage delicate structures). This step reduces the risk of rubbing dry dust into the component surface during wipe cleaning.

Step 2: Fold the Pre-Wet Wipe for Precision

Remove the pre-wet wipe from its sealed packaging and fold it into a 4-layer pad (e.g., fold an 8”x8” wipe twice to create a 4”x4” pad). Folding:
  • Concentrates the wipe’s moisture, preventing drips that could seep into component gaps.
  • Creates a smooth, low-linting surface (edges are tucked inward, reducing fraying).
  • Provides multiple clean layers—you can rotate the pad as one layer becomes soiled.

Step 3: Wipe in Dust-Trapping Patterns

The direction of wiping directly impacts dust removal—avoid motions that spread particles:
  • Flat Surfaces (e.g., PCB tops, sensor arrays): Wipe in single, straight strokes (horizontal or vertical) with 50% overlap between strokes. This traps dust in the wipe’s fibers instead of pushing it across the component. Never use circular motions—they redistribute dust and increase the risk of scratching.
  • Crevices/Pins (e.g., connector pins, MEMS gaps): Tear a small strip from the folded wipe (1”x2”) and use tweezers to guide it into tight spaces. Gently drag the strip along the crevice—do not scrub. The wipe’s pre-wet solution will loosen dust, while the dense fibers trap it.
  • Curved Surfaces (e.g., optical sensor domes): Use a radial pattern (from the center of the curve to the edge) to ensure even coverage. Apply light pressure—excessive force can deform soft materials (e.g., silicone sensor coatings).

Step 4: Ensure Residue-Free Drying

After wiping, allow the component to air-dry completely in a dust-free area:
  • For electronics (e.g., PCBs): Let the component dry for 15–30 minutes (or until no moisture is visible) before powering it on. IPA-based wipes evaporate faster (10–15 minutes) than water-based ones—use this to your advantage for time-sensitive tasks.
  • For optical components (e.g., sensor lenses): Blot excess moisture with a dry, lint-free corner of the pre-wet wipe (if unused) to prevent water spots. Avoid wiping while wet—this can leave streaks.

3. Post-Cleaning Verification

  • Inspect for Remaining Dust: Use a magnifying glass (10–20x) or a digital microscope to check for leftover particles, especially in crevices. If dust remains, repeat the process with a fresh pre-wet wipe (do not reuse wipes—they trap dust and can recontaminate).
  • Check for Residues: For critical components (e.g., semiconductor wafers), use a surface analyzer to confirm no ionic or organic residues are present. Pre-wet wipes meeting ISO Class 5 standards should leave no detectable residues when used correctly.
By following this method, pre-wet cleanroom wipes safely and effectively remove dust from precision components—protecting their performance, extending lifespan, and ensuring compliance with industry standards (e.g., IPC-A-610 for electronics, SEMI F21 for semiconductors).

High-density wipes for precision cleaning in Class 100 cleanrooms.

Class 100 cleanrooms (equivalent to ISO 14644-1 Class 5) demand uncompromising cleaning precision—allowing no more than 100 particles (≥0.5μm) per cubic foot of air. In environments like semiconductor wafer fabrication, medical implant manufacturing, or microelectronics assembly, even a single sub-micron particle or fiber can ruin high-value products or compromise sterile conditions. High-density cleanroom wipes, engineered with tightly woven microfiber or non-woven structures (250–400 gsm), outperform low-density alternatives by delivering unmatched control over particles, residues, and contamination—elevating cleaning precision to meet Class 100 standards. Below is a detailed breakdown of how these wipes enhance precision and support critical cleanroom operations.

1. Ultra-Low Particle Trapping: Targeting Sub-Micron Contaminants

Class 100 cleanrooms require removal of particles as small as 0.1μm—something low-density wipes often miss. High-density wipes achieve this through:
  • Tight Weave Construction: Their dense fiber matrix creates millions of tiny capillary channels that trap particles as small as 0.05μm—far below the Class 100 particle limit. For example, when cleaning wafer chucks (a critical component in semiconductor manufacturing), high-density wipes capture residual silicon fragments and dust that would otherwise cause “stain defects” on 5nm/3nm wafers.
  • Continuous-Filament Fibers: Made from 100% polyester or polypropylene continuous filaments (not staple fibers), these wipes shed ≤1 fiber per use. This eliminates fiber contamination—a top cause of product rejects in Class 100 environments. Low-density wipes, by contrast, can shed 5–10 fibers per wipe, risking cross-contamination of sterile medical devices or microchips.
  • Uniform Surface Contact: The smooth, consistent texture of high-density wipes ensures even contact with surfaces (e.g., optical lenses, sterile packaging). This prevents “missed spots” where particles accumulate, a common flaw with low-density wipes that have uneven fiber distribution.

2. Residue-Free Cleaning: Eliminating Chemical and Ionic Contaminants

Class 100 cleanrooms also prohibit trace residues (e.g., solvent films, ionic deposits) that can degrade product performance. High-density wipes address this by:
  • Controlled Absorption of Cleaning Solutions: When used with high-purity solvents (e.g., 99.9% IPA, deionized water), their dense structure absorbs and retains liquids evenly—preventing over-saturation (which leaves solvent residues) or under-wetting (which fails to dissolve contaminants). For medical device molds, this means no residual cleaning agents that could leach into implants.
  • Minimal Extractables: High-density wipes undergo rigorous testing to ensure they release fewer than 10ppb of ions (e.g., sodium, chloride) and organic compounds. This is critical for semiconductor cleanrooms, where ionic contaminants can corrode copper PCB traces or disrupt wafer etching processes. Low-density wipes often have higher extractable levels, making them unsuitable for Class 100 applications.
  • Fast, Even Evaporation: When used as pre-wet wipes, their dense fibers distribute solvent uniformly across surfaces, ensuring rapid, streak-free evaporation. This eliminates water spots or solvent rings that plague low-density wipes, which often leave uneven moisture patterns.

3. Durability for Precision Handling: Avoiding In-Use Contamination

Cleaning precision is lost if wipes tear or fray during use—releasing particles into the cleanroom air. High-density wipes maintain integrity through:
  • Reinforced Edges: Heat-sealed or laser-cut edges prevent fraying, even when wiping textured surfaces (e.g., equipment seams, grooved tooling). This means one wipe can clean multiple surfaces without disintegrating, reducing the need for frequent wipe changes (a source of cross-contamination).
  • Abrasion Resistance: Their thick, dense structure withstands gentle wiping (required for delicate Class 100 surfaces like optical masks) without breaking down. Low-density wipes, by contrast, may tear after 1–2 passes, forcing technicians to use more wipes and increasing particle release.
  • Consistent Performance: Each high-density wipe delivers the same particle-trapping and residue-removal efficacy, eliminating variability from wipe to wipe. This consistency is critical for meeting Class 100’s strict quality control requirements, where even minor performance fluctuations can lead to batch rejects.

4. Application-Specific Precision: Tailored to Class 100 Tasks

High-density cleanrooms wipes are optimized for the unique demands of Class 100 operations:
  • Wafer and Optic Cleaning: Small, 4”x4” high-density wipes reach tight spaces (e.g., between wafer handler grippers) without touching adjacent components, ensuring precision cleaning without damaging sensitive parts.
  • Sterile Surface Maintenance: For medical device cleanrooms, gamma-irradiated high-density wipes maintain sterility while removing particulate contamination—critical for implantable devices like pacemakers or stents.
  • Equipment Calibration Support: When cleaning metrology tools (used to measure wafer dimensions), high-density wipes remove dust without altering tool calibration—ensuring accurate measurements that keep production within Class 100 tolerances.
In Class 100 cleanrooms, where precision is non-negotiable, high-density cleanroom wipes are more than a cleaning tool—they are a critical component of quality assurance. By trapping sub-micron particles, eliminating residues, and maintaining durability, they ensure cleaning meets the strictest standards, protecting products, reducing rejects, and supporting reliable manufacturing.

Preventing Static on Optical Instruments with Dust-Free Wipes

Optical instruments—including microscopes, spectrometers, laser systems, and camera lenses—are highly vulnerable to electrostatic discharge (ESD) and ESD-attracted dust. Static charges can damage delicate anti-reflective (AR) coatings, distort light transmission, or cause micro-scratches when dust particles cling to lens surfaces. Specialized cleanroom wipes and cleaning wipes (engineered with anti-static properties and ultra-low linting) provide a dual solution: they remove contaminants and neutralize static, ensuring optical instruments maintain clarity and performance. Below is a detailed breakdown of their use for anti-static protection in optical instrument maintenance.

1. Selecting the Right Wipes for Optical Anti-Static Needs

Not all cleanroom wipes work for optics—choose variants tailored to static control and surface sensitivity:
  • Anti-Static Dry Cleanroom Wipes: Made from 100% continuous-filament polyester or microfiber with permanent anti-static treatments (e.g., conductive microfibers). These wipes have a surface resistance of 10⁶–10¹¹ Ω (per ANSI/ESD S20.20), safely dissipating static without creating electrical arcs. Ideal for dry dust removal on lens surfaces, mirror housings, and instrument exteriors.
  • Anti-Static Pre-Wet Cleaning Wipes: Impregnated with high-purity, residue-free solutions (e.g., 70% IPA + 30% deionized water or pure deionized water). The solvent dissolves oil-based residues (e.g., fingerprints) that attract static, while the anti-static wipe material prevents charge buildup during cleaning. Avoid wipes with surfactants or fragrances—these leave residues that cloud optics.
  • Low-Linting Guarantee: Ensure wipes meet ISO 14644-1 Class 5 standards (≤1 particle ≥0.1μm per wipe). Lint from low-quality wipes can trap static and scratch AR coatings, undoing anti-static efforts.

2. Step-by-Step Anti-Static Cleaning Process

Follow this workflow to protect optics from static while removing contaminants:

Step 1: Prep the Workspace and Operator

  • Control Static in the Environment: Work in a room with 30–50% relative humidity (low humidity increases static generation). Use an ionizer near the workbench to neutralize ambient static before cleaning.
  • Ground the Operator: Wear an ESD wrist strap connected to a grounded optical bench and anti-static nitrile gloves. This prevents your body’s static charge from transferring to the instrument or wipes.
  • Inspect Wipes and Instruments: Check wipes for tears, loose fibers, or expired anti-static treatments. Examine the optical instrument for visible dust or oil—avoid cleaning hot components (e.g., recently used laser diodes) to prevent thermal shock.

Step 2: Dry Anti-Static Wiping (Dust Removal)

  • Fold the Wipe for Precision: Fold the anti-static dry wipe into a small, firm pad (2–3 layers thick). This reduces the risk of edge fraying (a source of lint) and concentrates the wipe’s static-dissipative surface.
  • Wipe in Static-Safe Patterns:
    • For flat optics (e.g., spectrometer windows): Wipe in single, straight strokes (horizontal or vertical) with light pressure. Circular motions can generate friction-induced static.
    • For curved lenses (e.g., camera objectives): Use a radial pattern (from the lens center to the edge) to ensure even static dissipation and dust removal.
  • Neutralize Surface Static: After wiping, hold the wipe near the lens surface for 2–3 seconds—this allows the wipe’s anti-static properties to neutralize any remaining charge on the optic.

Step 3: Pre-Wet Anti-Static Cleaning (Residue Removal)

  • Target Oil-Based Residues: If fingerprints or oil are present, use an anti-static pre-wet wipe. Blot excess solution on a dry wipe first to avoid over-saturating the optic (excess liquid can seep into lens housings and damage internal components).
  • Gentle Residue Dissolution: Press the pre-wet wipe lightly against the residue for 5–10 seconds to let the solvent dissolve it, then wipe in the same pattern used for dry cleaning. The IPA or deionized water evaporates quickly, leaving no residues, while the wipe’s anti-static material prevents charge buildup during the process.
  • Final Dry Wipe: Follow the pre-wet wipe with a fresh anti-static dry wipe to absorb any remaining moisture. This step eliminates water spots and ensures the optic is fully static-neutralized.

3. Post-Cleaning Anti-Static Maintenance

  • Inspect for Static and Contaminants: Use an ESD tester to confirm the optic’s surface charge is <100V (safe for sensitive optics). Check the lens under angled light for remaining dust or lint—repeat cleaning if needed with a fresh wipe.
  • Store Instruments Properly: Place cleaned optical instruments in anti-static cases or covers. Avoid storing them near plastic or synthetic materials (which generate static) and keep them in a humidity-controlled environment to minimize future static buildup.
  • Regular Wipe Replacement: Use fresh wipes for each cleaning session—reused wipes lose anti-static efficacy and trap contaminants that can scratch optics.
By using cleanroom wipes and cleaning wipes with anti-static properties, you protect optical instruments from both static damage and contamination—extending their lifespan, ensuring accurate light transmission, and maintaining the precision critical for lab work, imaging, or industrial applications.

Guidelines for Anti-Static Wipes in Lab Cleaning

Laboratories handling electronics, precision instruments, or ESD-sensitive components require strict contamination and static control. Anti-static cleanroom wipes—engineered to dissipate static and trap particles—are critical tools, but their effectiveness depends on standardized protocols. Below is a comprehensive guide to their 规范操作 (standard operation) in lab settings, ensuring safety, compliance, and optimal cleaning results.

1. Pre-Cleaning Preparation: Lay the Foundation

  • Wipe Selection: Choose wipes certified for lab use with surface resistance 10⁶–10¹¹ Ω (ANSI/ESD S20.20) and ultra-low linting (≤1 fiber shed per wipe). Match to tasks: dry wipes for dust, pre-wet (IPA/deionized water) for residues.
  • Operator Grounding: Wear ESD wrist straps connected to grounded workbenches and anti-static gloves. This prevents personal static from transferring to wipes or equipment.
  • Wipe Inspection: Check for tears, loose fibers, or expired anti-static treatments (shelf life: 12–24 months). Discard defective wipes to avoid contamination.
  • Environment Check: Maintain 30–50% humidity (reduces static generation) and ensure workbenches are clean and clutter-free.

2. Step-by-Step Wiping Protocols

A. Dry Wiping for Particle Removal

  • Folding Technique: Fold the wipe into a 4-layer pad to create a dense, low-linting surface. This maximizes particle trapping and minimizes edge fraying.
  • Wiping Direction: Use single, straight strokes (horizontal/vertical) with 50% overlap. Avoid circular motions, which redistribute particles. For curved surfaces (e.g., sensor housings), use radial strokes from center to edge.
  • Pressure Control: Apply light, even pressure (≤1 psi). Excessive force generates static and compresses fibers, reducing particle retention.
  • Layer Rotation: Rotate the wipe to a clean layer after 2–3 strokes. Discard when all layers are soiled.

B. Pre-Wet Wiping for Residue Removal

  • Moisture Check: Ensure pre-wet wipes are damp (not dripping). Blot excess liquid on a dry wipe to prevent seepage into equipment (e.g., circuit boards).
  • Residue Targeting: For oils/fingerprints, hold the wipe against the area for 5 seconds to dissolve residues, then wipe gently. Focus on high-touch areas (e.g., instrument knobs, sample ports).
  • Post-Wipe Drying: Follow with a dry anti-static wipe to absorb excess moisture, preventing water spots on optics or corrosion on metal components.

3. Post-Cleaning Practices

  • Waste Disposal: Place used wipes in sealed, anti-static waste bins. Separate solvent-soaked wipes (e.g., IPA) from dry ones to avoid fire risks.
  • Equipment Verification: Use a particle counter to check surface cleanliness (≤5 particles ≥0.5μm/cm²) and an ESD tester to confirm static levels <100V.
  • Documentation: Log wipe lot numbers, cleaning tasks, and results for compliance (e.g., GLP, ISO 17025). This aids traceability if contamination issues arise.

4. Key 禁忌 (Taboos) to Avoid

  • Reusing Single-Use Wipes: Reused wipes shed trapped particles and lose anti-static efficacy.
  • Ignoring Compatibility: Do not use solvent-based pre-wet wipes on soft plastics or uncoated optics—test compatibility first.
  • Skipping Grounding: Ungrounded operators can transfer static to wipes, negating their anti-static benefits.
By following these procedures, anti-static cleanroom wipes effectively prevent ESD damage, reduce particle contamination, and maintain lab equipment reliability—critical for accurate experiments and compliance.