Precision components—such as semiconductor chips, PCB connectors, optical sensors, and microelectromechanical systems (MEMS)—have ultra-delicate surfaces where even sub-micron dust particles can cause electrical shorts, signal interference, or mechanical failure. Unlike dry wipes (which may push dust into crevices or generate static), pre-wet cleanroom wipes (impregnated with high-purity solutions like deionized water or 70% IPA) dissolve dust adhesions, trap particles, and leave no residues—making them ideal for dust removal on sensitive components. Below is a step-by-step method to safely and effectively eliminate dust, paired with key best practices to protect component integrity.
1. Pre-Method Preparation: Ensure Compatibility and Safety
Before cleaning, proper prep prevents accidental damage and ensures dust removal efficacy:
- Select the Right Pre-Wet Wipe:
- For non-conductive components (e.g., optical lenses, plastic MEMS housings): Choose wipes pre-moistened with deionized water—this avoids chemical damage to coatings or plastics.
- For conductive/electronic components (e.g., PCB traces, semiconductor wafers): Opt for 70% high-purity IPA wipes (99.9% IPA purity) to dissolve oil-based dust binders (e.g., fingerprint oils) and ensure fast evaporation.
- Verify wipes meet ISO 14644-1 Class 5 standards (ultra-low linting, ≤1 particle ≥0.1μm per wipe) to avoid introducing new contaminants.
- Inspect the Component: Check for visible damage (e.g., cracked coatings, bent pins) and confirm the component is powered off (for electronics) to prevent short circuits from excess moisture.
- Control the Workspace: Clean in a low-dust environment (e.g., a laminar flow hood or Class 100 cleanroom). Avoid drafty areas—airflow can spread dust or cause the wipe’s solution to evaporate too quickly.
2. Step-by-Step Dust Removal Process
Follow this gentle, targeted workflow to remove dust without scratching or contaminating the component:
Step 1: Loosen Surface Dust (Optional Pre-Clean)
For components with loose, dry dust (e.g., unused sensors), first use a clean, dry anti-static bulb blower to gently dislodge particles. Hold the blower 2–3 inches from the component and direct air in a sweeping motion—never use compressed air (it can force dust into component crevices or damage delicate structures). This step reduces the risk of rubbing dry dust into the component surface during wipe cleaning.
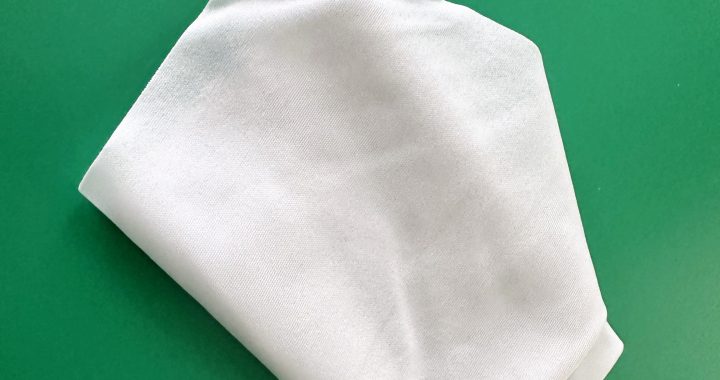
Step 2: Fold the Pre-Wet Wipe for Precision
Remove the pre-wet wipe from its sealed packaging and fold it into a 4-layer pad (e.g., fold an 8”x8” wipe twice to create a 4”x4” pad). Folding:
- Concentrates the wipe’s moisture, preventing drips that could seep into component gaps.
- Creates a smooth, low-linting surface (edges are tucked inward, reducing fraying).
- Provides multiple clean layers—you can rotate the pad as one layer becomes soiled.
Step 3: Wipe in Dust-Trapping Patterns
The direction of wiping directly impacts dust removal—avoid motions that spread particles:
- Flat Surfaces (e.g., PCB tops, sensor arrays): Wipe in single, straight strokes (horizontal or vertical) with 50% overlap between strokes. This traps dust in the wipe’s fibers instead of pushing it across the component. Never use circular motions—they redistribute dust and increase the risk of scratching.
- Crevices/Pins (e.g., connector pins, MEMS gaps): Tear a small strip from the folded wipe (1”x2”) and use tweezers to guide it into tight spaces. Gently drag the strip along the crevice—do not scrub. The wipe’s pre-wet solution will loosen dust, while the dense fibers trap it.
- Curved Surfaces (e.g., optical sensor domes): Use a radial pattern (from the center of the curve to the edge) to ensure even coverage. Apply light pressure—excessive force can deform soft materials (e.g., silicone sensor coatings).
Step 4: Ensure Residue-Free Drying
After wiping, allow the component to air-dry completely in a dust-free area:
- For electronics (e.g., PCBs): Let the component dry for 15–30 minutes (or until no moisture is visible) before powering it on. IPA-based wipes evaporate faster (10–15 minutes) than water-based ones—use this to your advantage for time-sensitive tasks.
- For optical components (e.g., sensor lenses): Blot excess moisture with a dry, lint-free corner of the pre-wet wipe (if unused) to prevent water spots. Avoid wiping while wet—this can leave streaks.
3. Post-Cleaning Verification
- Inspect for Remaining Dust: Use a magnifying glass (10–20x) or a digital microscope to check for leftover particles, especially in crevices. If dust remains, repeat the process with a fresh pre-wet wipe (do not reuse wipes—they trap dust and can recontaminate).
- Check for Residues: For critical components (e.g., semiconductor wafers), use a surface analyzer to confirm no ionic or organic residues are present. Pre-wet wipes meeting ISO Class 5 standards should leave no detectable residues when used correctly.
By following this method, pre-wet cleanroom wipes safely and effectively remove dust from precision components—protecting their performance, extending lifespan, and ensuring compliance with industry standards (e.g., IPC-A-610 for electronics, SEMI F21 for semiconductors).