Benefits of High-Density Wipes for Precision Components

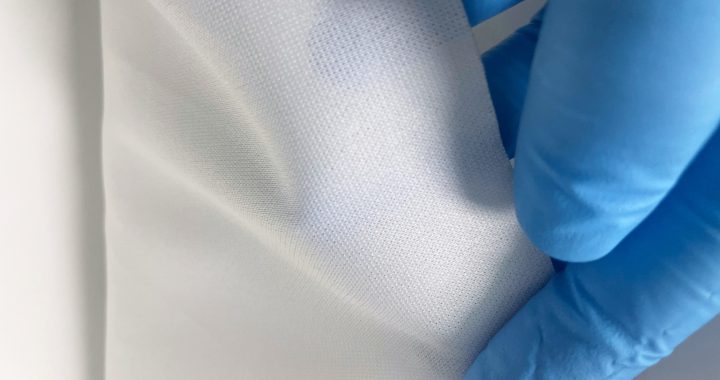
Laboratory precision components—such as AFM (Atomic Force Microscope) cantilevers, sensor chips, optical fibers, and microfluidic devices—demand cleaning solutions that balance thorough contamination removal with absolute surface protection. High-density cleanroom wipes (250–400 gsm) outperform low-density alternatives in this critical role, leveraging their robust fiber structure and engineered design to address the unique challenges of precision lab cleaning. Below are their key advantages.

1. Superior Particle & Residue Capture: Ensuring Sub-Micron Cleanliness

Precision components (e.g., 10μm microfluidic channels, 0.1μm AFM tips) are vulnerable to even tiny particles or residue, which can distort test data or disable functionality. High-density wipes excel at capturing contaminants:
  • Dense Fiber Network: Their tight, multi-layered fiber structure (often polyester or microfiber) creates more surface area to trap sub-micron particles (down to 0.1μm)—far better than low-density wipes, which let small debris pass through gaps. For example, when cleaning HPLC (High-Performance Liquid Chromatography) detector cells, high-density wipes remove 98% of protein residue or buffer salts in one pass, vs. 70% with low-density wipes.
  • Effective Solvent Retention: High-density fibers hold 12–15x their weight in solvents (e.g., IPA, acetone), ensuring consistent solvent contact to dissolve stubborn residues (e.g., dried glue on sensor chips, oil on optical fiber connectors). This eliminates the need for repeated wiping, reducing the risk of surface wear.

2. Enhanced Durability: Avoiding Fiber Shedding & Surface Damage

Precision components (e.g., anti-reflective coated lenses, gold-plated sensor pins) are easily scratched by abrasive fibers or shedding materials. High-density wipes offer unmatched durability:
  • Continuous-Filament Construction: Most high-density wipes use continuous-filament fibers (not staple fibers), which resist tearing or fraying even when used on rough surfaces (e.g., aluminum heat sinks) or in tight spaces (e.g., between IC pins). Unlike low-density wipes, they never shed fibers that could clog microfluidic channels or stick to sensor arrays.
  • Controlled Abrasion: Their thick, plush texture distributes pressure evenly across the component surface, avoiding the “point pressure” that low-density wipes exert (which can scratch delicate films). For cleaning laser diode lenses, this means no coating damage—extending component lifespan by 2–3x.

3. Precision Handling: Reaching Tight Spaces Without Compromise

Laboratory precision components often have intricate geometries (e.g., multi-pin connectors, recessed sensor wells) that are hard to access with standard wipes. High-density wipes offer flexible, targeted cleaning:
  • Rigid Yet Moldable: Their dense structure maintains shape when folded into narrow strips (e.g., 1cm wide) or wrapped around plastic tweezers, making it easy to clean between 0201 resistors, inside microfluidic inlet ports, or around AFM cantilever holders. Low-density wipes bunch or tear when manipulated this way, leaving areas uncleaned.
  • Edge Cleaning Capability: The firm edges of folded high-density wipes can reach into crevices (e.g., the gap between a microscope stage and sample holder) without collapsing—critical for removing dust that accumulates in hidden spots and causes equipment drift.

4. Consistent Performance: Reducing Variability in Lab Results

Laboratory workflows require consistent cleaning to ensure reproducible test data. High-density wipes deliver uniform results:
  • Predictable Absorbency: Their standardized density ensures every wipe absorbs the same amount of solvent and captures contaminants at the same rate—eliminating the variability of low-density wipes (which may be over- or under-saturated). For example, when cleaning qPCR (quantitative PCR) plates, this consistency reduces well-to-well contamination rates to <1%, ensuring accurate DNA amplification data.
  • Minimal Rework: By removing contaminants in one pass, high-density wipes reduce the need for re-cleaning—saving time and minimizing the risk of accidental damage from repeated handling (e.g., bending delicate optical fibers).

IPA Wipes for Removing Oil from Precision Components

Precision components—such as semiconductor wafers, PCB pins, optical lens mounts, and MEMS sensors—often accumulate oil stains (e.g., fingerprint oils, lubricant residues, or machining fluids) that compromise performance. IPA (Isopropyl Alcohol) wipes are ideal for this task, as IPA dissolves oils without damaging most materials. However, improper use can scratch delicate surfaces or leave residues. Below are targeted tips to ensure effective, safe oil removal from precision components.

1. Pre-Work Preparation: Safety & Compatibility First

Before cleaning, lay the groundwork to avoid damage or hazards:
  • Verify Component Compatibility:
    • Check the component’s material specifications—avoid IPA on soft plastics (e.g., PVC, polystyrene), uncoated rubber, or some anti-glare/AR coatings (IPA may cause swelling or discoloration). For unsure cases, perform a spot test: apply a small amount of IPA from the wipe to an inconspicuous area, wait 2 minutes, and confirm no damage.
    • Choose the right IPA concentration: 70% IPA is optimal for oil removal (the water content enhances oil dissolution), while 99% IPA is better for residue-free drying on metal or glass components (e.g., stainless steel sensor housings).
  • Select High-Quality IPA Wipes:
    • Opt for lint-free, continuous-filament polyester wipes (avoid cotton or low-grade synthetics—they shed fibers that stick to oil-stained surfaces).
    • For ESD-sensitive components (e.g., IC chips, semiconductors), use anti-static IPA wipes (surface resistance: 10⁶–10¹¹ Ω) to prevent static discharge during cleaning.
  • Set Up a Clean Workspace:
    • Work in a well-ventilated area (fume hood or open window) to disperse IPA vapors (flammable and irritating to airways).
    • Remove ignition sources (e.g., heat guns, Bunsen burners) and place components on an ESD-safe mat if applicable.

2. Oil Removal Technique: Gentle, Targeted Action

The key to removing oil without harming precision components is controlled, minimal friction:
  • Remove Loose Debris First:
    • Use a static-neutralized bulb blower or compressed air (low pressure, <30 PSI) to blow away dust or particles from the oil-stained area. Rubbing dry debris into oil can scratch surfaces or create a harder-to-remove sludge.
  • Fold the Wipe for Precision:
    • Fold the IPA wipe into a 4-layer pad. This creates a dense, smooth cleaning surface (reduces fiber shedding) and allows you to use a fresh layer for each pass—preventing re-depositing oil.
  • Wipe with Light, Directional Strokes:
    • Apply pressure <1 psi (light enough to barely feel the component through the wipe) to avoid scratching delicate features (e.g., fine-pitch PCB pins, thin-film coatings).
    • For flat surfaces (e.g., wafer backsides, lens mounts): Wipe in single, overlapping horizontal/vertical strokes—circular motions spread oil and increase friction.
    • For curved or small surfaces (e.g., sensor pins, connector housings): Use a folded corner of the wipe to target the oil stain—this avoids covering non-oiled areas unnecessarily.
  • Treat Stubborn Oil Stains Carefully:
    • For dried or thick oil (e.g., old lubricant on bearing components), hold the IPA-dampened wipe against the stain for 5–10 seconds (let IPA penetrate and dissolve the oil) before wiping. Do not scrub—this can abrade surfaces or push oil into component crevices.

3. Post-Cleaning Steps: Ensure No Residues or Damage

After oil removal, confirm the component is clean and undamaged:
  • Remove IPA Residues:
    • For water-sensitive components (e.g., electronics, MEMS sensors), follow the IPA wipe with a dry, lint-free anti-static wipe to blot excess moisture. This prevents water spots (from 70% IPA’s water content) or solvent intrusion into internal parts.
    • For glass/metal components (e.g., optical lens barrels), allow the surface to air-dry completely (10–15 minutes) before handling—ensure no streaks remain (streaks indicate leftover oil or wipe fibers).
  • Inspect Under Magnification:
    • Use a 10–20x magnifying glass or digital microscope to check for:
      • Remaining oil (appears as glossy spots on matte surfaces).
      • Fiber debris (from low-quality wipes—remove with a gentle air blast).
      • Scratches or coating damage (address immediately if found, as they may impact component function).
  • Store Components Properly:
    • Place cleaned components in a dust-free, oil-free container (e.g., anti-static bags for electronics, lens cases for optics) to prevent re-contamination. Avoid touching the cleaned surface with bare hands—skin oils will reintroduce stains.

4. Common Mistakes to Avoid

  • Over-Saturating the Wipe: Dripping IPA can seep into component gaps (e.g., IC chip leads, sensor enclosures) and cause corrosion or short circuits. The wipe should be damp, not wet.
  • Reusing Wipes: A used IPA wipe traps oil and debris—reusing it will spread contaminants to other areas of the component.
  • Cleaning Hot Components: Wait for components to cool to <40°C (e.g., after soldering or machining) before using IPA wipes—thermal shock can crack glass or delaminate coatings.
By following these tips, IPA wipes safely and effectively remove oil stains from precision components—preserving their functionality, extending lifespan, and ensuring compliance with industry quality standards (e.g., IPC-A-610 for electronics, ISO 10110 for optics).

Using Pre-Wetted Wipes to Clean Precision Components

Precision components—such as semiconductor chips, PCB connectors, optical sensors, and microelectromechanical systems (MEMS)—have ultra-delicate surfaces where even sub-micron dust particles can cause electrical shorts, signal interference, or mechanical failure. Unlike dry wipes (which may push dust into crevices or generate static), pre-wet cleanroom wipes (impregnated with high-purity solutions like deionized water or 70% IPA) dissolve dust adhesions, trap particles, and leave no residues—making them ideal for dust removal on sensitive components. Below is a step-by-step method to safely and effectively eliminate dust, paired with key best practices to protect component integrity.

1. Pre-Method Preparation: Ensure Compatibility and Safety

Before cleaning, proper prep prevents accidental damage and ensures dust removal efficacy:
  • Select the Right Pre-Wet Wipe:
    • For non-conductive components (e.g., optical lenses, plastic MEMS housings): Choose wipes pre-moistened with deionized water—this avoids chemical damage to coatings or plastics.
    • For conductive/electronic components (e.g., PCB traces, semiconductor wafers): Opt for 70% high-purity IPA wipes (99.9% IPA purity) to dissolve oil-based dust binders (e.g., fingerprint oils) and ensure fast evaporation.
    • Verify wipes meet ISO 14644-1 Class 5 standards (ultra-low linting, ≤1 particle ≥0.1μm per wipe) to avoid introducing new contaminants.
  • Inspect the Component: Check for visible damage (e.g., cracked coatings, bent pins) and confirm the component is powered off (for electronics) to prevent short circuits from excess moisture.
  • Control the Workspace: Clean in a low-dust environment (e.g., a laminar flow hood or Class 100 cleanroom). Avoid drafty areas—airflow can spread dust or cause the wipe’s solution to evaporate too quickly.

2. Step-by-Step Dust Removal Process

Follow this gentle, targeted workflow to remove dust without scratching or contaminating the component:

Step 1: Loosen Surface Dust (Optional Pre-Clean)

For components with loose, dry dust (e.g., unused sensors), first use a clean, dry anti-static bulb blower to gently dislodge particles. Hold the blower 2–3 inches from the component and direct air in a sweeping motion—never use compressed air (it can force dust into component crevices or damage delicate structures). This step reduces the risk of rubbing dry dust into the component surface during wipe cleaning.

Step 2: Fold the Pre-Wet Wipe for Precision

Remove the pre-wet wipe from its sealed packaging and fold it into a 4-layer pad (e.g., fold an 8”x8” wipe twice to create a 4”x4” pad). Folding:
  • Concentrates the wipe’s moisture, preventing drips that could seep into component gaps.
  • Creates a smooth, low-linting surface (edges are tucked inward, reducing fraying).
  • Provides multiple clean layers—you can rotate the pad as one layer becomes soiled.

Step 3: Wipe in Dust-Trapping Patterns

The direction of wiping directly impacts dust removal—avoid motions that spread particles:
  • Flat Surfaces (e.g., PCB tops, sensor arrays): Wipe in single, straight strokes (horizontal or vertical) with 50% overlap between strokes. This traps dust in the wipe’s fibers instead of pushing it across the component. Never use circular motions—they redistribute dust and increase the risk of scratching.
  • Crevices/Pins (e.g., connector pins, MEMS gaps): Tear a small strip from the folded wipe (1”x2”) and use tweezers to guide it into tight spaces. Gently drag the strip along the crevice—do not scrub. The wipe’s pre-wet solution will loosen dust, while the dense fibers trap it.
  • Curved Surfaces (e.g., optical sensor domes): Use a radial pattern (from the center of the curve to the edge) to ensure even coverage. Apply light pressure—excessive force can deform soft materials (e.g., silicone sensor coatings).

Step 4: Ensure Residue-Free Drying

After wiping, allow the component to air-dry completely in a dust-free area:
  • For electronics (e.g., PCBs): Let the component dry for 15–30 minutes (or until no moisture is visible) before powering it on. IPA-based wipes evaporate faster (10–15 minutes) than water-based ones—use this to your advantage for time-sensitive tasks.
  • For optical components (e.g., sensor lenses): Blot excess moisture with a dry, lint-free corner of the pre-wet wipe (if unused) to prevent water spots. Avoid wiping while wet—this can leave streaks.

3. Post-Cleaning Verification

  • Inspect for Remaining Dust: Use a magnifying glass (10–20x) or a digital microscope to check for leftover particles, especially in crevices. If dust remains, repeat the process with a fresh pre-wet wipe (do not reuse wipes—they trap dust and can recontaminate).
  • Check for Residues: For critical components (e.g., semiconductor wafers), use a surface analyzer to confirm no ionic or organic residues are present. Pre-wet wipes meeting ISO Class 5 standards should leave no detectable residues when used correctly.
By following this method, pre-wet cleanroom wipes safely and effectively remove dust from precision components—protecting their performance, extending lifespan, and ensuring compliance with industry standards (e.g., IPC-A-610 for electronics, SEMI F21 for semiconductors).