Anti-Static Cloth for Laboratory Optical Instruments

Anti-static cleanroom wipes are essential for maintaining the cleanliness and performance of optical instruments in laboratories and cleanroom environments. Their lint-free, high-density fibers efficiently remove dust, oils, fingerprints, and microscopic residues from delicate surfaces such as lenses, microscopes, and spectrometers. The anti-static property prevents electrostatic discharge (ESD) and particle attraction, ensuring optical clarity and equipment safety. These wipes can be used dry or pre-wetted with high-purity solvents, providing flexibility and optimized cleaning efficiency. Proper wiping techniques, including single-direction strokes and controlled pressure, minimize contamination, reduce cleaning time, and extend instrument lifespan in Class 100–1000 cleanrooms.

Key Features:

  • Lint-free, high-density fibers for safe contaminant removal

  • Anti-static to prevent ESD and particle attraction

  • Compatible with dry or pre-wetted cleaning methods

  • Reduces cleaning time while ensuring optical clarity

Application Scope:

  • Laboratory optical instruments maintenance

  • Lenses, microscopes, spectrometers

  • Precision optical equipment in cleanrooms

  • Industrial and research laboratory facilities

Process specification for IPA wipes in cleaning optical instruments

Optical instruments—including microscopes, spectrometers, laser systems, and CCD cameras—rely on flawlessly clean lenses, mirrors, and detectors to maintain light transmission, imaging clarity, and measurement precision. Even minor missteps with IPA (Isopropyl Alcohol) wipes—such as using the wrong concentration or wiping technique—can scratch anti-reflective (AR) coatings, leave solvent streaks, or degrade instrument performance. Below is a standardized, step-by-step process 规范 (specification) to ensure safe, effective cleaning with IPA wipes.

1. Pre-Clean Preparation: Safety, Compatibility, and Tool Readiness

Proper prep eliminates risks before wet cleaning and ensures alignment with the instrument’s manufacturer guidelines:
  • Instrument & Workspace Prep:
    1. Power Down & Isolate: Turn off the optical instrument and disconnect it from power (critical for electronics-integrated tools like CCD cameras) to prevent electrostatic discharge (ESD) or short circuits. For laser systems, lock out the laser source to avoid accidental activation.
    2. Control Airborne Dust: Clean the workbench with a lint-free dry wipe and position a laminar flow hood (if available) over the cleaning area—this minimizes dust reattachment to wet optical surfaces. Close nearby windows or vents to avoid air currents stirring up debris.
    3. Ground Personal Equipment: Wear an ESD wrist strap (calibrated to 10⁶–10⁹ Ω) and nitrile cleanroom gloves (low-lint, powder-free) to prevent skin oil transfer or static damage to sensitive components (e.g., laser diodes).
  • IPA Wipe & Concentration Selection:
    1. Match Wipes to Optical Surfaces:
      • AR-Coated Lenses/Mirrors: Use lint-free microfiber IPA wipes (0.1μm diameter) pre-wet with 70% lens-grade IPA. The lower alcohol concentration reduces coating degradation, while microfiber’s ultra-soft texture avoids scratching.
      • Non-Coated Glass (e.g., microscope slides, quartz cuvettes): Opt for polyester IPA wipes pre-wet with 99% electronic-grade IPA (high purity avoids residue buildup).
      • Delicate Optics (e.g., fiber optic tips, AFM laser lenses): Choose mini IPA wipes (2”x2”) to limit contact to the optical surface only—avoids wiping non-optical metal housings.
    2. Verify Compatibility: Check the instrument’s user manual to confirm IPA is approved for its optics. Never use IPA on plastic lenses (e.g., some budget microscope eyepieces)—IPA dissolves plastic and causes clouding.
  • Tool Preparation:

    Gather a static-neutralized bulb blower, 20–40x magnifying glass, and dry lint-free optical cloth (for post-wipe blotting)—these tools support dust removal and validation.

2. Step 1: Remove Loose Dust (Mandatory Pre-Wet Step)

Wiping loose dust with an IPA wipe grinds particles into the optical surface, causing irreversible micro-scratches. Always eliminate dry debris first:
  1. Blow Away Surface Dust: Hold the static-neutralized bulb blower 15–20cm away from the optical surface (e.g., a spectrometer detector window) and deliver short, gentle bursts of air. Tilt the instrument at a 45° angle to let dust fall downward (not onto other optics). For narrow gaps (e.g., between microscope objective threads), direct airflow parallel to the gap to avoid forcing dust deeper.
  2. Target Stubborn Dust with Dry Swabs: For dust stuck in crevices (e.g., fiber optic connector ports), use a dry, lint-free micro-swab (wooden handle—avoids static) to lightly dab the area. Discard the swab after one use to prevent cross-contamination.
  3. Validate Dust Removal: Inspect the surface under the 20–40x magnifying glass—if dust spots remain, repeat the blower/swab step. Do not proceed to wet cleaning until no visible dust is present.

3. Step 2: Wet Cleaning with IPA Wipes (Controlled, Gentle Motion)

Follow these rules to remove residues (e.g., fingerprint oils, immersion oil) without damaging optics:
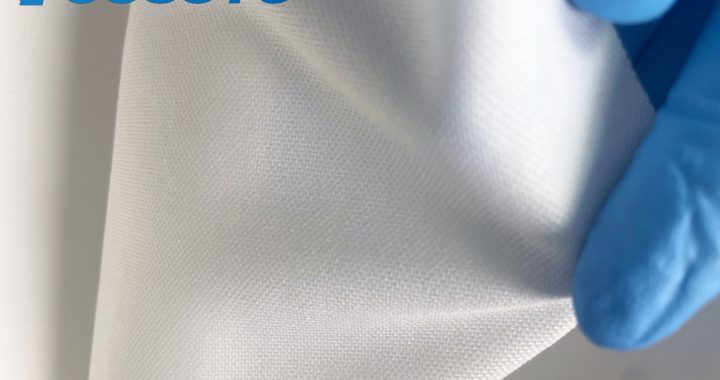
  • Wipe Handling:

    Remove one IPA wipe from its sealed packaging—hold it by the edges (never touch the cleaning surface with fingers) to avoid transferring oils. Fold the wipe into a thin, firm pad (2–3 layers) to ensure even solvent distribution and prevent the wipe from bunching.

  • Cleaning Motion for Different Optics:
    1. Large Flat Surfaces (e.g., laser mirrors, spectrometer windows):

      Wipe in single, slow linear strokes (e.g., top-to-bottom for horizontal surfaces) —never circular motions (which spread residue and generate friction). Apply pressure equivalent to pressing a feather (<0.2 psi)—enough to lift residue, not enough to compress dust into the coating.

    2. Curved Lenses (e.g., microscope objectives, camera lenses):

      Dab the lens surface gently with the folded IPA wipe—avoid wiping (curved surfaces increase the risk of uneven pressure and scratches). For dried oil, hold the wipe against the residue for 2–3 seconds to let IPA dissolve it, then dab once.

    3. Small Optics (e.g., fiber optic tips, laser diodes):

      Wrap a mini IPA wipe around the tip of plastic-tipped tweezers (avoids metal scratching). Rotate the tweezers 1–2 times to clean the tip—this ensures full coverage without bending delicate components.

  • Cross-Contamination Control:

    Use a fresh section of the IPA wipe for each optical component (e.g., one section for a microscope objective, a new section for the eyepiece). Unfold the wipe to expose a clean area between components—never reuse a soiled section.

4. Step 3: Post-Clean Blotting & Drying

Residual IPA causes streaks as it evaporates—proper drying ensures a spotless finish:
  1. Blot Excess Solvent: Immediately after wet cleaning, use the dry lint-free optical cloth to gently blot the optical surface. Use a single, light pass—do not rub (rubbing smears remaining residue and creates streaks). For small optics, use a dry micro-swab to dab moisture from edges.
  2. Air-Dry Fully: Let the instrument air-dry for 5–10 minutes in a low-humidity area (≤50% RH). For laser systems or vacuum-sealed optics, extend drying time to 15 minutes—residual IPA can vaporize and coat internal components if heated.
  3. Prevent Recontamination: Cover the cleaned instrument with a breathable, lint-free dust cover until ready for use. For detachable optics (e.g., microscope objectives), store them in their original lens cases with foam padding and a desiccant packet.

5. Step 4: Validation & Documentation

Ensure cleaning meets quality standards and maintain traceability for instrument maintenance:
  1. Inspect for Quality:
    • Check the optical surface under the 20–40x magnifying glass for streaks, lint, or remaining residue.
    • For imaging instruments (e.g., microscopes, CCD cameras), perform a test scan/image to verify no cleaning-related artifacts (e.g., lens flare, dead pixels) are present.
  2. Document the Process:

    Record details in the instrument’s maintenance log: date, IPA wipe type/concentration, surfaces cleaned, and any observations (e.g., “AR coating intact post-cleaning”). This supports compliance with lab quality standards (e.g., ISO 17025) and helps troubleshoot future performance issues.

Preventing Static on Optical Instruments with Dust-Free Wipes

Optical instruments—including microscopes, spectrometers, laser systems, and camera lenses—are highly vulnerable to electrostatic discharge (ESD) and ESD-attracted dust. Static charges can damage delicate anti-reflective (AR) coatings, distort light transmission, or cause micro-scratches when dust particles cling to lens surfaces. Specialized cleanroom wipes and cleaning wipes (engineered with anti-static properties and ultra-low linting) provide a dual solution: they remove contaminants and neutralize static, ensuring optical instruments maintain clarity and performance. Below is a detailed breakdown of their use for anti-static protection in optical instrument maintenance.

1. Selecting the Right Wipes for Optical Anti-Static Needs

Not all cleanroom wipes work for optics—choose variants tailored to static control and surface sensitivity:
  • Anti-Static Dry Cleanroom Wipes: Made from 100% continuous-filament polyester or microfiber with permanent anti-static treatments (e.g., conductive microfibers). These wipes have a surface resistance of 10⁶–10¹¹ Ω (per ANSI/ESD S20.20), safely dissipating static without creating electrical arcs. Ideal for dry dust removal on lens surfaces, mirror housings, and instrument exteriors.
  • Anti-Static Pre-Wet Cleaning Wipes: Impregnated with high-purity, residue-free solutions (e.g., 70% IPA + 30% deionized water or pure deionized water). The solvent dissolves oil-based residues (e.g., fingerprints) that attract static, while the anti-static wipe material prevents charge buildup during cleaning. Avoid wipes with surfactants or fragrances—these leave residues that cloud optics.
  • Low-Linting Guarantee: Ensure wipes meet ISO 14644-1 Class 5 standards (≤1 particle ≥0.1μm per wipe). Lint from low-quality wipes can trap static and scratch AR coatings, undoing anti-static efforts.

2. Step-by-Step Anti-Static Cleaning Process

Follow this workflow to protect optics from static while removing contaminants:

Step 1: Prep the Workspace and Operator

  • Control Static in the Environment: Work in a room with 30–50% relative humidity (low humidity increases static generation). Use an ionizer near the workbench to neutralize ambient static before cleaning.
  • Ground the Operator: Wear an ESD wrist strap connected to a grounded optical bench and anti-static nitrile gloves. This prevents your body’s static charge from transferring to the instrument or wipes.
  • Inspect Wipes and Instruments: Check wipes for tears, loose fibers, or expired anti-static treatments. Examine the optical instrument for visible dust or oil—avoid cleaning hot components (e.g., recently used laser diodes) to prevent thermal shock.

Step 2: Dry Anti-Static Wiping (Dust Removal)

  • Fold the Wipe for Precision: Fold the anti-static dry wipe into a small, firm pad (2–3 layers thick). This reduces the risk of edge fraying (a source of lint) and concentrates the wipe’s static-dissipative surface.
  • Wipe in Static-Safe Patterns:
    • For flat optics (e.g., spectrometer windows): Wipe in single, straight strokes (horizontal or vertical) with light pressure. Circular motions can generate friction-induced static.
    • For curved lenses (e.g., camera objectives): Use a radial pattern (from the lens center to the edge) to ensure even static dissipation and dust removal.
  • Neutralize Surface Static: After wiping, hold the wipe near the lens surface for 2–3 seconds—this allows the wipe’s anti-static properties to neutralize any remaining charge on the optic.

Step 3: Pre-Wet Anti-Static Cleaning (Residue Removal)

  • Target Oil-Based Residues: If fingerprints or oil are present, use an anti-static pre-wet wipe. Blot excess solution on a dry wipe first to avoid over-saturating the optic (excess liquid can seep into lens housings and damage internal components).
  • Gentle Residue Dissolution: Press the pre-wet wipe lightly against the residue for 5–10 seconds to let the solvent dissolve it, then wipe in the same pattern used for dry cleaning. The IPA or deionized water evaporates quickly, leaving no residues, while the wipe’s anti-static material prevents charge buildup during the process.
  • Final Dry Wipe: Follow the pre-wet wipe with a fresh anti-static dry wipe to absorb any remaining moisture. This step eliminates water spots and ensures the optic is fully static-neutralized.

3. Post-Cleaning Anti-Static Maintenance

  • Inspect for Static and Contaminants: Use an ESD tester to confirm the optic’s surface charge is <100V (safe for sensitive optics). Check the lens under angled light for remaining dust or lint—repeat cleaning if needed with a fresh wipe.
  • Store Instruments Properly: Place cleaned optical instruments in anti-static cases or covers. Avoid storing them near plastic or synthetic materials (which generate static) and keep them in a humidity-controlled environment to minimize future static buildup.
  • Regular Wipe Replacement: Use fresh wipes for each cleaning session—reused wipes lose anti-static efficacy and trap contaminants that can scratch optics.
By using cleanroom wipes and cleaning wipes with anti-static properties, you protect optical instruments from both static damage and contamination—extending their lifespan, ensuring accurate light transmission, and maintaining the precision critical for lab work, imaging, or industrial applications.