The role of cleanroom wipes in laboratory cleaning processes

Laboratories—whether in research, biotech, electronics, or pharmaceuticals—demand rigorous cleaning to maintain accuracy, prevent cross-contamination, and protect sensitive equipment. Cleanroom wipes (dry, ultra-low-linting variants) and cleaning wipes (pre-moistened with lab-safe solutions) are not just auxiliary tools—they are integral to every stage of the lab cleaning workflow, addressing unique challenges like particle control, residue removal, and surface disinfection. Below is a detailed breakdown of their key roles in standard lab cleaning processes.

1. Pre-Experiment Cleaning: Setting a Contamination-Free Baseline

Before starting experiments or handling samples, labs require a pristine workspace to avoid skewing results. Cleanroom wipes and cleaning wipes lay this foundation by:
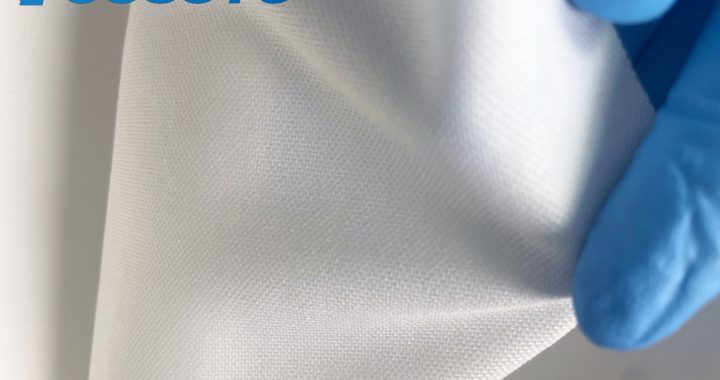
  • Removing Ambient Dust: Dry cleanroom wipes (made from continuous-filament polyester, ISO 14644-1 Class 6 compliant) dust workbenches, fume hood interiors, and equipment surfaces (e.g., microscope stages). Their dense weave traps sub-micron dust (0.5–1μm) that would otherwise contaminate samples (e.g., cell cultures, PCR reagents) or interfere with instrument calibration.
  • Disinfecting Critical Surfaces: Pre-moistened cleaning wipes with 70% high-purity IPA or quaternary ammonium compounds disinfect workbenches, sample preparation areas, and tool handles. This eliminates bacteria, viruses, and organic residues (e.g., leftover buffer solutions) that could cross-contaminate experiments—critical for biotech and clinical labs.
  • Preparing Equipment: For precision tools like pipettes, spectrometers, or HPLC detectors, pre-moistened lens-safe wipes clean optical components (e.g., detector windows, pipette tips) to ensure accurate readings. Dry wipes then remove excess moisture, preventing water spots that obscure measurements.

2. In-Experiment Spot Cleaning: Mitigating Real-Time Contamination

Even with pre-experiment preparation, spills, splatters, or dust accumulation can occur mid-process. Wipes provide rapid, non-disruptive solutions by:
  • Containing Spills: Absorbent cleaning wipes (high-density, 200–300 gsm) quickly soak up small spills of aqueous reagents (e.g., buffers, cell media) or solvents (e.g., ethanol, acetone). This prevents spills from spreading to sensitive equipment (e.g., electronic balance displays) or seeping into lab bench cracks, where residues breed contamination.
  • Cleaning Tool Surfaces: During sample transfers, dry cleanroom wipes wipe down tweezers, spatulas, or vortex mixer heads between uses. This removes sample residues (e.g., tissue fragments, powder reagents) that would otherwise transfer to subsequent samples—key for avoiding cross-contamination in batch processing.
  • Maintaining Optics: For experiments using microscopes or imaging systems, pre-moistened anti-static wipes periodically clean objective lenses to remove dust or oil smudges. This ensures consistent image quality throughout the experiment, eliminating the need to pause and recalibrate instruments.

3. Post-Experiment Deep Cleaning: Restoring Lab Readiness

After experiments conclude, thorough cleaning is essential to prepare the lab for the next user and prevent long-term residue buildup. Wipes play a critical role in:
  • Removing Stubborn Residues: Pre-moistened cleaning wipes with specialized solutions (e.g., enzyme-based cleaners for protein residues, mild surfactants for oil-based contaminants) break down and remove leftover experiment debris (e.g., dried agar, PCR master mix). Unlike harsh scrubbers, wipes clean delicate surfaces (e.g., plastic sample trays, glass cuvettes) without scratching.
  • Sanitizing Equipment Exteriors: Wipes disinfect the outer surfaces of centrifuges, incubators, and refrigerators—high-touch areas prone to bacterial growth. This maintains a hygienic environment, especially in shared labs where multiple users handle equipment.
  • Verifying Cleanliness: Dry cleanroom wipes are used as a “test” after cleaning—wiping a small area and inspecting the wipe for visible residues confirms surfaces are ready for the next experiment. For critical applications (e.g., pharmaceutical sample prep), wipes paired with particle counters verify that particle levels meet ISO Class 8 standards.

4. Specialized Roles in Niche Lab Workflows

Beyond general cleaning, wipes address unique needs in specialized lab areas:
  • Electronics Labs: Anti-static cleaning wipes remove flux residues from PCBs and dust from sensor components, preventing short circuits and signal interference in electronic experiments.
  • Semiconductor Labs: Ultra-low-linting (≤1 fiber per use) cleanroom wipes clean wafer handling tools and microscope optics, ensuring no particles disrupt microchip fabrication or testing.
  • Biohazard Labs: Sterile, gamma-irradiated cleaning wipes safely clean spills of biohazardous materials (e.g., cell lysates, viral samples), reducing the risk of exposure and cross-contamination.
In summary, cleanroom wipes and cleaning wipes are the backbone of lab cleaning processes—they ensure accuracy, protect equipment, and maintain safety at every stage. Their versatility and precision make them indispensable for labs striving to produce reliable results and comply with industry standards.

Guidelines for Anti-Static Wipes in Lab Cleaning

Laboratories handling electronics, precision instruments, or ESD-sensitive components require strict contamination and static control. Anti-static cleanroom wipes—engineered to dissipate static and trap particles—are critical tools, but their effectiveness depends on standardized protocols. Below is a comprehensive guide to their 规范操作 (standard operation) in lab settings, ensuring safety, compliance, and optimal cleaning results.

1. Pre-Cleaning Preparation: Lay the Foundation

  • Wipe Selection: Choose wipes certified for lab use with surface resistance 10⁶–10¹¹ Ω (ANSI/ESD S20.20) and ultra-low linting (≤1 fiber shed per wipe). Match to tasks: dry wipes for dust, pre-wet (IPA/deionized water) for residues.
  • Operator Grounding: Wear ESD wrist straps connected to grounded workbenches and anti-static gloves. This prevents personal static from transferring to wipes or equipment.
  • Wipe Inspection: Check for tears, loose fibers, or expired anti-static treatments (shelf life: 12–24 months). Discard defective wipes to avoid contamination.
  • Environment Check: Maintain 30–50% humidity (reduces static generation) and ensure workbenches are clean and clutter-free.

2. Step-by-Step Wiping Protocols

A. Dry Wiping for Particle Removal

  • Folding Technique: Fold the wipe into a 4-layer pad to create a dense, low-linting surface. This maximizes particle trapping and minimizes edge fraying.
  • Wiping Direction: Use single, straight strokes (horizontal/vertical) with 50% overlap. Avoid circular motions, which redistribute particles. For curved surfaces (e.g., sensor housings), use radial strokes from center to edge.
  • Pressure Control: Apply light, even pressure (≤1 psi). Excessive force generates static and compresses fibers, reducing particle retention.
  • Layer Rotation: Rotate the wipe to a clean layer after 2–3 strokes. Discard when all layers are soiled.

B. Pre-Wet Wiping for Residue Removal

  • Moisture Check: Ensure pre-wet wipes are damp (not dripping). Blot excess liquid on a dry wipe to prevent seepage into equipment (e.g., circuit boards).
  • Residue Targeting: For oils/fingerprints, hold the wipe against the area for 5 seconds to dissolve residues, then wipe gently. Focus on high-touch areas (e.g., instrument knobs, sample ports).
  • Post-Wipe Drying: Follow with a dry anti-static wipe to absorb excess moisture, preventing water spots on optics or corrosion on metal components.

3. Post-Cleaning Practices

  • Waste Disposal: Place used wipes in sealed, anti-static waste bins. Separate solvent-soaked wipes (e.g., IPA) from dry ones to avoid fire risks.
  • Equipment Verification: Use a particle counter to check surface cleanliness (≤5 particles ≥0.5μm/cm²) and an ESD tester to confirm static levels <100V.
  • Documentation: Log wipe lot numbers, cleaning tasks, and results for compliance (e.g., GLP, ISO 17025). This aids traceability if contamination issues arise.

4. Key 禁忌 (Taboos) to Avoid

  • Reusing Single-Use Wipes: Reused wipes shed trapped particles and lose anti-static efficacy.
  • Ignoring Compatibility: Do not use solvent-based pre-wet wipes on soft plastics or uncoated optics—test compatibility first.
  • Skipping Grounding: Ungrounded operators can transfer static to wipes, negating their anti-static benefits.
By following these procedures, anti-static cleanroom wipes effectively prevent ESD damage, reduce particle contamination, and maintain lab equipment reliability—critical for accurate experiments and compliance.

Tips for using dust-free cloth in laboratory cleaning

In laboratory environments—where even minute particles, fiber shedding, or improper cleaning can compromise experimental integrity, damage precision instruments, or contaminate samples—mastering the operational techniques of cleanroom wipes is critical to maintaining strict hygiene and performance standards. Cleanroom wipes, crafted from ultra-low-linting materials (e.g., microfiber, non-woven polyester) and often designed for lint-free, residue-free use, require deliberate handling to maximize their effectiveness while minimizing risks. Below is a detailed breakdown of key operational techniques tailored to laboratory needs.

1. Pre-Use Preparation: Ensure Wipe and Workspace Readiness

Before initiating cleaning, proper preparation lays the foundation for contamination control:
  • Inspect Wipes for Defects: Examine each wipe under good lighting to check for tears, loose fibers, or visible contaminants (e.g., dust spots). Discard any damaged wipes immediately—flaws can shed debris onto sensitive surfaces (e.g., microscope lenses, petri dishes) or leave uneven cleaning results.
  • Choose the Right Wipe Type: Match the wipe to the cleaning task: Use dry wipes for removing loose dust/particles from instrument exteriors or workbenches; opt for pre-wet, residue-free wipes (impregnated with high-purity solvents) for degreasing (e.g., removing fingerprint oils from glassware) or removing mild chemical residues. Avoid using multi-purpose wipes on ultra-sensitive areas (e.g., biosafety cabinet interiors) unless they meet ISO 14644-1 cleanroom classification standards.
  • Control Static (If Applicable): For labs handling electrostatic-sensitive equipment (e.g., PCR machines, electronic sensors), use anti-static cleanroom wipes. Prior to use, ensure the wipe is grounded (if required) or treated with anti-static solutions to prevent static discharge from attracting particles.

2. Wiping Techniques: Maximize Contamination Removal Without Damage

The direction, pressure, and pattern of wiping directly impact cleaning efficiency and surface safety:
  • Adopt a “One-Wipe, One-Direction” Rule: Avoid circular or back-and-forth motions, as these can redistribute contaminants (e.g., dust, spills) instead of removing them. Wipe in a single, consistent direction (e.g., horizontal strokes for workbenches, vertical strokes for glass surfaces) to trap debris within the wipe’s fibers. For large surfaces (e.g., lab countertops), divide the area into small sections and clean one section at a time to avoid missing spots.
  • Use Light, Even Pressure: Apply gentle pressure—excessive force can damage delicate surfaces (e.g., optical coatings on spectrometers, thin glass slides) or cause the wipe to shed fibers. Let the wipe’s material (e.g., microfiber’s capillary action) do the work: its fine fibers will lift particles without needing heavy pressure.
  • Prioritize “Clean-to-Dirty” Zones: Start cleaning from the least contaminated area and move toward the most soiled spot. For example, when cleaning a lab bench, begin with the area where samples are prepared (clean zone) and finish with the edge near the sink or waste bin (dirty zone). This prevents cross-contamination of critical surfaces.

3. Post-Use Handling: Avoid Secondary Contamination

Proper disposal or maintenance of used wipes prevents reintroducing contaminants into the lab:
  • Dispose of Single-Use Wipes Immediately: Most laboratory cleanroom wipes are single-use (to avoid cross-contamination). After use, place them in a sealed, labeled waste container (not open trash bins) to prevent particles from escaping back into the air. Do not reuse single-use wipes—even if they appear “clean,” they may harbor microscopic debris or residues.
  • Sterilize Reusable Wipes (If Approved): For reusable wipes (e.g., heavy-duty microfiber wipes for non-sensitive surfaces), follow strict sterilization protocols: Launder them in high-purity water with a residue-free detergent, dry at low temperatures (to prevent fiber damage), and store in a sealed, clean container until next use. Never mix reusable wipes with contaminated materials.
  • Clean Wipe Dispensers Regularly: Wipe dispensers (e.g., wall-mounted or tabletop units) can accumulate dust or debris over time. Clean the dispenser’s exterior and opening weekly with a dry cleanroom wipe to ensure that each new wipe remains uncontaminated when retrieved.

4. Specialized Tips for High-Risk Lab Areas

Certain laboratory zones require extra care to meet stringent standards:
  • Biosafety Cabinets (BSCs): Use sterile, non-pyrogenic cleanroom wipes to clean BSC interiors. Wipe down the work surface, side walls, and front window sash after each use, using a pre-wet wipe with a disinfectant compatible with the cabinet’s materials (check the manufacturer’s guidelines). Avoid wiping the HEPA filter grille—this can damage the filter.
  • Precision Instruments: For equipment like HPLC systems or microscopes, use ultra-soft, lint-free wipes (e.g., polyester-based) to clean external surfaces. Never wipe internal components (e.g., detector cells) unless guided by the instrument’s manual—incorrect wiping can disrupt calibration or damage parts.
  • Chemical Spill Cleanup: For small, non-hazardous chemical spills (e.g., water-based solutions), use an absorbent cleanroom wipe to blot the spill (do not wipe, as this can spread the liquid). For hazardous chemicals, follow the lab’s spill response protocol first, then use a chemically resistant cleanroom wipe to finish cleaning.
By following these operational techniques, laboratories can ensure that cleanroom wipes deliver consistent, reliable cleaning—protecting samples, preserving equipment lifespan, and maintaining compliance with industry and regulatory standards (e.g., GLP, ISO 14644).