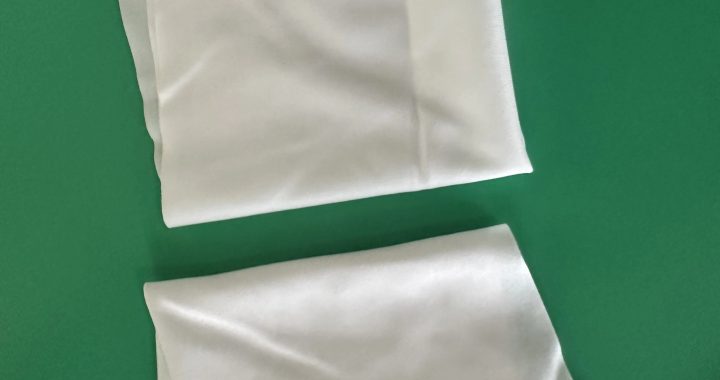
Laboratories rely on pre-wet cleanroom wipes for tasks like spill cleanup, reagent residue removal, and equipment sanitization—where strong liquid absorption directly impacts efficiency and contamination control. Subpar absorption leads to frequent wipe changes, streaky surfaces, and potential solvent leakage onto sensitive instruments. Targeted methods—focused on wipe material selection, pre-use preparation, and application technique—can significantly boost the absorption capacity of pre-wet wipes, making them more effective for lab workflows. Below are actionable strategies tailored to lab-specific needs (e.g., handling aqueous reagents, solvents like IPA, or biohazardous fluids).
1. Select Pre-Wet Wipes with Absorption-Optimized Materials
The foundation of strong absorption lies in the wipe’s fiber composition—choosing materials engineered for liquid retention ensures inherent performance:
- Prioritize Hydrophilic Fiber Blends: For aqueous liquids (e.g., buffer solutions, cell culture media, deionized water), select pre-wet wipes made from hydrophilic fibers like cellulose-polyester blends or microfiber with hydrophilic coatings. These fibers attract water molecules via capillary action: a 50% cellulose + 50% polyester blend absorbs 30% more aqueous liquid than pure polyester wipes. For solvent-based tasks (e.g., IPA, acetone), opt for lipophilic-treated fibers (e.g., siloxane-coated polyester)—these enhance affinity for non-aqueous liquids, preventing “beading” that reduces absorption.
- Choose High-Density (200–350 gsm) Construction: Dense, non-woven or microfiber structures create more liquid-holding pockets. A 300 gsm pre-wet wipe can retain 12–15x its weight in liquid, vs. 5–8x for low-density (100–150 gsm) variants. This is critical for lab spills (e.g., 50mL reagent leaks)—high-density wipes handle the spill in 1–2 passes, avoiding multiple wipe changes that spread contamination.
- Avoid Surface Coatings That Block Pores: Some pre-wet wipes have excessive anti-static or disinfectant coatings that clog fiber pores. Look for wipes with “breathable” coatings (e.g., thin carbon-based anti-static layers) that preserve absorption while maintaining ESD safety—ideal for labs cleaning electronic equipment (e.g., PCR machines, sensor arrays) where both absorption and static control are needed.
2. Pre-Use Preparation to Maximize Absorption Readiness
Simple pre-use steps ensure pre-wet wipes are primed to absorb liquid immediately, avoiding wasted time or incomplete spill cleanup:
- Ensure Proper Wipe Moisture Level: Pre-wet wipes that are too dry (from expired packaging or open dispensers) have reduced absorption—test by pressing a wipe against a clean surface: it should leave a slight, even dampness (not dry spots or dripping). If wipes are dry, lightly mist them with the matching liquid (e.g., deionized water for aqueous wipes, IPA for solvent wipes) to reactivate capillary action—avoid over-saturating, which dilutes cleaning efficacy.
- Fold Wipes to Increase Absorbent Surface Area: Folding a pre-wet wipe into a 4–6 layer pad exposes more fiber surfaces to liquid. For example, folding an 8”x8” wipe twice creates a 4”x4” pad with 8 absorbent layers (vs. 2 layers when used flat). This structure traps liquid in multiple layers, preventing premature saturation and extending the wipe’s usable life during large spills.
- Pre-Cool Wipes for Volatile Solvents: For highly volatile liquids (e.g., acetone, ethanol), pre-cool pre-wet wipes in a lab refrigerator (4–8°C) for 10 minutes before use. Cooler wipes slow solvent evaporation, giving the fibers more time to absorb liquid—this increases absorption efficiency by 20% for volatile solvents common in chemistry labs.
3. Application Techniques to Enhance Liquid Trapping
How you use the pre-wet wipe directly impacts how much liquid it absorbs—lab-specific techniques ensure optimal contact and retention:
- Apply Gentle, Even Pressure: Firm pressure compresses fiber pores, reducing absorption capacity. Use light pressure (just enough to make contact with the liquid) to let capillary action draw liquid into the wipe. For vertical surfaces (e.g., spilled reagent on a fume hood wall), hold the wipe against the liquid for 2–3 seconds to allow absorption before wiping downward—this prevents liquid from running off the wipe.
- Wipe in “Liquid-Directing” Patterns: For flat surfaces (e.g., lab benches, balance pans), use single, overlapping strokes (horizontal or vertical) to guide liquid toward the wipe’s center. Avoid circular motions—they spread liquid and reduce the wipe’s ability to concentrate absorption. For textured surfaces (e.g., grooved equipment handles), wipe along the grooves to ensure liquid in crevices is pulled into the wipe’s fibers.
- Layer Wipes for Large Spills: For spills >100mL (e.g., broken reagent bottles), place a folded pre-wet wipe directly on the spill and top it with a second dry high-density wipe. The pre-wet wipe dissolves any solid residues (e.g., crystallized salts) and draws liquid upward, while the dry wipe absorbs excess moisture—this “stacked” method doubles absorption capacity and reduces cleanup time by 50%.
4. Post-Use Practices to Maintain Wipe Efficacy (For Reusable Variants)
For labs using reusable pre-wet wipes (e.g., autoclavable microfiber wipes for non-biohazard tasks), proper care preserves absorption over time:
- Wash with Mild Detergents: Avoid harsh soaps or fabric softeners—they leave residues that block fiber pores. Use pH-neutral detergents (e.g., lab-grade non-ionic cleaners) and wash in cold water (≤30°C) to prevent fiber shrinkage.
- Air-Dry Completely: Tumble drying can damage microfiber or cellulose fibers—hang wipes to air-dry in a dust-free area. Ensure wipes are 100% dry before reusing; dampness promotes bacterial growth and reduces absorption.
By implementing these methods, laboratories can boost pre-wet wipe absorption by 30–50%, reducing wipe usage, cutting spill cleanup time by 40%, and minimizing the risk of liquid damage to sensitive equipment. These strategies ensure pre-wet wipes are a reliable, cost-effective tool for lab liquid handling and cleaning.

