Laboratories handling ESD-sensitive equipment (e.g., microchips, sensors, optical instruments) or electrostatically charged materials (e.g., powders, thin films) require strict cleaning protocols to prevent static-induced damage or contamination. Anti-static cleanroom wipes (static-dissipative: 10⁶–10¹⁰ Ω; conductive: 10³–10⁶ Ω) are essential for this task, but their effectiveness depends on standardized use. Below is a step-by-step standard operating procedure (SOP) to ensure safe, consistent, and static-free cleaning in lab environments.
1. Pre-Clean Preparation: Safety & Setup
Proper prep eliminates static buildup, verifies wipe suitability, and protects lab equipment—never skip this phase:
- Personal & Workspace Grounding:
- Put on an ESD wrist strap (tested to 10⁶–10⁹ Ω) and connect it to a verified earth ground (e.g., lab bench ground port). Ensure direct skin contact with the strap’s conductive material (no gloves between skin and strap).
- Place the item to be cleaned on an ESD-safe mat (grounded to the same earth point). Remove all static-generating materials (e.g., plastic bags, foam, synthetic fabrics) from the immediate workspace (minimum 30cm radius).
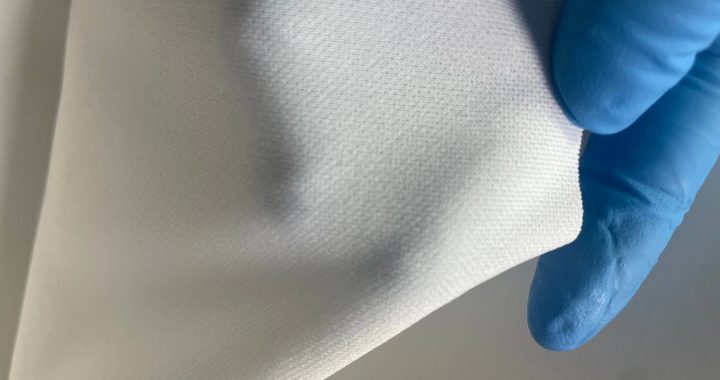
- Wipe Inspection & Selection:
- Check the anti-static wipe’s packaging for damage (e.g., tears, punctures)—discard if compromised (exposure to air may reduce anti-static properties).
- Select the appropriate wipe type based on the item:
- For electronics (PCBs, sensors): Use anti-static microfiber wipes (0.1μm diameter) pre-wet with 70% electronic-grade IPA (avoids short circuits).
- For optics (lenses, lasers): Choose anti-static lens-safe wipes pre-wet with deionized water or lens-grade IPA (protects AR coatings).
- For dry dust (powders, films): Opt for dry anti-static polyester wipes (lint-free, high particle capture).
- Verify the wipe’s anti-static certification (e.g., ANSI/ESD S20.20 compliance) via product labeling—never use non-certified wipes for ESD-sensitive items.
2. Step 1: Neutralize Static on the Item (Critical for Dust Removal)
Static charges on lab items attract dust and can damage components—neutralize before cleaning:
- Use an ESD-safe ionizer (calibrated per manufacturer guidelines) to treat the item. Hold the ionizer 15–20cm from the surface and move it in slow, overlapping passes (10–15 seconds per side for small items).
- For large equipment (e.g., spectrometers, HPLC systems), treat the entire surface—focus on crevices (e.g., button gaps, cable ports) where static accumulates.
- Confirm static neutralization with an ESD field meter (readings should be <100 V)—if charges remain, repeat ionizer treatment.
3. Step 2: Remove Loose Dust (Avoid Scratching)
Never wipe loose dust directly with an anti-static wipe—rubbing dry particles causes micro-scratches. First, eliminate dry debris:
- Use a static-neutralized bulb blower (non-metallic, ESD-safe) to gently remove loose dust. Hold the blower 10–15cm from the item and deliver short, controlled bursts—direct dust downward to avoid reattachment.
- For narrow gaps (e.g., between microscope objective threads, sensor ports), use a dry anti-static micro-swab (wooden handle) to lightly dab the area. Discard the swab after one use to prevent cross-contamination.
- Inspect the item under angled bright light or a 10x magnifier—ensure no visible dust remains before wet cleaning (if using pre-wet wipes).
4. Step 3: Wipe Cleaning (Static-Free & Gentle)
Follow these rules to clean without generating static or damaging the item:
- For Dry Cleaning (Dust, Light Debris):
- Remove one dry anti-static wipe from its packaging—hold it by the edges (avoid touching the cleaning surface with fingers, which transfer oils).
- Wipe the item in slow, single linear strokes (e.g., top-to-bottom for horizontal surfaces) instead of circular motions (circular wiping generates friction and static). Apply light pressure (<0.2 psi)—enough to capture dust, not enough to scratch.
- Fold the wipe to expose a fresh section after each stroke—reusing sections spreads dust and reduces anti-static efficacy.
- For Wet Cleaning (Residues, Oils):
- Use pre-wet anti-static wipes (per Step 1 selection) and squeeze gently to remove excess solvent (prevents dripping and static buildup from liquid).
- For electronics: Wipe in the direction of circuit traces (not across) to avoid damaging delicate connections. For optics: Dab lens surfaces (do not rub) to protect coatings.
- Immediately blot excess solvent with a dry anti-static wipe—residual moisture can attract dust or cause corrosion.
5. Step 4: Post-Clean Validation & Storage
Ensure the item is clean, static-free, and protected:
- Inspect for Cleanliness: Check for remaining dust, lint, or residue using a 10–20x magnifier. For optics, verify no streaks by holding the item under a light source.
- Re-Check Static Levels: Use the ESD field meter to confirm the item’s surface charge is <100 V—if static is detected, re-treat with the ionizer.
- Store Properly: Place cleaned items in ESD-safe containers (e.g., shielded bags for electronics, lens cases for optics) with desiccant packets. For equipment, cover with an anti-static dust cover.
- Log the Cleaning: Record the date, wipe type, item cleaned, and static readings in the lab’s maintenance log—this ensures traceability and compliance with ESD standards.