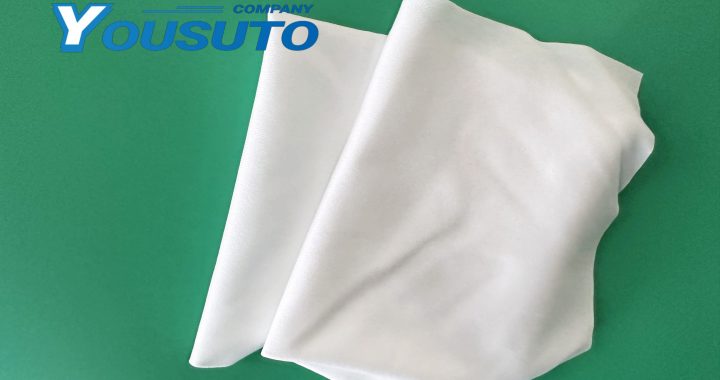
Anti-static cleanroom wipes are critical for protecting ESD-sensitive components (e.g., microchips, optical sensors) and maintaining contamination control in labs, semiconductor facilities, and electronics manufacturing. Their effectiveness depends on standardized usage—from pre-use preparation to post-clean verification. Below are detailed process specifications and real-world cases demonstrating successful implementation.
1. Standardized Usage Process Specifications
Follow this step-by-step workflow to ensure anti-static wipes deliver consistent ESD protection and cleaning efficacy:
Step 1: Pre-Use Preparation (Safety & Compatibility)
- Wipe Selection:
- Choose wipes matching the application’s ESD risk: Use static-dissipative wipes (10⁶–10¹⁰ Ω) for general tasks (e.g., cleaning PCB workbenches); opt for conductive wipes (10³–10⁶ Ω) for high-risk components (e.g., MEMS sensors, EUV reticles).
- Confirm material compatibility: Avoid solvent-based anti-static wipes on soft plastics (e.g., PVC) or AR-coated optics—use deionized water-based wipes instead.
- Inspect wipes for defects (frayed edges, lint) – discard damaged wipes to prevent contamination.
- Operator & Workspace Grounding:
- Wear an ESD wrist strap (test resistance to 10⁶–10⁹ Ω) and nitrile ESD gloves (latex generates static).
- Place the target component on an ESD-safe mat (grounded via a 1MΩ resistor) and remove non-essential items (e.g., plastic containers) from the workspace—they act as static generators.
- Component Prep:
- Power down electronics and disconnect power sources (if safe) to eliminate ESD pathways.
- Use a static-neutralized bulb blower to remove loose dust—rubbing dry dust with wipes creates friction-induced static.
Step 2: In-Use Cleaning Technique
- Wipe Handling:
- Remove one wipe at a time from its sealed ESD-safe packaging—exposure to air degrades anti-static coatings. Hold wipes by the edges to avoid transferring skin oils (which reduce conductivity).
- Cleaning Strokes:
- For flat surfaces (e.g., PCB trays, sensor windows): Wipe in slow, single linear strokes (horizontal/vertical)—never circular motions (spread dust and generate static). Apply light pressure (<0.5 psi) to avoid scratching.
- For curved/tight areas (e.g., connector pins, lens edges): Fold the wipe into a thin strip (1cm wide) or small pad to conform to the surface. Use tweezers to guide the wipe for precision—prevents accidental contact with sensitive pins.
- Solvent Use (for Pre-Wet Wipes):
- Ensure pre-wet wipes are damp, not dripping—excess solvent seeps into component housings and damages electronics.
- For residue removal (e.g., flux on PCBs), hold the wipe against the residue for 2–3 seconds to let the solvent dissolve it—avoid scrubbing.
Step 3: Post-Use Verification & Protection
- ESD Testing: Use an ESD field meter to measure surface charge on the component—target charge ≤100V (no detectable static field). Re-wipe with a fresh anti-static wipe if charge exceeds this threshold.
- Contamination Check: Inspect the component under 10–20x magnification for lint, dust, or solvent streaks—remove remaining debris with a bulb blower.
- Storage & Waste:
- Store cleaned components in ESD-safe bags/containers immediately.
- Dispose of used wipes in lab-approved bins—solvent-soaked wipes are flammable and must be segregated.
2. Real-World Application Cases
Case 1: Semiconductor Wafer Handling (ISO Class 3 Cleanroom)
Challenge
A semiconductor plant faced 5% of 3nm wafer batches being rejected due to ESD-induced defects (e.g., transistor short circuits) and fiber contamination from non-anti-static wipes. Workers used standard microfiber wipes, which generated up to 800V of static and shed fibers onto wafers.
Solution
Implemented the standardized anti-static wipe process:
- Used conductive polyester wipes (10³–10⁶ Ω) for wafer chuck cleaning and static-dissipative pre-wet IPA wipes for edge residue removal.
- Trained staff on linear stroke techniques and mandatory wrist strap testing.
Outcomes
- Wafer rejection rate dropped from 5% to 0.3%—ESD defects eliminated entirely.
- Fiber contamination reduced by 95%—wipes met ISO Class 3 lint standards (≤0.5 fibers per use).
Case 2: Medical Device Manufacturing (ECG Sensor Assembly)
Challenge
A medical device maker struggled with intermittent failures in ECG sensors—root cause: static-attracted dust blocking electrode contacts, and ESD damaging sensor circuits during cleaning with non-anti-static rags.
Solution
Adopted anti-static wipes and process 规范:
- Used static-dissipative dry wipes for dust removal and deionized water-based pre-wet wipes for electrode cleaning (avoids solvent damage to sensor coatings).
- Added post-clean ESD testing with a field meter to ensure charge ≤50V.
Outcomes
- Sensor failure rate fell from 12% to 1.2%—dust-free electrodes improved signal accuracy.
- No ESD-related circuit damage reported post-implementation.
Key Takeaways
- Standardization Prevents Errors: Documented workflows eliminate variability in wipe selection and technique.
- ESD Testing is Non-Negotiable: Post-clean charge checks ensure components stay protected.
- Material Compatibility Matters: Matching wipes to components avoids damage and maintains efficacy.
These specifications and cases prove that anti-static cleanroom wipes, when used correctly, protect high-value components, reduce defects, and ensure compliance with industry standards (ANSI/ESD S20.20, ISO 14644).
