IPA rag alcohol cleaning process optimization case analysis

Isopropyl Alcohol (IPA) wipes are foundational for precision cleaning in electronics, optics, and lab settings—but inefficient workflows (e.g., redundant steps, improper wipe selection) often lead to residue, rework, or ESD damage. Below are two real-world optimization cases that improved cleaning efficacy, reduced costs, and minimized errors, demonstrating how targeted adjustments transform IPA wipe usage.

Case 1: Electronics Manufacturer – PCB Post-Soldering Flux Cleaning

Challenge

A mid-sized PCB manufacturer faced two critical issues with their IPA wipe cleaning process:
  1. High Rework Rate: 12% of PCBs required re-cleaning due to leftover flux residues—caused by using low-density (150 gsm) IPA wipes that dried out mid-task, leaving incomplete flux dissolution.
  2. ESD Damage: 3% of fine-pitch IC chips were damaged by static discharge—workers used non-ESD IPA wipes and skipped grounding steps, leading to charge buildup on PCBs.
  3. Waste: 2–3 wipes were used per PCB, as low-density wipes tore easily when wiping around component leads.

Optimization Measures

The manufacturer implemented three key changes:
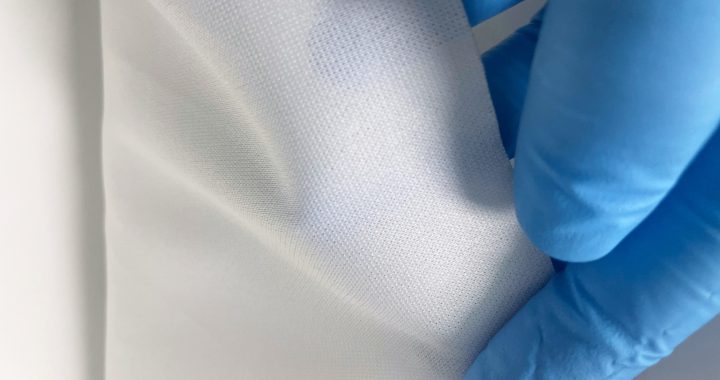
  1. Wipe Upgrade: Switched to 250 gsm anti-static IPA wipes (surface resistance: 10⁶–10¹⁰ Ω, 99% electronic-grade IPA). The higher density retained solvent longer (3x vs. 150 gsm wipes), ensuring full flux dissolution in one pass; anti-static fibers eliminated charge buildup.
  2. Process Standardization:
    • Added a pre-clean step: Use a dry anti-static wipe to remove loose solder debris before IPA cleaning—prevents debris from mixing with flux and forming hard-to-remove sludge.
    • Mandated ESD grounding (wrist straps + grounded workbenches) and trained workers to wipe in single radial strokes (center to edge) for PCBs, avoiding back-and-forth motions that generate static.
  3. Waste Reduction: Implemented “wipe segmentation”—folding each IPA wipe into 4 usable quadrants, using one quadrant per PCB section (e.g., top traces, bottom connectors).

Outcomes

  • Rework Rate: Dropped from 12% to 1.5%—residue-free PCBs reduced component failure in final testing.
  • ESD Damage: Eliminated entirely (0% from 3%)—anti-static wipes and grounding protected IC chips.
  • Cost Savings: Wipe usage per PCB fell from 2.5 to 1, cutting annual wipe costs by 60% ($45,000 saved).

Case 2: Biomedical Lab – Optical Microscope Objective Cleaning

Challenge

A research lab’s confocal microscope objectives (60x, 100x oil-immersion) suffered from:
  1. Image Artifacts: Blurred imaging due to incomplete oil residue removal—workers used 70% IPA wipes but wiped too quickly, leaving solvent streaks.
  2. Coating Damage: 2 objectives required replacement ($1,200 each) after scratches from low-quality, linty IPA wipes.
  3. Inconsistency: Different researchers used varying wipe pressures and strokes, leading to uneven cleaning results.

Optimization Measures

The lab optimized the process for optical sensitivity:
  1. Wipe Selection: Adopted ultra-fine microfiber IPA wipes (0.1μm fiber diameter, 70% IPA + 30% deionized water blend). The microfibers trapped oil residues without scratching AR coatings, while the water blend reduced solvent evaporation (avoiding streaks).
  2. Step-by-Step Protocol:
    • Pre-clean: Use a bulb blower to remove loose dust—prevents rubbing particles into the objective.
    • Wipe technique: Fold the wipe into a 2-layer pad, hold the objective barrel steady, and wipe in slow, single radial strokes (1 rotation) with light pressure (<0.5 psi).
    • Post-clean: Use a dry microfiber wipe to buff the objective—removes remaining solvent and ensures clarity.
  3. Training & Accountability: Trained all researchers on the protocol, added visual guides near the microscope, and assigned a “cleaning log” to track objective maintenance.

Outcomes

  • Imaging Quality: Artifacts eliminated—microscope resolution restored to manufacturer specifications, enabling clear subcellular imaging.
  • Coating Protection: No new scratches in 18 months—extended objective lifespan by 2x.
  • Consistency: 100% of researchers followed the protocol, ensuring uniform cleaning results across experiments.

Key Takeaways from Both Cases

  1. Wipe Selection Drives Efficacy: Matching IPA wipe density, fiber type, and anti-static properties to the application (PCB vs. optics) eliminates root-cause issues.
  2. Standardization Reduces Errors: Documented strokes, pressure, and pre/post steps prevent variability and rework.
  3. ESD & Coating Protection Are Non-Negotiable: Anti-static features and ultra-soft fibers avoid costly damage to sensitive components.
These cases prove that optimizing IPA wipe cleaning processes—beyond just “using a wipe”—delivers measurable improvements in quality, cost, and equipment longevity.

IPA Wipes for Removing Oil from Precision Components

Precision components—such as semiconductor wafers, PCB pins, optical lens mounts, and MEMS sensors—often accumulate oil stains (e.g., fingerprint oils, lubricant residues, or machining fluids) that compromise performance. IPA (Isopropyl Alcohol) wipes are ideal for this task, as IPA dissolves oils without damaging most materials. However, improper use can scratch delicate surfaces or leave residues. Below are targeted tips to ensure effective, safe oil removal from precision components.

1. Pre-Work Preparation: Safety & Compatibility First

Before cleaning, lay the groundwork to avoid damage or hazards:
  • Verify Component Compatibility:
    • Check the component’s material specifications—avoid IPA on soft plastics (e.g., PVC, polystyrene), uncoated rubber, or some anti-glare/AR coatings (IPA may cause swelling or discoloration). For unsure cases, perform a spot test: apply a small amount of IPA from the wipe to an inconspicuous area, wait 2 minutes, and confirm no damage.
    • Choose the right IPA concentration: 70% IPA is optimal for oil removal (the water content enhances oil dissolution), while 99% IPA is better for residue-free drying on metal or glass components (e.g., stainless steel sensor housings).
  • Select High-Quality IPA Wipes:
    • Opt for lint-free, continuous-filament polyester wipes (avoid cotton or low-grade synthetics—they shed fibers that stick to oil-stained surfaces).
    • For ESD-sensitive components (e.g., IC chips, semiconductors), use anti-static IPA wipes (surface resistance: 10⁶–10¹¹ Ω) to prevent static discharge during cleaning.
  • Set Up a Clean Workspace:
    • Work in a well-ventilated area (fume hood or open window) to disperse IPA vapors (flammable and irritating to airways).
    • Remove ignition sources (e.g., heat guns, Bunsen burners) and place components on an ESD-safe mat if applicable.

2. Oil Removal Technique: Gentle, Targeted Action

The key to removing oil without harming precision components is controlled, minimal friction:
  • Remove Loose Debris First:
    • Use a static-neutralized bulb blower or compressed air (low pressure, <30 PSI) to blow away dust or particles from the oil-stained area. Rubbing dry debris into oil can scratch surfaces or create a harder-to-remove sludge.
  • Fold the Wipe for Precision:
    • Fold the IPA wipe into a 4-layer pad. This creates a dense, smooth cleaning surface (reduces fiber shedding) and allows you to use a fresh layer for each pass—preventing re-depositing oil.
  • Wipe with Light, Directional Strokes:
    • Apply pressure <1 psi (light enough to barely feel the component through the wipe) to avoid scratching delicate features (e.g., fine-pitch PCB pins, thin-film coatings).
    • For flat surfaces (e.g., wafer backsides, lens mounts): Wipe in single, overlapping horizontal/vertical strokes—circular motions spread oil and increase friction.
    • For curved or small surfaces (e.g., sensor pins, connector housings): Use a folded corner of the wipe to target the oil stain—this avoids covering non-oiled areas unnecessarily.
  • Treat Stubborn Oil Stains Carefully:
    • For dried or thick oil (e.g., old lubricant on bearing components), hold the IPA-dampened wipe against the stain for 5–10 seconds (let IPA penetrate and dissolve the oil) before wiping. Do not scrub—this can abrade surfaces or push oil into component crevices.

3. Post-Cleaning Steps: Ensure No Residues or Damage

After oil removal, confirm the component is clean and undamaged:
  • Remove IPA Residues:
    • For water-sensitive components (e.g., electronics, MEMS sensors), follow the IPA wipe with a dry, lint-free anti-static wipe to blot excess moisture. This prevents water spots (from 70% IPA’s water content) or solvent intrusion into internal parts.
    • For glass/metal components (e.g., optical lens barrels), allow the surface to air-dry completely (10–15 minutes) before handling—ensure no streaks remain (streaks indicate leftover oil or wipe fibers).
  • Inspect Under Magnification:
    • Use a 10–20x magnifying glass or digital microscope to check for:
      • Remaining oil (appears as glossy spots on matte surfaces).
      • Fiber debris (from low-quality wipes—remove with a gentle air blast).
      • Scratches or coating damage (address immediately if found, as they may impact component function).
  • Store Components Properly:
    • Place cleaned components in a dust-free, oil-free container (e.g., anti-static bags for electronics, lens cases for optics) to prevent re-contamination. Avoid touching the cleaned surface with bare hands—skin oils will reintroduce stains.

4. Common Mistakes to Avoid

  • Over-Saturating the Wipe: Dripping IPA can seep into component gaps (e.g., IC chip leads, sensor enclosures) and cause corrosion or short circuits. The wipe should be damp, not wet.
  • Reusing Wipes: A used IPA wipe traps oil and debris—reusing it will spread contaminants to other areas of the component.
  • Cleaning Hot Components: Wait for components to cool to <40°C (e.g., after soldering or machining) before using IPA wipes—thermal shock can crack glass or delaminate coatings.
By following these tips, IPA wipes safely and effectively remove oil stains from precision components—preserving their functionality, extending lifespan, and ensuring compliance with industry quality standards (e.g., IPC-A-610 for electronics, ISO 10110 for optics).