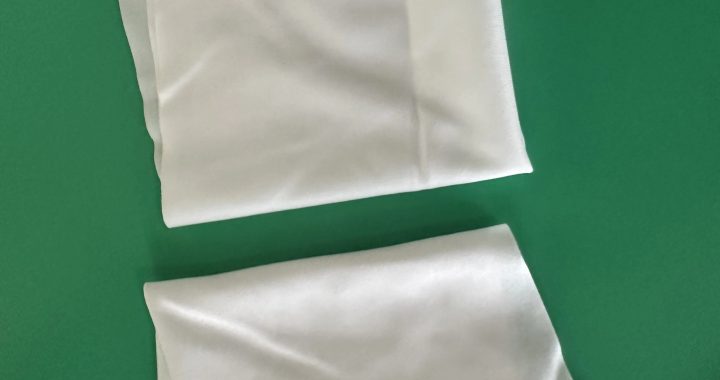
Precision components—such as microchips, sensor diaphragms, fiber optic connectors, and MEMS devices—have ultra-sensitive surfaces; even 0.1μm dust particles can cause functional failures, signal interference, or irreversible scratches. Pre-wet cleanroom wipes—pre-impregnated with low-residue solvents (deionized water, lens-grade IPA) or sterile cleaners—offer a gentle yet effective solution for dust removal, avoiding the risks of dry wiping (scratching) or compressed air (forcing dust into crevices). Below is a step-by-step method tailored to protect these delicate components.
1. Pre-Clean Preparation: Minimize Risk & Control Contamination
Proper prep is critical to prevent dust reattachment and component damage before wet cleaning:
- Component & Workspace Prep:
- Ground the Workspace: Place the precision component on an ESD-safe mat and wear an ESD wrist strap (calibrated to 10⁶–10⁹ Ω) to eliminate static—static charges attract dust and can damage microelectronics.
- Reduce Airborne Dust: Clean the workbench with a lint-free dry wipe and use a laminar flow hood (if available) to create a particle-free zone. Turn off fans or air vents nearby to avoid stirring up dust during cleaning.
- Inspect the Component: Use a 20–40x magnifying glass to map dust locations (e.g., connector pins, sensor edges)—this ensures targeted cleaning and avoids unnecessary wipe contact with sensitive areas.
- Pre-Wet Wipe Selection:
- Match Wipes to Component Type:
- For electronics (microchips, PCBs): Choose pre-wet wipes with 70% lens-grade IPA (low conductivity, avoids short circuits) and ultra-fine microfiber (0.1μm diameter) to prevent scratching.
- For optical components (fiber optic tips, lens arrays): Use deionized water-based pre-wet wipes—avoids solvent damage to anti-reflective (AR) coatings.
- For sterile components (medical sensors): Opt for gamma-irradiated pre-wet wipes with sterile isopropyl alcohol to remove dust and maintain sterility.
- Avoid Oversized Wipes: Select mini pre-wet wipes (2”x2”) or cut standard wipes into 1cm-wide strips—large wipes increase the risk of contacting non-target areas (e.g., component leads, delicate diaphragms).
- Match Wipes to Component Type:
2. Step 1: Loosen Loose Dust (Avoid Direct Wiping First)
Never wipe loose dust directly with a pre-wet wipe—rubbing dry particles against the component surface causes micro-scratches. First, loosen and remove as much dry dust as possible:
- Use a Static-Neutralized Bulb Blower: Hold the blower 15–20cm away from the component and deliver short, gentle bursts of air to dislodge loose dust. Tilt the component at a 45° angle to let dust fall away (not onto other surfaces). For narrow gaps (e.g., between connector pins), direct the airflow parallel to the gap—avoids forcing dust deeper.
- Dab with a Dry Micro-Swab: For dust stuck in tight crevices (e.g., MEMS device grooves), use a clean, dry, lint-free micro-swab (wooden handle—avoids static) to lightly dab the area. Discard the swab immediately after use to prevent cross-contamination.
3. Step 2: Targeted Dust Removal with Pre-Wet Wipes
Use pre-wet wipes to eliminate remaining dust and light adhesive residues (e.g., from tape or handling) without damaging the component:
- For Flat Surfaces (e.g., Microchip Die, Sensor Housing):
- Remove one pre-wet wipe from its sealed packaging (do not expose to air—solvent evaporation reduces efficacy). Fold the wipe into a thin, firm pad (2–3 layers) to ensure controlled pressure and avoid finger contact with the component.
- Wipe the surface in slow, single linear strokes (e.g., top-to-bottom for horizontal surfaces)—never circular motions (which spread dust and residue). Apply pressure equivalent to pressing a feather (<0.2 psi)—enough to lift dust, not enough to compress or scratch the surface.
- Use a fresh section of the wipe for each stroke (unfold the pad to expose clean fibers) to prevent re-depositing dust.
- For Small/Delicate Features (e.g., Fiber Optic Tips, Connector Pins):
- Wrap a pre-wet wipe strip (1cm wide) around the tip of plastic-tipped tweezers (avoids metal scratching). Secure the wipe with gentle pressure to prevent slipping.
- For fiber optic tips: Gently rotate the tweezers 1–2 times to wipe the tip’s surface—this ensures full dust removal without bending the fiber core.
- For connector pins: Slide the wipe-wrapped tweezers along the length of each pin (parallel to the pin) to remove dust—avoid crosswise wiping (risks bending pins).
- For Adhesive Residues (e.g., Tape Marks):
- Hold the pre-wet wipe against the residue for 2–3 seconds to let the solvent soften it—do not rub immediately (this smears the residue).
- Gently dab the area once to lift the residue—repeat with a fresh wipe section if needed.
4. Step 3: Post-Clean Validation & Protection
Ensure dust is fully removed and the component is protected from recontamination:
- Inspect Under Magnification: Use the 20–40x magnifying glass to check for remaining dust, fiber lint, or solvent streaks. If dust spots remain, repeat Step 2 with a fresh pre-wet wipe (do not reuse wipes).
- Dry Thoroughly: Blot the component with a dry, lint-free cleanroom wipe to remove excess solvent. For micro-components, use a dry micro-swab to dab moisture from crevices—residual solvent can cause corrosion or short circuits (for electronics) over time.
- Store Immediately: Place the cleaned component in an ESD-safe container (for electronics) or a dust-free case (for optics) with a desiccant packet. Avoid plastic bags—they trap static and attract dust.
Critical Do’s and Don’ts
- Do: Use only pre-wet wipes labeled “precision component-safe” or “lint-free”—industrial wipes may contain abrasives or harsh solvents.
- Don’t: Reuse pre-wet wipes—used wipes trap dust and solvent residues, leading to cross-contamination or scratches.
- Don’t: Clean components while powered on—even 70% IPA can conduct electricity and damage microelectronics.
By following this method, pre-wet cleanroom wipes safely and thoroughly remove dust from precision components—preserving functionality, extending lifespan, and ensuring reliability in applications like aerospace, medical devices, and semiconductor manufacturing.
