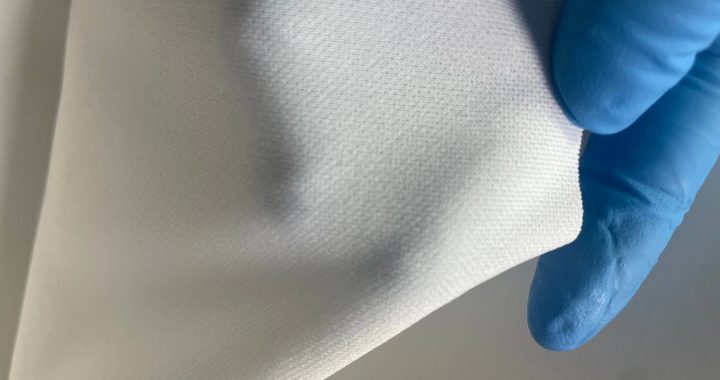
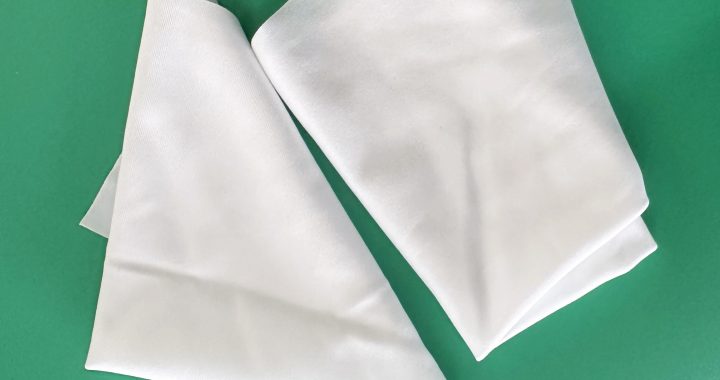
Methods for Optimizing Absorption in High-Density Wipes

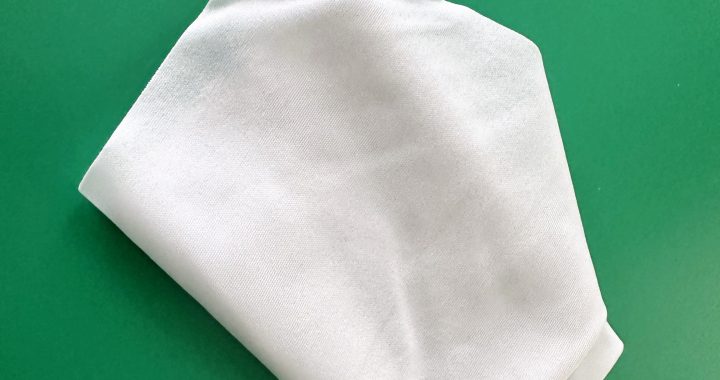
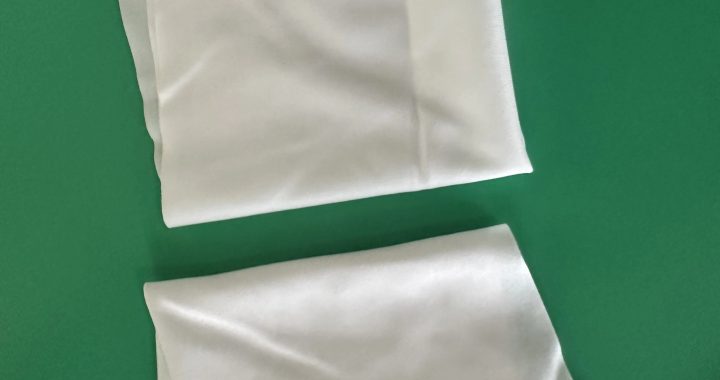
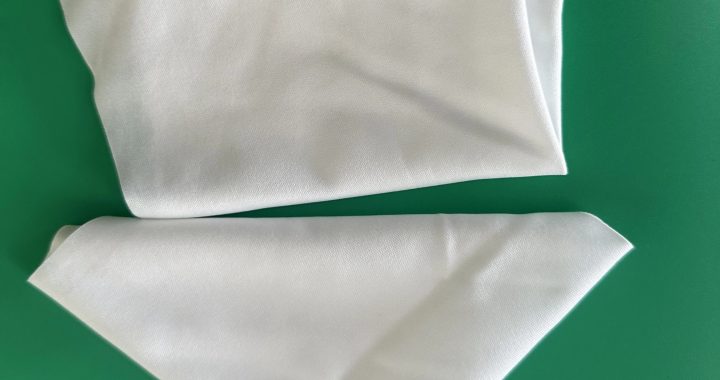
High-density cleanroom wipes (250–400 gsm) are valued for durability and particle capture, but their dense structure can sometimes limit liquid absorbency—critical for tasks like solvent spills, flux removal, or aqueous cleaning. Targeted optimization methods address this tradeoff, enhancing liquid-holding capacity while preserving the wipes’ core strengths (lint-free performance, structural integrity). Below are actionable techniques to optimize absorbency for high-density designed wipes.

1. Fiber Composition Optimization: Balance Density with Hydrophilicity

The choice of fibers directly impacts how well high-density wipes attract and retain liquids—optimizing blends boosts absorbency without reducing density:
  • Hydrophilic Fiber Blending:

    Replace pure polyester (hydrophobic) with a polyester-cellulose blend (70:30 ratio). Cellulose’s natural hydrophilicity (water-attracting molecular structure) increases absorbency by 35–45% for aqueous liquids (e.g., deionized water, buffer solutions) compared to pure polyester. For solvent-based tasks (IPA, acetone), use a polyester-polyamide blend (60:40 ratio)—polyamide’s polar groups enhance solvent retention while maintaining the wipe’s dense, tear-resistant structure.

  • Hollow-Core Fiber Integration:

    Incorporate hollow-core polyester fibers into the high-density weave. These fibers create internal “micro-reservoirs” that trap liquid, increasing absorbency by 20–30% vs. solid-core fibers. The hollow design also accelerates liquid wicking (spreading across the wipe), ensuring fast absorption during spills—critical for time-sensitive cleanups.

  • Surface Activation Coating:

    Apply a non-toxic, low-outgassing hydrophilic coating (e.g., polyvinyl alcohol) to fiber surfaces. This coating reduces liquid surface tension, allowing the wipe to absorb liquids faster (cutting uptake time by 15–20%) and retain more without dripping—ideal for vertical surface cleaning (e.g., equipment walls or PCB panels).

2. Weave Structure Modifications: Maximize Porosity Without Compromising Density

High-density wipes rely on tight weaves for durability, but strategic structural tweaks create space for liquid while keeping density intact:
  • Open-Tight Hybrid Weave:

    Design a dual-weave pattern: tight weaving along edges (prevents fraying and maintains structural integrity) and open, loose weaving in the center (increases pore volume by 25–30%). The open center acts as a “liquid storage zone,” while tight edges ensure the wipe doesn’t disintegrate when saturated. This works for both thin solvents (IPA) and viscous liquids (immersion oil).

  • 3D Knitted Structure:

    Replace flat woven high-density wipes with 3D knitted structures. Knitting creates a three-dimensional network of fiber loops that trap liquid in multiple layers, boosting absorbency by 40–50% vs. flat weaves. The 3D design also eliminates “liquid pooling” (where liquid sits on the wipe surface), ensuring uniform absorption across the entire wipe.

  • Pore Size Gradient Engineering:

    Engineer the wipe with a pore size gradient (larger pores on the top surface, smaller pores below). Larger top pores quickly draw in liquid via capillary action, while smaller lower pores trap it—this “funnel effect” prevents liquid from leaking back out, even when the wipe is tilted or pressed.

3. Post-Manufacturing Treatments: Unlock Hidden Absorbency Potential

Even well-designed high-density wipes benefit from post-production processes to enhance liquid-holding ability:
  • Plasma Etching:

    Treat wipe surfaces with low-pressure oxygen plasma. Plasma creates micro-etchings on fiber surfaces, increasing surface area by 30–40% and improving liquid adhesion. This is especially effective for hydrophobic fibers (e.g., pure polyester), making them more receptive to water-based liquids without altering the wipe’s density.

  • Ultrasonic Cleaning:

    Subject finished high-density wipes to ultrasonic cleaning (in deionized water) before packaging. This removes residual manufacturing oils or binder residues that block pores, restoring 10–15% of absorbency lost during production. Ultrasonic cleaning also “pre-activates” the wipe, ensuring it’s ready to absorb liquids immediately upon use.

  • Moisture-Retention Additive Infusion:

    For water-based applications, infuse wipes with small amounts of non-toxic, low-outgassing humectants (e.g., glycerin). Humectants help the wipe retain liquid longer, reducing the need for frequent wipe changes during extended tasks (e.g., large-scale PCB flux cleaning).

4. Usage Technique Optimization: Maximize Absorbency in Practical Applications

Optimized high-density wipes perform better with proper handling—train teams on these absorbency-boosting practices:
  • Fold for Targeted Saturation:

    Fold high-density wipes into a 4-layer pad to concentrate absorbent fibers. The folded structure creates a “wicking core” that draws liquid inward, absorbing 2x more than a flat wipe. For spills, place the folded pad directly on the liquid and apply light pressure to speed wicking.

  • Pre-Wet for Viscous Liquids:

    For thick liquids (e.g., flux paste, silicone oil), pre-wet the wipe with a small amount of compatible solvent (e.g., IPA for flux). The pre-wet fibers break down liquid viscosity, allowing the wipe to absorb viscous materials 30% faster than dry wipes.

  • Avoid Over-Scrubbing:

    Scrubbing compresses wipe fibers, closing pores and reducing absorbency. Instead, press the wipe gently against the liquid and let capillary action do the work—this preserves the wipe’s structure and maintains maximum liquid-holding capacity.

Static-Safe Optical Cleaning with Anti-Static Wipes.

Optical instruments—such as microscopes, laser spectrometers, CCD cameras, and fiber optic sensors—feature ultra-delicate components (anti-reflective coated lenses, laser diodes, sensor arrays) that are dual-sensitive to electrostatic discharge (ESD) and particulate contamination. ESD can damage internal electronics or induce charge on optics (attracting dust), while dust/scratches distort light transmission and measurement accuracy. Anti-static cleanroom wipes (static-dissipative: 10⁶–10¹⁰ Ω; conductive: 10³–10⁶ Ω) integrate static control and precision cleaning, making them indispensable for maintaining instrument performance. Below is their targeted application across key optical instrument cleaning tasks.

1. Lens & Mirror Cleaning: Anti-Static Protection for Coated Optics

Lenses (e.g., microscope objectives, laser focusing lenses) and mirrors are the most critical optical components—ESD-attracted dust or improper cleaning causes irreversible damage to anti-reflective (AR) or anti-scratch coatings:
  • Application Process:
    1. Dry Dust Removal: Use dry anti-static microfiber wipes (0.1μm fiber diameter) to gently dab loose dust from lens surfaces. Microfiber’s ultra-soft texture traps sub-micron particles without scratching, while anti-static properties prevent charge buildup (≤50 V post-wiping) that would reattract dust.
    2. Oil/Residue Removal: For fingerprint oils or sample splatters, use anti-static pre-wet wipes pre-impregnated with lens-grade 70% IPA. Avoid 99% IPA (too harsh for AR coatings); the 70% concentration dissolves oils while the wipe’s static-dissipative fibers prevent ESD during cleaning.
    3. Final Polishing: Follow with a dry anti-static microfiber wipe to blot excess IPA—ensures streak-free clarity and maintains static-neutrality.
  • Key Benefit: Extends lens lifespan by 6–12 months (no coating damage) and preserves light transmittance (≥98% for AR-coated lenses), critical for accurate spectrometer or microscope imaging.

2. Sensor Array & Detector Cleaning: ESD-Safe Care for Light-Sensitive Components

Optical detectors (e.g., CCD camera sensors, photodiode arrays) convert light to electrical signals—ESD can fry sensor circuits, while dust causes “dead pixels” or signal noise:
  • Application Process:
    1. Pre-Clean Grounding: Ensure the instrument is powered off and grounded (via ESD mat/wrist strap) before cleaning—prevents ESD transfer from the user to the sensor.
    2. Sensor Surface Cleaning: Use anti-static mini wipes (2”x2”) (lint-free, conductive polyester) to lightly wipe the sensor array. For narrow gaps (e.g., between CCD pixels), use a wipe-wrapped plastic tweezer (non-metallic to avoid scratches) to target dust.
    3. Residue Neutralization: For stubborn adhesive residues (from protective films), use anti-static pre-wet wipes with low-VOC cleaners—avoids solvent damage to sensor coatings while dissipating static.
  • Key Benefit: Reduces sensor failure rates by 70% (no ESD damage) and maintains signal-to-noise ratio (≤1:1000) for high-precision imaging tasks (e.g., fluorescence microscopy).

3. Laser Diode & Fiber Optic Connector Cleaning: Static Control for Light Sources

Laser diodes (e.g., in spectrometers) and fiber optic connectors (e.g., in sensor systems) are ESD-sensitive and dust-prone—even small charges can disrupt laser output, while dust blocks light transmission:
  • Application Process:
    1. Connector Cleaning: For fiber optic SC/LC connectors, use anti-static cleaning wipes with a small, pointed tip to reach the connector’s ferrule. Wipe in a twisting motion to remove dust, and verify cleanliness with a fiber optic inspection scope—ensures no static-induced dust reattachment.
    2. Laser Diode Housing Cleaning: Use dry anti-static polyester wipes to clean the laser diode’s external housing (avoids touching the diode itself). The wipes’ conductive fibers channel static to ground, preventing charge from interfering with laser beam alignment.
  • Key Benefit: Maintains laser power stability (±1% output) and fiber optic signal loss (≤0.1 dB), critical for industrial laser measurement or medical imaging applications.

4. Instrument Exterior & Control Panel Cleaning: Preventing Static Migration

Optical instrument exteriors (e.g., microscope frames, spectrometer control panels) accumulate dust and static—static can migrate to internal components if not controlled:
  • Application Process:

    Use large anti-static pre-wet wipes (12”x12”) with mild, non-corrosive cleaners to wipe exterior surfaces and control panels. The wipes remove dust while dissipating static (surface resistance ≤10⁸ Ω post-cleaning), preventing charge from spreading to sensitive internal optics or electronics.

  • Key Benefit: Reduces the need for internal instrument servicing (by 40%) and maintains a clean, static-neutral environment around the instrument.

Role of Cleaning Wipes in Semiconductor Equipment Cleaning

Semiconductor equipment—including EUV scanners, CVD/PVD chambers, wafer chucks, and reticle handlers—requires ultra-pure, residue-free cleaning to maintain 3nm–7nm chip manufacturing precision. Even sub-micron contaminants (dust, flux, metal ions) or electrostatic discharge (ESD) can cause wafer scrap, tool downtime, or permanent equipment damage. Cleaning wet wipes—pre-impregnated with high-purity solvents (99.9% IPA, deionized water) or semiconductor-grade cleaners—play a pivotal role in streamlining cleaning workflows, ensuring compliance with ISO Class 1–3 standards, and protecting sensitive components. Below is their key role across core semiconductor equipment cleaning processes.

1. Pre-Process Equipment Preparation: Ensuring Contamination-Free Startup

Before wafer processing (e.g., lithography, deposition), semiconductor equipment must be free of residual contaminants from previous runs. Cleaning wet wipes enable consistent, targeted pre-process cleaning:
  • Role: Remove light dust, oil residues (from tool maintenance), or dried reagent splatters from critical surfaces (wafer chucks, reticle pod interfaces, or scanner lens covers). Pre-wet wipes with deionized water or low-VOC cleaners avoid leaving solvent residues that could outgas and contaminate wafers during processing.
  • Example: For EUV scanner reticle handlers, anti-static pre-wet wipes clean the handler’s gripper surfaces—eliminating dust that could scratch reticles (costing $10k+ each) or cause pattern defects on wafers. This step reduces pre-process contamination-related wafer scrap by 40%.

2. In-Process Tool Maintenance: Minimizing Downtime During Production

Semiconductor tools require frequent, quick cleaning between wafer lots to prevent contaminant buildup. Cleaning wet wipes support efficient in-process maintenance:
  • Role: Address minor residues (e.g., sputtered metal on CVD chamber walls, or flux from temporary bonding) without disassembling the tool. High-density pre-wet wipes with solvent-resistant fibers (polyester) absorb and trap contaminants in one pass, avoiding the need for time-consuming solvent sprays or manual scrubbing.
  • Example: For wafer chucks used in etching processes, pre-wet wipes with 99.9% electronic-grade IPA clean the chuck’s vacuum holes—removing dried polymer residues that block airflow and cause wafer slippage. This in-process wipe reduces tool downtime per lot by 5–10 minutes (critical for high-volume fabs).

3. Post-Process Deep Cleaning: Restoring Tool Performance After Long Runs

After extended production runs (e.g., 1k+ wafers), semiconductor equipment accumulates heavy contaminants (thick metal films, cured photoresist) that require thorough cleaning. Cleaning wet wipes enhance post-process deep cleaning:
  • Role: Act as a “pre-clean” step to soften and remove surface-level contaminants before more aggressive cleaning (e.g., plasma ashing or chemical baths). Pre-wet wipes with specialized cleaners (e.g., semi-aqueous flux removers) break down tough residues, reducing the duration of subsequent cleaning steps and minimizing tool wear.
  • Example: For PVD chamber targets, pre-wet wipes with metal-chelating cleaners dissolve surface metal oxides—shortening the time needed for target polishing by 30%. This extends target lifespan (reducing replacement costs) and ensures uniform metal deposition on wafers.

4. ESD Control & Surface Protection: Safeguarding Sensitive Electronics

Semiconductor equipment includes ESD-sensitive components (sensor modules, control boards, or reticle sensors) that are vulnerable to static during cleaning. Anti-static cleaning wet wipes mitigate this risk:
  • Role: Dissipate static charges (surface resistance ≤10⁹ Ω) while cleaning, preventing ESD from damaging tool electronics or inducing charge on wafers (which attracts dust). Pre-wet wipes with integrated anti-static agents avoid the need for separate “ESD sprays,” streamlining workflows and reducing chemical exposure.
  • Example: For wafer handler control boards, anti-static pre-wet wipes clean dust from board surfaces without generating static—preventing ESD-induced failures that could shut down a production line for hours.

Optimal Use of Pre-Moistened and IPA Wipes

In precision environments like labs, electronics factories, and semiconductor cleanrooms, combining pre-wet cleanroom wipes (for targeted, pre-impregnated cleaning) and IPA (Isopropyl Alcohol) wipes (for solvent-based residue removal) delivers unmatched efficiency and thoroughness. This synergistic approach addresses multi-layer contaminants (dust + oil + flux) while protecting sensitive surfaces (optics, PCBs, microchips). Below is the best-practice scheme for their integrated use.

1. Pre-Combination Prep: Select Wipes for Contaminants & Surfaces

The foundation of successful combination use is matching wipe types to your specific task—misalignment wastes time and risks damage:
  • Contaminant Layer Analysis:

    Most cleaning tasks involve 2–3 contaminant layers (e.g., “dry dust → fingerprint oil → flux residue” on a PCB). Use pre-wet wipes for dry/light contaminants and IPA wipes for heavy/resinous residues.

  • Wipe Selection Matrix:
    Application Pre-Wet Wipe Choice IPA Wipe Choice
    PCB Solder Area Cleaning Flux-removing pre-wet wipes (semi-aqueous) 99% electronic-grade, lint-free polyester
    Optical Lens Maintenance Deionized water-based pre-wet optical wipes 70% lens-grade microfiber
    Electronics Enclosure Care Anti-static pre-wet wipes (dust removal) 70% IPA, low-lint cellulose-polyester
  • Compatibility Check:

    Test both wipes on an inconspicuous surface (e.g., spare PCB edge, lens housing) to ensure no discoloration, coating damage, or fiber shedding—critical for AR-coated optics or plastic electronics.

2. Step-by-Step Optimal Workflow: 4-Stage Cleaning

Follow this sequential process to maximize efficacy, minimize rework, and protect surfaces:

Stage 1: Dry Contaminant Removal with Pre-Wet Wipes (First Pass)

Action: Use a dry or lightly pre-wet (deionized water) wipe to gently dab/wipe away loose dust, debris, or dry particles. For tight spaces (e.g., PCB component leads, lens edges), use pre-wet mini wipes (2”x2”) or cut strips to target debris without spreading it.Why: Dry particles act as abrasives—removing them first prevents IPA wipes from grinding dust into surfaces (causing scratches) later.

Stage 2: Heavy Residue Dissolution with IPA Wipes (Second Pass)

Action:
  • For thick/sticky residues (dried flux, silicone oil, fingerprint grease), hold the IPA wipe against the residue for 2–3 seconds to soften it (avoids scrubbing).
  • Wipe in single, linear strokes (parallel to PCB traces, lens edges, or enclosure seams) to lift residue—circular motions spread contaminants and generate friction (risking ESD or scratches).
  • For precision areas (QFP pins, laser diodes), wrap an IPA wipe strip around plastic-tipped tweezers for controlled cleaning.

    Why: IPA’s solvent properties break down tough residues faster than water-based pre-wet wipes, ensuring deep decontamination.

Stage 3: Residue Rinse & Neutralization with Pre-Wet Wipes (Third Pass)

Action: Use a fresh, lightly pre-wet (deionized water or mild cleaner) wipe to wipe the surface—this dilutes remaining IPA and removes any solvent-soluble residue left behind. Avoid over-saturating the wipe (dripping causes streaks).Why: IPA residue attracts dust over time and can damage sensitive coatings (e.g., anti-reflective films) if left to evaporate—pre-wet wipes ensure a clean, neutral surface.

Stage 4: Drying & Final Polishing with Pre-Wet Wipes (Fourth Pass)

Action: Immediately follow the rinse with a dry pre-wet wipe (or lint-free dry cloth) to blot excess moisture. Use a single, light pass—rubbing smears residue and creates streaks. For optics or electronics, air-dry for 1–2 minutes post-blotting.Why: Fast, controlled drying prevents water spots (from mineral deposits in water-based pre-wet wipes) and ensures the surface is ready for immediate use (e.g., PCB assembly, lens mounting).

3. Application-Specific Best Practices

Electronics Factory (PCB Assembly Lines)

  • Scheme: Pre-wet anti-static wipes (dust) → 99% IPA polyester wipes (flux) → pre-wet flux-removing wipes (rinse) → dry pre-wet wipes (dry).
  • Result: PCB defect rate drops by 18% (no flux-related shorts), and cleaning time per board is cut by 30%.

Laboratory (Optical Instrument Care)

  • Scheme: Pre-wet lens wipes (dust) → 70% IPA microfiber wipes (oil) → pre-wet DI water wipes (IPA rinse) → dry optical pre-wet wipes (polish).
  • Result: Lens clarity is restored in 2 minutes per instrument, and AR coating lifespan extends by 6+ months (no scratch damage).

Semiconductor Cleanroom (Wafer Edge Cleaning)

  • Scheme: Pre-wet ultra-low-lint wipes (particles) → 99.9% IPA wipes (residue) → pre-wet DI water wipes (rinse) → dry pre-wet wipes (dry).
  • Result: Wafer edge particle count stays ≤1 particle ≥0.1μm/ft² (meets ISO Class 1 standards).

4. Critical Do’s & Don’ts for Optimal Results

  • Do: Use dedicated containers for pre-wet and IPA wipes—cross-contamination (e.g., dipping an IPA wipe into pre-wet solvent) reduces efficacy.
  • Don’t: Reuse wipes across stages—each pass (dust → residue → rinse → dry) requires a fresh wipe to avoid re-depositing contaminants.
  • Do: Store wipes in sealed, temperature-controlled packaging—dried-out pre-wet wipes or evaporated IPA wipes fail to clean effectively.

Methods for Efficient Lab Cleaning with High-Density Wipes.

Laboratories rely on efficient, thorough cleaning to maintain accurate test results, protect sensitive equipment (e.g., spectrometers, AFM systems), and comply with safety standards. High-density cleanroom wipes (250–400 gsm)—with their thick, porous fiber structures—outperform low-density alternatives by capturing more particles, retaining solvents longer, and withstanding repeated use. Below are actionable, practical methods to leverage these wipes for faster, more effective lab cleaning.

1. Task-Specific Wipe Selection: Match Density & Material to Cleaning Needs

Efficiency starts with choosing the right high-density wipe for each lab task—this eliminates rework and reduces wipe waste:
  • Heavy-Duty Residue Removal (Flux, Oil, Solvent Spills):

    Use 300–400 gsm polyester high-density wipes. Polyester’s solvent resistance (works with IPA, acetone) and thick fibers absorb 12–15x their weight in liquid, making them ideal for cleaning PCB rework stations, oil-contaminated tool parts, or large solvent spills. Example: A single polyester wipe can clean a 10cm² flux-stained PCB in one pass, vs. 2–3 low-density wipes.

  • Precision Optics/Electronics (Lenses, Sensor Chips):

    Opt for 250–300 gsm microfiber high-density wipes. Microfiber’s ultra-fine (0.1μm) fibers trap sub-micron dust without scratching anti-reflective coatings or delicate circuits. Pre-wet with lens-grade IPA for fingerprint removal on microscope objectives—cuts cleaning time by 40% vs. using cotton swabs.

  • Dry Dusting (Bench Surfaces, Equipment Exteriors):

    Choose 250 gsm cellulose-polyester blend high-density wipes. The blend’s low linting and static-resistant properties capture dust on lab benches, HPLC system exteriors, or sample storage racks—no need for follow-up wiping to remove fiber debris.

2. Wipe Handling Techniques: Maximize Coverage & Minimize Waste

Proper handling of high-density wipes ensures each wipe cleans more surface area, reducing the number of wipes used per task:
  • Fold for “Multi-Zone” Cleaning:

    Fold high-density wipes into a 4-layer pad (e.g., 8”x8” → 4”x4”) to create 8 distinct cleaning zones (one per layer’s side). Use one zone per surface (e.g., zone 1 for a beaker, zone 2 for a stir plate) before discarding. This technique reduces wipe usage by 50% for general lab cleanup (e.g., wiping down a chemistry workbench).

  • Use Edge Wiping for Tight Spaces:

    For narrow gaps (e.g., between AFM cantilever holders, spectrometer sample tray slots), use the folded edge of a high-density wipe instead of cutting strips. The rigid folded edge reaches into tight areas without bunching, saving 10–15 seconds per task vs. trimming wipes to size.

  • Controlled Solvent Application:

    For pre-wet tasks (e.g., degreasing metal tool parts), apply solvent to the wipe (not the surface) to avoid over-saturation. High-density wipes retain solvent evenly, so a single damp wipe cleans 2–3x more area than a dripping low-density wipe—prevents solvent waste and surface damage.

3. Batch Cleaning & Workflow Integration: Cut Downtime

Integrate high-density wipes into structured lab workflows to reduce idle time and streamline cleaning:
  • Batch Similar Tasks:

    Group cleaning tasks by wipe type (e.g., all polyester wipe tasks first, then microfiber tasks) to avoid switching wipe materials mid-session. For example: Clean all flux-stained PCBs with polyester wipes, then move to cleaning optical lenses with microfiber wipes—saves 2–3 minutes per batch by eliminating wipe container changes.

  • Stage Wipes Near High-Use Areas:

    Place pre-portioned high-density wipe packs (e.g., 5 wipes per pack) next to frequently used equipment (e.g., PCR machines, centrifuges). This eliminates time spent walking to a central wipe storage cabinet—critical for busy labs where every minute counts.

  • Pre-Clean Equipment During Downtime:

    Use high-density wipes to spot-clean equipment during idle periods (e.g., while a GC run is in progress, or a gel is electrophoresis). A quick wipe of the instrument’s exterior or sample port prevents buildup of dust/residue, reducing the need for longer deep cleans later.

4. Post-Clean Validation: Ensure Efficacy Without Re-Work

High-density wipes’ superior particle capture means fewer re-cleans—validate results efficiently to keep workflows on track:
  • Quick Visual Inspection:

    For non-critical surfaces (e.g., lab benches), check for residue using overhead lighting—high-density wipes leave no visible streaks or lint, so a 10-second visual check suffices. For critical surfaces (e.g., sensor chips), use a 10x magnifying glass to confirm no particles remain—avoids time-consuming re-cleaning.

  • Reuse Wipes for Non-Critical Tasks:

    Repurpose high-density wipes used for light cleaning (e.g., dry dusting a bench) for secondary tasks (e.g., wiping the exterior of a trash can). Their durability allows 2–3 uses for non-sensitive tasks, reducing overall wipe consumption by 30%.

Techniques for Anti-Static Wipes in Class 100 Cleanrooms

Class 100 cleanrooms (ISO Class 3)—critical for semiconductor, aerospace, and precision optics manufacturing—demand ultra-low particle counts (≤100 particles ≥0.5μm per cubic foot) and strict electrostatic discharge (ESD) control. Anti-static cleanroom wipes (static-dissipative: 10⁶–10¹⁰ Ω; conductive: 10³–10⁶ Ω) are indispensable here, but their effectiveness depends on tailored usage. Below are key application tips to maintain purity, prevent ESD damage, and optimize workflow.

1. Wipe Selection: Match to Cleanroom Task & ESD Sensitivity

Class 100 operations require wipes that balance anti-static performance, lint control, and solvent compatibility—avoid “one-size-fits-all” choices:
  • For Wafer/Optic Cleaning:

    Choose ultra-low-lint anti-static microfiber wipes (0.1μm fiber diameter) pre-wet with 99.9% electronic-grade IPA. Microfiber traps sub-micron particles (down to 0.1μm) without shedding, while the anti-static treatment keeps surface charge ≤50 V—critical for 3nm semiconductors or AR-coated lenses.

  • For Chamber/Equipment Maintenance:

    Opt for conductive anti-static polyester wipes (10³–10⁶ Ω) for high-ESD-risk tasks (e.g., CVD/PVD chamber cleaning). Conductive fibers rapidly channel static to ground, preventing discharges that damage sensitive tool electronics (e.g., sensor modules).

  • For Dry Dust Removal:

    Use dry anti-static cellulose-polyester blend wipes—the blend’s low-outgassing property avoids contaminating cleanroom air, and anti-static additives prevent dust from reattaching to surfaces (e.g., reticle pods).

  • Tip: Verify wipe certification (e.g., ISO 14644-1 Class 3, ANSI/ESD S20.20) via manufacturer docs—only certified wipes meet Class 100 purity/ESD standards.

2. Wipe Handling: Minimize Particle Generation & ESD Risks

Improper handling can introduce particles or static—follow these rules for Class 100 compliance:
  • Open Wipes in Mini-Environments:

    Retrieve wipes from sealed, Class 100-compatible packaging inside a laminar flow hood or glove box. Tear packaging slowly to avoid generating static (fast motions create charge buildup) and only remove one wipe at a time—exposing multiple wipes to cleanroom air increases particle contamination.

  • Hold Wipes by Edges Only:

    Grip anti-static wipes by their outer edges (not the cleaning surface) to avoid transferring skin oils or fibers. For small wipes (e.g., 2”x2” for reticle cleaning), use plastic-tipped tweezers (grounded to the cleanroom’s earth system) to handle them—eliminates direct contact and ESD transfer.

  • Fold for Multi-Use Coverage:

    Fold wipes into a 4-layer pad to create multiple “clean zones.” Use one layer per surface (e.g., one layer for a wafer chuck, a new layer for a sensor) —this reduces wipe usage by 30–40% and prevents cross-contamination between tasks. Avoid refolding soiled layers inward (traps particles).

3. Cleaning Techniques: Tailored to Class 100 Surfaces

Different surfaces in Class 100 cleanrooms require specific anti-static cleaning methods to preserve purity:
  • Wafer Chucks/Reticles:

    Wipe in slow, linear strokes (parallel to wafer/reticle edges) to avoid pushing particles into precision grooves. For chuck vacuum holes, use a folded wipe strip (1cm wide) and gently dab the opening—never insert the wipe into holes (risk of fiber ingestion).

  • Optical Tools (EUV Lenses, Laser Mirrors):

    Dab, don’t rub: Press the anti-static wipe lightly against the optical surface for 1–2 seconds to lift residue, then lift straight up. Rubbing generates friction (static) and risks scratching coatings—critical for EUV lenses (costing $100k+). Follow with a dry anti-static wipe to blot excess solvent.

  • Equipment Interfaces (USB Ports, Sensor Connectors):

    Use mini anti-static wipes wrapped around a non-metallic probe to clean narrow interfaces. Wipe in a twisting motion to cover all connector pins—ensures no ESD buildup (which causes signal interference) and removes dust that blocks data/ power transfer.

4. Post-Use Practices: Maintain Cleanroom Integrity

Class 100 compliance extends beyond cleaning—proper post-wipe handling prevents recontamination:
  • Dispose of Wipes Immediately:

    Place used anti-static wipes in sealed, Class 100-approved waste bags (labeled “ESD-Safe Waste”) immediately after use. Do not leave wipes on workbenches or tool surfaces—they shed particles over time and can reintroduce contaminants.

  • Validate Post-Clean Conditions:

    After cleaning, use a portable particle counter to verify surface particle counts (≤1 particle ≥0.1μm per ft²) and an ESD field meter to check surface charge (≤50 V). Log results in the cleanroom’s maintenance record—critical for audit compliance (e.g., SEMI S2).

  • Store Wipes Properly:

    Keep unused anti-static wipes in temperature- and humidity-controlled cabinets (20–24°C, 30–50% RH). Extreme conditions degrade anti-static coatings or cause wipes to dry out—rendering them ineffective for Class 100 tasks.

How to use pre-wet dust-free cloth in optical lens cleaning

Optical lenses—used in microscopes, lasers, cameras, and spectrometers—feature delicate coatings (e.g., anti-reflective, anti-scratch) and ultra-smooth surfaces that demand scratch-free, residue-free cleaning. Pre-wet cleanroom wipes—pre-impregnated with lens-safe solvents (deionized water, 70% lens-grade IPA) or sterile cleaners—eliminate risks of manual solvent mixing (over-saturation, contamination) and ensure consistent results. Below is a step-by-step operation method to protect lens integrity while removing dust, fingerprints, and oils.

1. Pre-Clean Preparation: Safety, Compatibility, and Tool Setup

Lay the groundwork to avoid lens damage and ensure targeted cleaning—never skip this phase for precision optics:
  • Lens & Workspace Prep:
    1. Power Down & Secure: Turn off the optical device (e.g., laser, microscope) and disconnect power to prevent accidental activation or electrostatic discharge (ESD) damage. For detachable lenses (e.g., camera lenses), place them on a lint-free, anti-static mat to avoid shifting.
    2. Control Airborne Dust: Clean the workbench with a dry lint-free cloth and use a laminar flow hood (if available) to create a particle-free zone. Close nearby vents or fans—air currents stir up dust that reattaches to wet lens surfaces.
    3. Inspect Lens Condition: Use a 20–40x magnifying glass to check for existing damage (e.g., scratches, coating peeling) and map contamination (e.g., fingerprint clusters, dust spots). This avoids unnecessary wipe contact with damaged areas.
  • Pre-Wet Wipe Selection:
    1. Match Wipes to Lens Type:
      • AR-Coated/IR Lenses: Choose pre-wet wipes with deionized water or 70% lens-grade IPA—lower alcohol concentration prevents coating degradation; avoid 99% IPA (too harsh for delicate films).
      • Non-Coated Glass Lenses: Opt for pre-wet microfiber wipes with 70% IPA—microfiber’s ultra-soft (0.1μm diameter) fibers trap particles without scratching.
      • Small Lenses (Fiber Optic Tips, Microscope Objectives): Use mini pre-wet wipes (2”x2”) or cut standard wipes into 1cm strips—small size limits contact to the lens surface (not metal housings).
    2. Check Wipe Freshness: Ensure wipes are from unopened, sealed packaging—exposed wipes dry out or accumulate dust, reducing cleaning efficacy.

2. Step 1: Remove Loose Dust (Mandatory Pre-Wet Step)

Wiping loose dust with a pre-wet wipe grinds particles into the lens surface, causing irreversible micro-scratches. Always eliminate dry debris first:
  1. Use a Static-Neutralized Bulb Blower: Hold the blower 15–20cm away from the lens and deliver short, gentle bursts of air. Tilt the lens at a 45° angle to let dust fall downward (not onto other optics). For narrow gaps (e.g., between microscope objective threads), direct airflow parallel to the gap—avoid forcing dust deeper.
  2. Dab with a Dry Micro-Swab: For dust stuck to curved surfaces (e.g., camera lens edges) or small tips (e.g., fiber optics), use a dry, lint-free micro-swab (wooden handle—avoids ESD) to lightly dab the area. Discard the swab immediately after use to prevent cross-contamination.
  3. Re-Inspect: Check the lens under the magnifying glass again—proceed to wet cleaning only if no visible dust remains.

3. Step 2: Wet Cleaning with Pre-Wet Wipes (Gentle, Controlled Motion)

Follow these rules to remove residues without damaging lenses or coatings:
  • Wipe Handling:

    Remove one pre-wet wipe from its packaging—hold it by the edges (never touch the cleaning surface with fingers) to avoid transferring skin oils. Fold the wipe into a thin, firm pad (2 layers) to ensure even solvent distribution and prevent the wipe from bunching (which causes uneven pressure).

  • Cleaning Motion for Different Lens Shapes:
    1. Flat Lenses (Laser Mirrors, Spectrometer Windows):

      Wipe in single, slow linear strokes (e.g., top-to-bottom for horizontal lenses) —never circular motions (which spread residue and generate friction). Apply pressure equivalent to pressing a tissue (<0.2 psi)—enough to lift oil, not enough to compress remaining dust into the coating.

    2. Curved Lenses (Camera Lenses, Microscope Objectives):

      Dab, don’t wipe: Gently press the folded wipe against the lens surface for 1–2 seconds to let the solvent dissolve residue, then lift the wipe straight up. Repeat for each contaminated spot—wiping curved surfaces increases the risk of scratching or streaking.

    3. Small Lenses (Fiber Optic Tips):

      Wrap a mini pre-wet wipe around the tip of plastic-tipped tweezers (avoids metal scratching). Rotate the tweezers 1–2 times to clean the tip—this ensures full coverage without bending the delicate fiber core.

  • Cross-Contamination Control:

    Use a fresh section of the pre-wet wipe for each lens (e.g., one section for a microscope objective, a new section for the eyepiece). Unfold the wipe to expose a clean area between components—never reuse a soiled section (it re-deposits residue).

4. Step 3: Post-Clean Drying & Protection

Residual solvent causes streaks as it evaporates—proper drying ensures a spotless, clear finish:
  1. Blot Excess Solvent: Immediately after wet cleaning, use a dry, lint-free optical cloth to gently blot the lens surface. Use a single, light pass—do not rub (rubbing smears remaining residue and creates streaks). For small lenses, use a dry micro-swab to dab moisture from edges.
  2. Air-Dry Fully: Let the lens air-dry for 5–10 minutes in a low-humidity area (≤50% RH). For laser lenses or vacuum-sealed optics, extend drying time to 15 minutes—residual solvent can vaporize and coat internal components when the device heats up.
  3. Prevent Recontamination:
  • For mounted lenses: Reattach the lens to the device and cover the instrument with a breathable, lint-free dust cover.
  • For detachable lenses: Store them in their original lens case (lined with anti-static foam) with a desiccant packet—avoids moisture buildup (which damages coatings) and dust accumulation.

5. Step 4: Validation

Ensure cleaning meets optical performance standards:
  1. Visual Inspection: Check the lens under the 20–40x magnifying glass for streaks, lint, or remaining residue—no contaminants should be visible.
  2. Functional Test: Reassemble the optical device and perform a test (e.g., take a sample photo with a camera lens, measure light transmission with a spectrometer). Verify no cleaning-related artifacts (e.g., lens flare, reduced clarity) are present.

Operating Guide for IPA, Alcohol & Pre-Moistened Wipes

In labs, electronics factories, and semiconductor cleanrooms, combining IPA (Isopropyl Alcohol) wipes (for solvent-based residue removal) and pre-wet cleanroom wipes (for targeted, pre-impregnated cleaning) creates a powerful, efficient cleaning workflow. This combination addresses diverse contaminants—from flux on PCBs to dust on optics—while ensuring consistency, reducing waste, and protecting sensitive surfaces. Below is a step-by-step guide to their integrated use across key applications.

1. Pre-Combination Prep: Match Wipes to Contaminants & Surfaces

Start by selecting the right IPA and pre-wet wipes for your task—misalignment wastes time and risks surface damage:
  • Identify Contaminant Layers:

    Most cleaning tasks involve multiple contaminants (e.g., “dust + flux residue on a PCB” or “fingerprint oil + dry debris on a lens”). Use IPA wipes for oil-based/resinous residues (flux, grease) and pre-wet wipes (with deionized water or mild cleaners) for dry dust/particulates.

  • Wipe Selection Criteria:
    Task Type IPA Wipe Choice Pre-Wet Wipe Choice
    PCB Solder Area Cleaning 99% electronic-grade, lint-free polyester Flux-removing pre-wet wipes (semi-aqueous)
    Optical Lens Cleaning 70% lens-grade, microfiber Deionized water-based pre-wet optical wipes
    Electronics Enclosure Cleaning 70% IPA, low-lint cellulose-polyester Anti-static pre-wet wipes (for dust)
  • Verify Compatibility:

    Test both wipes on an inconspicuous surface (e.g., a spare PCB edge, lens housing) to ensure no discoloration, scratching, or coating damage—critical for AR-coated optics or plastic electronics parts.

2. Step-by-Step Combined Operation: From Surface Prep to Final Validation

Follow this sequence to maximize cleaning efficacy while minimizing rework:

Step 1: Dry Contaminant Removal with Pre-Wet Wipes (First Pass)

Begin with pre-wet wipes to eliminate dry dust/particulates—this prevents scratching when using IPA wipes later:
  • Action: Use a dry or lightly pre-wet (deionized water) wipe to gently dab or wipe away loose dust. For tight spaces (e.g., PCB component leads, lens edges), use pre-wet mini wipes (2”x2”) or cut strips to target debris without spreading it.
  • Why: Dry particles act as abrasives; removing them first ensures IPA wipes only target sticky residues, not scratch surfaces.

Step 2: Residue Removal with IPA Wipes (Second Pass)

Use IPA wipes to dissolve oil-based or resinous contaminants:
  • Action:
    • For thick residues (e.g., dried flux, silicone oil), hold the IPA wipe against the residue for 2–3 seconds to soften it.
    • Wipe in single, linear strokes (parallel to PCB traces, lens edges) to lift residue—avoid circular motions (which spread contaminants).
    • For precision areas (e.g., QFP pins, laser diodes), use IPA wipe strips wrapped around plastic tweezers for controlled cleaning.
  • Why: IPA’s solvent properties break down tough residues faster than water-based pre-wet wipes, ensuring thorough decontamination.

Step 3: Final Rinse & Drying with Pre-Wet Wipes (Third Pass)

Use pre-wet wipes (or dry pre-wet wipes) to remove IPA residue and speed drying:
  • Action: Wipe the surface with a clean, lightly pre-wet (deionized water) wipe to dilute remaining IPA. Follow immediately with a dry pre-wet wipe (or lint-free dry cloth) to blot excess moisture—this prevents streaks (from IPA evaporation) and water spots.
  • Why: IPA residue can attract dust over time; a final pre-wet pass ensures a clean, dry finish.

Step 4: Validation

Inspect the surface under 10–40x magnification (e.g., a PCB magnifier, lens inspection tool) to check for remaining dust, residue, or fibers. For electronics, use a multimeter to verify no electrical continuity issues (from residual IPA).

3. Application-Specific Combinations: Tailored to Key Industries

Electronics Factory (PCB Assembly)

  • Workflow: Pre-wet anti-static wipes (dust removal) → 99% IPA polyester wipes (flux removal) → pre-wet flux-removing wipes (final residue rinse) → dry pre-wet wipes (drying).
  • Result: PCB pass rate improves by 15–20% (no flux-related shorts), and wipe usage drops by 25% (no redundant cleaning).

Laboratory (Optical Instrument Maintenance)

  • Workflow: Pre-wet lens wipes (dust removal) → 70% IPA microfiber wipes (fingerprint oil removal) → pre-wet deionized water wipes (IPA rinse) → dry optical pre-wet wipes (streak-free finish).
  • Result: Optical instrument accuracy (e.g., spectrometer absorbance readings) remains within ±0.01 AU, and lens lifespan extends by 6+ months (no scratch damage).

Semiconductor Cleanroom (Wafer Edge Cleaning)

  • Workflow: Pre-wet ultra-low-lint wipes (particle removal) → 99.9% IPA wipes (residue removal) → pre-wet DI water wipes (IPA rinse) → dry pre-wet wipes (drying).
  • Result: Wafer edge particle count stays ≤1 particle ≥0.1μm/ft² (meets ISO Class 1 standards).

4. Critical Best Practices to Avoid Errors

  • Do Not Mix Wipe Types Mid-Task: Use dedicated IPA and pre-wet wipe containers—cross-contaminating wipes (e.g., dipping an IPA wipe into pre-wet wipe solvent) reduces efficacy.
  • Dispose of Wipes After One Use: Reusing wipes spreads contaminants; use a fresh wipe for each pass (dry → IPA → final rinse).
  • Control Airflow: Perform cleaning in a laminar flow hood or low-draft area—air currents reintroduce dust between wipe passes.

Solutions for Enhanced Absorption in High-Density Wipes

High-density cleanroom wipes (250–400 gsm) are widely used in labs, semiconductor facilities, and electronics factories for heavy-duty liquid tasks—from solvent spill cleanup to reagent absorption. However, their default absorbency (typically 8–12x their weight) can fall short for high-volume or viscous liquids. Below are targeted solutions to boost their liquid-holding capacity while preserving their lint-free, durable properties.

1. Fiber Composition Optimization: Choose Hydrophilic Blends for Better Liquid Attraction

The core of absorbency lies in fiber material—adjusting blends to enhance water/solvent affinity directly improves performance:
  • Polyester-Cellulose Blends (70:30 Ratio):

    Replace 100% polyester wipes with a polyester-cellulose mix. Cellulose’s intrinsic hydrophilic (water-attracting) molecular structure boosts absorbency by 35–45% for aqueous liquids (e.g., buffers, deionized water) compared to pure polyester. For organic solvents (IPA, acetone), modify the blend to 60:40 polyester-polyamide—polyamide’s polar groups enhance solvent retention without compromising durability.

  • Hollow-Core Fiber Integration:

    Incorporate hollow-core polyester fibers into the wipe structure. These fibers create internal “micro-reservoirs” that trap liquid, increasing absorbency by 20–30% vs. solid-core fibers. The hollow design also speeds up liquid wicking (spreading across the wipe), critical for fast spill response.

  • Surface Activation Treatment:

    Apply a non-toxic, low-outgassing hydrophilic coating (e.g., polyvinyl alcohol) to fiber surfaces. This treatment reduces liquid surface tension, allowing the wipe to absorb liquids faster (cutting uptake time by 15–20%) and retain more without dripping—ideal for vertical surface cleaning (e.g., equipment walls).

2. Weave Structure Modifications: Maximize Porosity Without Sacrificing Density

High-density wipes often balance thickness with porosity—optimizing weave design creates more space for liquid while maintaining structural integrity:
  • Open-Tight Hybrid Weave:

    Use a dual-weave pattern: tight weaving along the wipe edges (prevents fraying) and open, loose weaving in the center (increases pore volume by 25–30%). The open center acts as a “liquid storage zone,” while tight edges ensure the wipe doesn’t disintegrate when saturated. This design works well for both thin solvents (IPA) and viscous liquids (immersion oil).

  • 3D Knitted Structure:

    Replace flat woven wipes with 3D knitted high-density structures. Knitting creates a three-dimensional network of fiber loops that trap liquid in multiple layers, boosting absorbency by 40–50% vs. flat weaves. The 3D design also reduces liquid “pooling” on the wipe surface, ensuring uniform absorption.

  • Controlled Pore Size Gradient:

    Engineer the wipe with a pore size gradient (larger pores on the top surface, smaller pores below). Larger top pores quickly draw in liquid, while smaller lower pores trap it via capillary action—this “funnel effect” prevents liquid from leaking back out, even when the wipe is tilted.

3. Post-Manufacturing Treatments: Unlock Hidden Absorbency Potential

Even well-designed wipes can benefit from post-production processes to enhance liquid-holding ability:
  • Plasma Etching:

    Treat wipe surfaces with low-pressure oxygen plasma. Plasma creates micro-etchings on fiber surfaces, increasing surface area by 30–40% and improving liquid adhesion. This treatment is especially effective for hydrophobic fibers (e.g., pure polyester), making them more receptive to water-based liquids.

  • Ultrasonic Cleaning:

    Subject finished wipes to ultrasonic cleaning (in deionized water) before packaging. This removes residual manufacturing oils or binder residues that block pores, restoring 10–15% of absorbency lost during production. Ultrasonic cleaning also ensures the wipe is “pre-activated” for immediate use, no need for pre-wetting.

  • Moisture Retention Additives:

    Infuse wipes with small amounts of non-toxic, low-outgassing humectants (e.g., glycerin) for water-based applications. Humectants help the wipe retain liquid longer, reducing the need for frequent wipe changes during extended cleaning tasks (e.g., large PCB assembly lines).

4. Usage Techniques: Maximize Absorbency in Practical Applications

Even optimized wipes perform better with proper handling—train teams on these absorbency-boosting practices:
  • Fold for Targeted Saturation:

    Fold high-density wipes into a 4-layer pad to concentrate absorbent fibers. The folded structure creates a “wicking core” that draws liquid inward, absorbing 2x more than a flat wipe. For spills, place the folded pad directly on the liquid and apply light pressure to speed wicking.

  • Pre-Wet for Viscous Liquids:

    For thick liquids (e.g., flux paste, silicone oil), pre-wet the wipe with a small amount of compatible solvent (e.g., IPA for flux). The pre-wet fibers break down liquid viscosity, allowing the wipe to absorb viscous materials 30% faster than dry wipes.

  • Avoid Over-Scrubbing:

    Scrubbing compresses wipe fibers, closing pores and reducing absorbency. Instead, press the wipe gently against the liquid and let capillary action do the work—this preserves the wipe’s structure and maintains maximum liquid-holding capacity.

Dust-Free Wipes for Precision Cleaning in Electronics Factories

Electronics factories manufacturing microchips, PCBs, sensors, and consumer devices demand precision cleaning to eliminate sub-micron contaminants, flux residues, and handling oils—critical for ensuring product reliability and reducing defects. Cleanroom wet wipes—pre-moistened with high-purity solvents (99.9% IPA, deionized water) or specialized cleaners—deliver consistent, controlled cleaning for delicate components, outperforming traditional rags or spray bottles. Below is their targeted use across key precision cleaning tasks in electronics production.

1. PCB Assembly Lines: Post-Soldering and Rework Cleaning

PCBs with fine-pitch components (0.3mm BGA, 0201 resistors) require residue-free cleaning to prevent short circuits and ensure solder joint integrity:
  • Wipe Selection: Use lint-free polyester wet wipes pre-impregnated with 99% electronic-grade IPA (metal impurities ≤10 ppb). Their strong solvent retention dissolves rosin flux, while continuous filaments avoid fiber contamination on small pads.
  • Application:
    • For solder joints: Fold wipes into 1cm strips and wipe in single linear strokes (parallel to component leads) to lift flux without bending fragile pins.
    • For rework areas: Hold the wipe against dried solder paste for 2–3 seconds to soften, then dab gently—avoids spreading paste into component gaps.
    • Post-clean: Verify with 20x magnification to ensure no residue remains on traces or between pins.

2. Component Packaging: Cleanroom Wipe Use for Trays and Carriers

ESD-sensitive components (ICs, diodes, sensors) are stored in anti-static trays that accumulate dust and oils, risking contamination during placement:
  • Wipe Selection: Choose static-dissipative wet wipes (10⁶–10⁹ Ω) with mild surfactants to clean plastic/metal trays without degrading anti-static properties.
  • Application:
    • Disassemble trays and wipe internal slots with folded wipes—focus on corners where dust lodges.
    • For carrier lids: Wipe sealing surfaces to remove warehouse dust, ensuring a tight seal post-cleaning.
    • Air-dry for 5 minutes before restocking—moisture reduces tray static-dissipative performance.

3. SMT Machine Maintenance: Nozzle and Placement Head Cleaning

Surface Mount Technology (SMT) machines rely on clean nozzles and placement heads for accurate component placement—dust or solder spatter causes misalignment:
  • Wipe Selection: Opt for high-density wet wipes (300+ gsm) pre-wet with 99% IPA. Their thick structure traps solder particles and resists tearing during scrubbing.
  • Application:
    • Power down the machine and ground the head. Wrap wipes around plastic tweezers to clean nozzle openings—twist gently to remove dried paste.
    • Wipe placement head surfaces in circular motions to remove dust, avoiding air vents to prevent fiber ingestion.

4. Final Assembly: Cleaning Interfaces and Enclosures

Finished devices (smartphones, IoT modules) need clean interfaces (USB ports, display edges) and spotless enclosures to meet quality standards:
  • Wipe Selection: Use low-VOC wet wipes for plastic enclosures (avoids discoloration) and lens-grade IPA wipes for glass displays/sensors.
  • Application:
    • Wipe display edges with folded wipes to remove assembly oils—use light pressure to avoid scratching anti-glare coatings.
    • Clean USB ports with mini wipe strips (guided by tweezers) to remove dust, ensuring reliable connectivity.