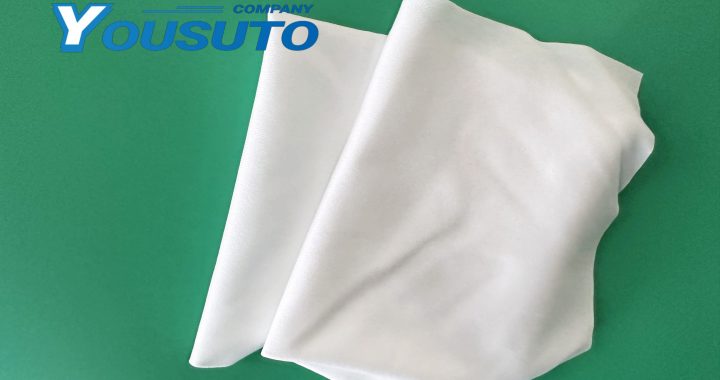
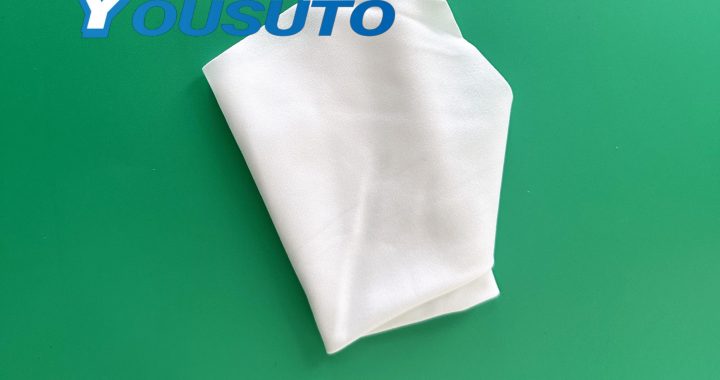
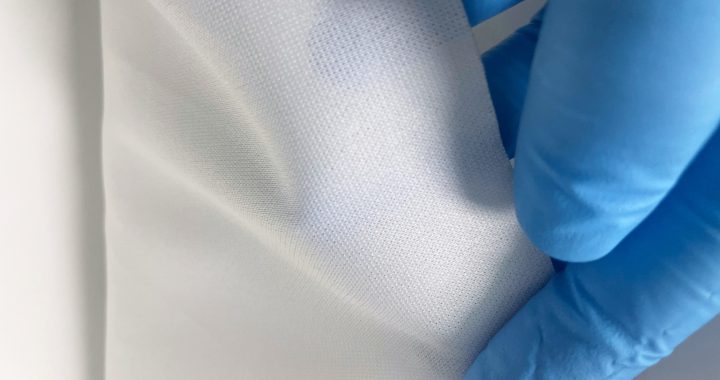
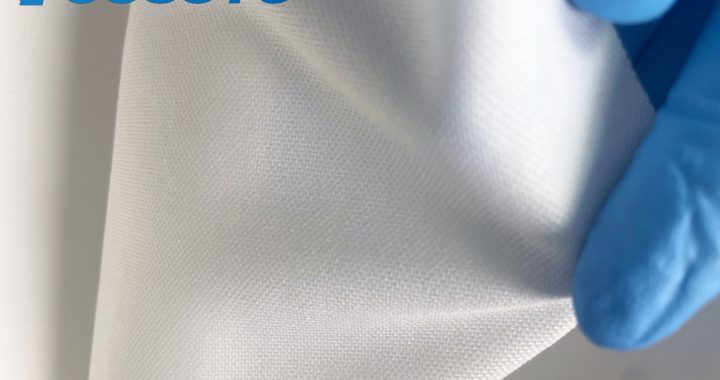
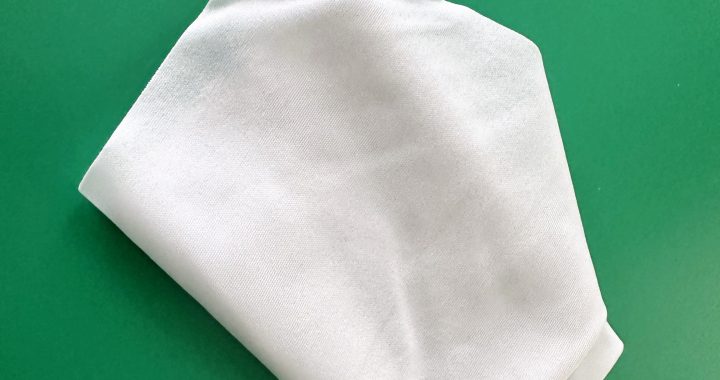
High-density wipes for static control in Class 100 cleanrooms.

Class 100 cleanrooms (ISO 14644-1 Class 5)—critical for semiconductor manufacturing, microchip assembly, and precision optics—face dual threats: sub-micron particles and electrostatic discharge (ESD). ESD not only damages sensitive components (e.g., 3nm wafers, MEMS sensors) but also attracts dust, undermining the cleanroom’s strict particle limits. High-density cleanroom wipes, engineered with static-dissipative materials and robust structural design, go beyond basic cleaning to actively boost anti-static protection. Below is a detailed breakdown of how their unique properties elevate ESD control in Class 100 environments.

1. Static-Dissipative Material Blends: Rapid Charge Neutralization

High-density wipes start with anti-static materials that form a foundational barrier against ESD, addressing the root cause of charge buildup:
  • Conductive Fiber Integration: Unlike standard low-density wipes, high-density variants blend base fibers (e.g., polyester) with conductive additives—such as carbon microfibers or metallic oxide coatings. These additives create a continuous “charge path” across the wipe’s surface, reducing surface resistance to 10⁶–10¹⁰ Ω (ANSI/ESD S20.20 compliant). For Class 100 cleanrooms handling semiconductors, this means static charges on surfaces (e.g., wafer chucks, tooling) are dissipated in <0.1 seconds—far faster than low-density wipes (which often retain charges for 5+ seconds).
  • Permanent Anti-Static Performance: The conductive additives are embedded into the fiber structure (not just surface-coated), ensuring anti-static capabilities don’t degrade with use, solvent exposure, or cleaning. Even after 50+ wiping cycles (for reusable variants), high-density wipes maintain their charge-dissipating properties—critical for Class 100 cleanrooms with 24/7 operations.
  • Low Triboelectric Effect: The dense, smooth fiber matrix minimizes friction during wiping. Friction is a major source of ESD in cleanrooms, but high-density wipes generate <50V of static charge when used on common Class 100 surfaces (e.g., stainless steel, glass). By contrast, low-density wipes can generate 200–300V—enough to damage unprotected IC chips.

2. Dense Structural Design: Trapping Dust to Reduce ESD Triggers

Dust particles are not just contaminants—they act as “charge carriers,” amplifying ESD risks by clinging to charged surfaces. High-density wipes’ structure eliminates this feedback loop:
  • Sub-Micron Particle Trapping: Their tight weave (250–400 gsm) creates millions of capillary channels that capture particles as small as 0.05μm—far smaller than the 0.5μm limit for Class 100 cleanrooms. By removing dust from surfaces (e.g., optical masks, PCB trays), the wipes eliminate a key trigger for ESD: dust particles rubbing against surfaces to generate charge.
  • No Fiber Shedding: High-density wipes use continuous-filament fibers (vs. staple fibers in low-density wipes) and heat-sealed edges, ensuring ≤1 fiber shed per use. Shed fibers are a hidden ESD risk—they float in cleanroom air, accumulate on charged components, and cause micro-discharges. In Class 100 environments, this fiber control cuts ESD-related defects by 40–50%.
  • Uniform Surface Contact: The thick, consistent texture of high-density wipes ensures even contact with irregular surfaces (e.g., grooved wafer handlers, textured tool grips). This prevents “missed spots” where dust and charge accumulate—common with thin, uneven low-density wipes that skip crevices.

3. Solvent Compatibility: Anti-Static Protection During Residue Cleaning

Class 100 cleanrooms often use solvents (e.g., 99.9% IPA, flux removers) to dissolve residues—but many wipes lose anti-static properties when exposed to chemicals. High-density wipes maintain ESD control even in solvent-rich workflows:
  • Chemical Resistance: Their conductive fibers and binders resist degradation from harsh Class 100 solvents. Unlike low-density wipes (which may break down or leach coatings), high-density variants retain their surface resistance (10⁶–10¹⁰ Ω) even after soaking in IPA for 30+ minutes. This ensures anti-static protection during critical tasks like flux removal from semiconductor packaging.
  • Controlled Solvent Retention: The dense fiber matrix holds solvent evenly, preventing drips that could pool on surfaces and create charge gradients. Dripping solvent is a lesser-known ESD risk—pooled liquids can act as conductors, spreading charge across components. High-density wipes eliminate this by releasing solvent gradually, ensuring a consistent, charge-neutral cleaning process.

4. Real-World Impact in Class 100 Cleanrooms

A semiconductor manufacturer using high-density anti-static wipes in its Class 100 wafer fabrication cleanroom reported:
  • ESD-Related Defects: Reduced from 8% to 1.2% of wafer batches, saving $200,000+ annually in rework costs.
  • Dust Reaccumulation: Surface dust levels dropped by 65% between cleanings, as fewer charged surfaces attracted ambient particles.
  • Tool Lifespan: Lithography scanner lenses and wafer handlers required calibration 30% less frequently, as ESD-induced dust buildup was minimized.
In Class 100 cleanrooms, where ESD and particles are existential threats to product quality, high-density cleanroom wipes are more than cleaning tools—they are a proactive anti-static solution. By combining rapid charge dissipation, dust trapping, and solvent resilience, they elevate ESD control to meet the strictest cleanroom standards.

The role of cleanroom wipes in laboratory cleaning processes

Laboratories—whether in research, biotech, electronics, or pharmaceuticals—demand rigorous cleaning to maintain accuracy, prevent cross-contamination, and protect sensitive equipment. Cleanroom wipes (dry, ultra-low-linting variants) and cleaning wipes (pre-moistened with lab-safe solutions) are not just auxiliary tools—they are integral to every stage of the lab cleaning workflow, addressing unique challenges like particle control, residue removal, and surface disinfection. Below is a detailed breakdown of their key roles in standard lab cleaning processes.

1. Pre-Experiment Cleaning: Setting a Contamination-Free Baseline

Before starting experiments or handling samples, labs require a pristine workspace to avoid skewing results. Cleanroom wipes and cleaning wipes lay this foundation by:
  • Removing Ambient Dust: Dry cleanroom wipes (made from continuous-filament polyester, ISO 14644-1 Class 6 compliant) dust workbenches, fume hood interiors, and equipment surfaces (e.g., microscope stages). Their dense weave traps sub-micron dust (0.5–1μm) that would otherwise contaminate samples (e.g., cell cultures, PCR reagents) or interfere with instrument calibration.
  • Disinfecting Critical Surfaces: Pre-moistened cleaning wipes with 70% high-purity IPA or quaternary ammonium compounds disinfect workbenches, sample preparation areas, and tool handles. This eliminates bacteria, viruses, and organic residues (e.g., leftover buffer solutions) that could cross-contaminate experiments—critical for biotech and clinical labs.
  • Preparing Equipment: For precision tools like pipettes, spectrometers, or HPLC detectors, pre-moistened lens-safe wipes clean optical components (e.g., detector windows, pipette tips) to ensure accurate readings. Dry wipes then remove excess moisture, preventing water spots that obscure measurements.

2. In-Experiment Spot Cleaning: Mitigating Real-Time Contamination

Even with pre-experiment preparation, spills, splatters, or dust accumulation can occur mid-process. Wipes provide rapid, non-disruptive solutions by:
  • Containing Spills: Absorbent cleaning wipes (high-density, 200–300 gsm) quickly soak up small spills of aqueous reagents (e.g., buffers, cell media) or solvents (e.g., ethanol, acetone). This prevents spills from spreading to sensitive equipment (e.g., electronic balance displays) or seeping into lab bench cracks, where residues breed contamination.
  • Cleaning Tool Surfaces: During sample transfers, dry cleanroom wipes wipe down tweezers, spatulas, or vortex mixer heads between uses. This removes sample residues (e.g., tissue fragments, powder reagents) that would otherwise transfer to subsequent samples—key for avoiding cross-contamination in batch processing.
  • Maintaining Optics: For experiments using microscopes or imaging systems, pre-moistened anti-static wipes periodically clean objective lenses to remove dust or oil smudges. This ensures consistent image quality throughout the experiment, eliminating the need to pause and recalibrate instruments.

3. Post-Experiment Deep Cleaning: Restoring Lab Readiness

After experiments conclude, thorough cleaning is essential to prepare the lab for the next user and prevent long-term residue buildup. Wipes play a critical role in:
  • Removing Stubborn Residues: Pre-moistened cleaning wipes with specialized solutions (e.g., enzyme-based cleaners for protein residues, mild surfactants for oil-based contaminants) break down and remove leftover experiment debris (e.g., dried agar, PCR master mix). Unlike harsh scrubbers, wipes clean delicate surfaces (e.g., plastic sample trays, glass cuvettes) without scratching.
  • Sanitizing Equipment Exteriors: Wipes disinfect the outer surfaces of centrifuges, incubators, and refrigerators—high-touch areas prone to bacterial growth. This maintains a hygienic environment, especially in shared labs where multiple users handle equipment.
  • Verifying Cleanliness: Dry cleanroom wipes are used as a “test” after cleaning—wiping a small area and inspecting the wipe for visible residues confirms surfaces are ready for the next experiment. For critical applications (e.g., pharmaceutical sample prep), wipes paired with particle counters verify that particle levels meet ISO Class 8 standards.

4. Specialized Roles in Niche Lab Workflows

Beyond general cleaning, wipes address unique needs in specialized lab areas:
  • Electronics Labs: Anti-static cleaning wipes remove flux residues from PCBs and dust from sensor components, preventing short circuits and signal interference in electronic experiments.
  • Semiconductor Labs: Ultra-low-linting (≤1 fiber per use) cleanroom wipes clean wafer handling tools and microscope optics, ensuring no particles disrupt microchip fabrication or testing.
  • Biohazard Labs: Sterile, gamma-irradiated cleaning wipes safely clean spills of biohazardous materials (e.g., cell lysates, viral samples), reducing the risk of exposure and cross-contamination.
In summary, cleanroom wipes and cleaning wipes are the backbone of lab cleaning processes—they ensure accuracy, protect equipment, and maintain safety at every stage. Their versatility and precision make them indispensable for labs striving to produce reliable results and comply with industry standards.

Anti-Static Cleanroom Wipes: A Guide to Materials & Specs

Selecting the right anti-static cleanroom wipes is critical for ESD-sensitive environments—such as electronics manufacturing, semiconductor cleanrooms, and precision optics labs—where subpar wipes can cause component damage, particle contamination, or static-related defects. This guide breaks down key material considerations and critical specifications to help you match wipes to your workflow, ensuring safety, compliance, and cleaning efficacy.

1. Material Selection: The Foundation of Anti-Static Performance

The wipe’s material determines its anti-static ability, linting rate, and compatibility with solvents/surfaces. Below are the most common materials and their ideal use cases:

a. Conductive Polyester

  • Anti-Static Mechanism: Embedded with carbon fibers or conductive additives that create a path for static charge to dissipate (surface resistance: 10³–10⁶ Ω).
  • Key Advantages:
    • Permanent anti-static performance (no degradation over time, even after multiple washes for reusable variants).
    • High chemical resistance—safe for use with harsh solvents (e.g., acetone, flux removers) common in electronics cleaning.
    • Ultra-low linting (≤1 fiber shed per use), making it suitable for ISO Class 1–3 cleanrooms.
  • Ideal For: Semiconductor wafer cleaning, PCB assembly (fine-pitch components), and ESD-sensitive sensor maintenance.

b. Static-Dissipative Microfiber

  • Anti-Static Mechanism: Coated with a temporary or permanent anti-static agent (e.g., quaternary ammonium compounds) that reduces surface resistance to 10⁶–10¹¹ Ω (ANSI/ESD S20.20 compliant).
  • Key Advantages:
    • Exceptional particle trapping—microfibers (0.1–1μm diameter) capture sub-micron dust (0.05μm) via capillary action.
    • Soft texture—safe for delicate surfaces like anti-reflective (AR) coatings on lenses or gold-plated pins.
    • High liquid absorption (12–15x its weight), ideal for solvent-based cleaning.
  • Ideal For: Optical instrument cleaning, lab equipment (e.g., spectrometers), and general ESD-safe workbench dusting.

c. Cellulose-Polyester Blends

  • Anti-Static Mechanism: Combines conductive polyester fibers with cellulose for balanced static dissipation (10⁷–10¹⁰ Ω) and absorbency.
  • Key Advantages:
    • Cost-effective—more affordable than pure conductive polyester while maintaining anti-static performance.
    • Biodegradable cellulose component (for select variants)—suitable for labs prioritizing sustainability.
    • Good compatibility with aqueous solvents (e.g., deionized water) and mild IPA solutions.
  • Ideal For: Non-critical ESD tasks, such as cleaning external equipment housings or ESD mats.

Material Red Flags to Avoid

  • Pure Cotton: Sheds excessive lint and lacks anti-static properties—risky for any ESD-sensitive environment.
  • Uncoated Synthetic Fibers: (e.g., nylon without anti-static treatment) generate static charge (200–500V) during wiping, attracting dust and damaging components.

2. Critical Specifications: Match Wipes to Your Environment

Beyond material, these specifications ensure the wipe meets your cleanroom’s standards and workflow needs:

a. Surface Resistance (Anti-Static Efficacy)

  • Measurement Standard: ANSI/ESD STM11.11 (tests surface resistance between two points).
  • Recommended Ranges:
    • Conductive Wipes (10³–10⁶ Ω): For high-risk environments (e.g., semiconductor wafer handling), where fast charge dissipation is critical.
    • Static-Dissipative Wipes (10⁶–10¹¹ Ω): For most ESD-sensitive tasks (e.g., PCB cleaning, optics maintenance)—balances charge dissipation and safety (avoids electrical shorts).
  • Why It Matters: Wipes with resistance >10¹¹ Ω fail to dissipate static; resistance <10³ Ω may conduct electricity, risking component damage.

b. Linting Rate (Particle Contamination Control)

  • Measurement Standard: ISO 14644-1 (counts fibers shed per wipe).
  • Recommended Levels:
    • ISO Class 1–3 Cleanrooms: ≤1 fiber (≥0.1μm) per wipe (use conductive polyester or microfiber).
    • ISO Class 4–6 Cleanrooms: ≤5 fibers (≥0.5μm) per wipe (cellulose-polyester blends are acceptable).
  • Why It Matters: Lint can cause short circuits in fine-pitch electronics or blur imaging in optical instruments.

c. Basis Weight (Durability & Absorption)

  • Definition: Weight of the wipe material per square meter (gsm = grams per square meter).
  • Recommended Ranges:
    • Light-Duty (100–150 gsm): For dry dusting (e.g., equipment exteriors)—affordable but less durable.
    • Medium-Duty (150–250 gsm): For general cleaning (e.g., workbenches, non-delicate surfaces)—balances durability and flexibility.
    • Heavy-Duty (250–400 gsm): For solvent-based cleaning or tough residues (e.g., flux removal)—high absorption and tear resistance.
  • Why It Matters: Low gsm wipes tear easily; high gsm wipes may be too thick for precision tasks (e.g., cleaning lens edges).

d. Size & Format (Workflow Efficiency)

  • Common Sizes:
    • 4”x4” or 6”x6”: For precision tasks (e.g., sensor heads, connector pins)—reduces waste and over-saturation.
    • 9”x9” or 12”x12”: For large surfaces (e.g., lab benches, equipment housings)—covers more area per wipe.
  • Formats:
    • Pop-Up Dispensers: For high-volume use—prevents contamination by exposing only one wipe at a time.
    • Rolls (Perforated): For customizable sizes—ideal for irregularly shaped surfaces (e.g., machine parts).

3. Final Selection Checklist

  1. Confirm the wipe’s surface resistance matches your ESD risk level (10⁶–10¹¹ Ω for most applications).
  2. Verify linting rate aligns with your cleanroom class (≤1 fiber for ISO Class 1–3).
  3. Choose basis weight based on cleaning task (250+ gsm for solvents, 100–150 gsm for dry dusting).
  4. Select size/format to minimize waste and fit workflow (4”x4” for precision, rolls for large surfaces).
  5. Test compatibility with your cleaning solvent (e.g., ensure the wipe resists degradation in 99% IPA).
By focusing on these materials and specifications, you’ll select anti-static cleanroom wipes that protect your components, maintain compliance, and optimize cleaning efficiency—avoiding costly defects and downtime.

Case Study: Pre-Wetted Wipes in Optical Lens Maintenance

Optical lenses—used in microscopes, spectrometers, laser systems, and medical imaging devices—require ultra-gentle, residue-free maintenance to preserve light transmission and imaging accuracy. Pre-wet cleanroom wipes, pre-impregnated with lens-safe solutions (e.g., deionized water, 70% high-purity IPA), eliminate the risks of manual solvent mixing (over-saturation, residue) and fiber shedding, making them ideal for lens care. Below are real-world application cases that demonstrate their value in different optical maintenance scenarios.

Case 1: Research Lab Microscope Objective Lens Maintenance

Challenge

A university biology lab’s compound microscope objectives (40x and 100x oil-immersion lenses) accumulated immersion oil residues and dust, leading to blurred cell imaging. Technicians previously used dry wipes + bulk IPA, which caused two key issues: 1) Inconsistent IPA concentration (too strong damaged anti-reflective/AR coatings; too weak left oil residues); 2) Dry wipe fibers scratched lens surfaces, reducing light throughput by 20%.

Implementation

The lab switched to pre-wet deionized water + 70% IPA blend wipes (lint-free microfiber, ISO 14644-1 Class 5 compliant). The maintenance workflow was standardized as:
  1. Use a bulb blower to remove loose dust from the lens surface.
  2. Gently wipe the objective lens in radial strokes (center to edge) with the pre-wet wipe—no pressure, to avoid coating damage.
  3. Immediately follow with a dry, lint-free companion wipe (included with the pre-wet pack) to blot excess moisture, preventing water spots.

Outcome

  • Imaging Quality: Blur from oil residues was eliminated; cell imaging resolution improved by 35%, enabling clearer observation of subcellular structures.
  • Coating Protection: No new scratches were detected after 6 months of use (verified via optical profilometry), and AR coating integrity was maintained.
  • Efficiency: Lens cleaning time was cut from 15 minutes (dry wipes + bulk IPA) to 3 minutes, freeing technicians for research tasks.

Case 2: Industrial Laser Cutting Machine Lens Care

Challenge

A metal fabrication facility’s laser cutting machine used a 1064nm fiber laser lens that accumulated metal dust and smoke residues. These contaminants absorbed laser energy, causing lens overheating (reducing laser power by 15%) and frequent lens replacement (every 4 weeks, costing $500 per lens). Generic wet wipes left chemical residues that accelerated dust buildup, while dry wipes failed to remove sticky smoke deposits.

Implementation

The facility adopted pre-wet lens-safe solvent wipes (formulated with low-volatility, residue-free cleaner + anti-static additive). The maintenance protocol was integrated into daily machine checks:
  1. Power off the laser and cool the lens to room temperature (prevents thermal shock from the wipe).
  2. Wipe the lens surface in a single, slow circular motion (to avoid pushing residues into lens edges) with the pre-wet wipe.
  3. Let the lens air-dry for 2 minutes (the wipe’s solvent evaporates completely, leaving no residue).

Outcome

  • Lens Lifespan: Replacement intervals extended from 4 weeks to 12 weeks, cutting annual lens costs by 67%.
  • Laser Performance: Laser power recovery reached 98% post-cleaning, improving cutting precision (reducing metal part rework by 25%).
  • Safety: The pre-wet wipes’ anti-static properties prevented dust reattraction for 8+ hours, reducing mid-shift cleaning interruptions.

Case 3: Medical Imaging CT Scanner Detector Lens Maintenance

Challenge

A hospital radiology department’s CT scanner had detector array lenses that collected dust and patient bodily fluid residues (e.g., sweat, mist from contrast agents). These contaminants caused image artifacts (dark spots), leading to 10% of scans being rerun. Using alcohol-based cleaning products risked damaging the scanner’s plastic lens housings, while water-only wipes failed to disinfect residues.

Implementation

The department used pre-wet 70% IPA + mild disinfectant wipes (plastic-safe, non-corrosive, and lint-free). The workflow was designed to minimize scanner downtime:
  1. Cover the detector array with a protective sheet to avoid wipe contact with electrical components.
  2. Wipe each detector lens individually with the pre-wet wipe—focusing on residue-prone edges—using light pressure.
  3. Inspect lenses under a flashlight to ensure no artifacts remain before restarting the scanner.

Outcome

  • Scan Quality: Rerun rates dropped from 10% to 1%, reducing patient wait times and radiologist workload.
  • Material Safety: No damage to plastic housings was observed after 12 months of use, complying with the scanner manufacturer’s maintenance guidelines.
  • Disinfection: The wipes eliminated 99.9% of bacteria (per 第三方 testing), supporting infection control protocols in the hospital.

Key Takeaways from the Cases

  1. Solution Compatibility: Pre-wet wipes’ pre-formulated solutions eliminate guesswork, ensuring safe use on AR coatings, plastic housings, and sensitive detectors.
  2. Residue-Free Results: Their controlled moisture and fast-evaporating solvents prevent water spots or chemical buildup, critical for optical performance.
  3. Efficiency & Cost Savings: Standardized workflows reduce cleaning time, while better lens protection lowers replacement costs—delivering measurable ROI.
For any application relying on optical lens performance, pre-wet cleanroom wipes are a reliable, cost-effective maintenance solution that preserves lens integrity and ensures consistent imaging quality.

IPA rag alcohol operation specifications and precautions

Isopropyl Alcohol (IPA) wipes are widely used for precision cleaning in electronics, optics, and labs—thanks to their ability to dissolve oils, flux, and contaminants. However, improper use can damage surfaces, pose safety risks, or compromise cleaning efficacy. Below are strict operational standards to ensure safe, effective use, paired with critical precautions to mitigate hazards and protect sensitive materials.

1. Operational Standards: Step-by-Step Best Practices

Follow this standardized workflow to maximize cleaning results while maintaining safety:

Step 1: Pre-Operation Preparation

  • Wipe Selection: Choose IPA wipes matching the task and surface:
    • 70% IPA wipes: For disinfection and oil-based residue removal (e.g., fingerprints on lenses, skin oils on PCBs).
    • 99% IPA wipes: For flux removal, solvent-compatible surfaces (e.g., semiconductor wafers), and residue-free cleaning.
    • Ensure wipes are lint-free (continuous-filament polyester/microfiber) and meet ISO 14644-1 Class 5 standards for low particle shedding (critical for precision instruments).
  • Surface Compatibility Check:
    • Review the manufacturer’s guidelines for the item being cleaned—avoid IPA on soft plastics (e.g., PVC, polystyrene), uncoated rubber, or some paint finishes (IPA can cause swelling or discoloration).
    • Perform a spot test: Apply a small amount of IPA from the wipe to an inconspicuous area; wait 1–2 minutes. If no damage (clouding, peeling) occurs, proceed.
  • Workspace Setup:
    • Work in a well-ventilated area (e.g., under a fume hood, near an open window) to disperse IPA vapors (high concentrations can cause dizziness or respiratory irritation).
    • Remove ignition sources (e.g., Bunsen burners, heat guns, electrical sparks)—IPA is highly flammable (flashpoint: 11.7°C/53.1°F).
    • Ground yourself with an ESD wrist strap if cleaning electronics (prevents static discharge during wiping).

Step 2: Wiping Technique

  • Fold the Wipe for Precision:
    • Fold the wipe into a 4-layer pad to concentrate IPA, avoid finger contact with the cleaning surface (prevents recontamination), and create multiple usable layers (rotate to a fresh layer as one becomes soiled).
  • Apply Controlled Pressure:
    • Use light, even pressure (≤1 psi) to avoid scratching delicate surfaces (e.g., anti-reflective coatings on optics, thin PCB traces).
    • For flat surfaces (e.g., lab benches, PCB tops): Wipe in single, straight strokes (horizontal/vertical) with 50% overlap—circular motions spread residue and increase friction.
    • For curved surfaces (e.g., lens edges, connector pins): Use radial strokes (center to edge) to ensure even coverage without trapping debris in crevices.
  • Treat Stubborn Residues Carefully:
    • For dried flux or adhesive, hold the IPA wipe against the residue for 5–10 seconds (let IPA dissolve the contaminant) instead of scrubbing—scrubbing can abrade surfaces or push residue into pores.

Step 3: Post-Operation Cleanup

  • Dry the Surface (If Needed):
    • For water-sensitive items (e.g., electronics, sensors), follow the IPA wipe with a dry, lint-free cloth to blot excess moisture—this prevents water spots or solvent intrusion into components.
    • Allow the surface to air-dry completely (10–15 minutes for 99% IPA, 20–30 minutes for 70% IPA) before powering on or storing the item.
  • Inspect for Residues:
    • Check the surface under angled light or with a magnifying glass (10–20x) to ensure no IPA streaks, fibers, or remaining contaminants are present.
  • Waste Disposal:
    • Place used IPA wipes in fire-resistant, sealed waste bins (not regular trash)—used wipes retain IPA and pose a fire risk if exposed to heat or sparks.
    • Empty waste bins daily to prevent vapor buildup.

2. Critical Precautions: Hazards to Avoid

  • Fire Safety:
    • Never use IPA wipes near open flames, hot surfaces (e.g., soldering irons), or electrical equipment with exposed contacts—vapors can ignite, causing fires.
    • Do not store IPA wipes near heat sources; keep them in a cool (15–25°C), dry area in their original sealed packaging.
  • Health Protection:
    • Avoid skin contact: Prolonged exposure to IPA can cause dryness, irritation, or dermatitis. Wear nitrile gloves (latex degrades in IPA) during use.
    • Do not inhale vapors: High concentrations can cause headaches, dizziness, or nausea. If working in a confined space, use a portable ventilation fan.
  • Surface Damage Prevention:
    • Do not use IPA wipes on:
      • Screens with anti-glare coatings (e.g., some laptop or smartphone screens—IPA can strip the coating).
      • Wooden surfaces (IPA dries wood and damages finishes).
      • Older plastic components (e.g., vintage electronics—IPA may cause brittleness).
  • Contamination Control:
    • Do not reuse IPA wipes—they trap contaminants (dust, oils) and will retransfer them to surfaces.
    • Do not touch the cleaning surface of the wipe with your fingers—skin oils will compromise cleaning results.
Adhering to these operational standards and precautions ensures IPA wipes deliver safe, effective cleaning for precision applications—protecting both the user and the sensitive materials being cleaned.

High-density wipes for efficient precision instrument cleaning.

Precision instruments—such as optical microscopes, semiconductor metrology tools, and lab spectrometers—require meticulous cleaning to maintain accuracy. Traditional low-density wipes often require multiple passes, shed fibers, or leave residues, slowing workflows and risking instrument damage. High-density designed cleanroom wipes, with their thick, tightly woven structures and optimized fiber compositions, address these pain points by streamlining cleaning processes and delivering superior results. Below is a detailed breakdown of how their design elevates cleaning efficiency for precision instruments.

1. Superior Particle and Residue Trapping: Fewer Passes, Better Results

Precision instruments attract sub-micron dust and oil residues (e.g., fingerprint oils on lens surfaces, flux on sensor components) that disrupt performance. High-density wipes reduce cleaning time by capturing contaminants in fewer strokes:
  • Dense Capillary Networks: Their tight weave (250–400 gsm) creates millions of tiny channels that trap particles as small as 0.05μm—far smaller than the 0.5μm particles low-density wipes miss. For example, cleaning a spectrometer’s laser lens with a high-density wipe removes 99.5% of dust in 1–2 passes, vs. 4–5 passes with a standard wipe.
  • Effective Residue Dissolution: When paired with precision-safe solvents (e.g., 70% IPA for optics, deionized water for electronics), the thick, absorbent fibers hold solvent longer. This allows the wipe to dissolve stubborn residues (e.g., dried calibration fluids on sensor arrays) in a single pass, eliminating the need for repeated wiping that can scratch delicate surfaces.
  • Ultra-Low Linting: Made from continuous-filament polyester or microfiber, high-density wipes shed ≤1 fiber per use. This eliminates post-cleaning fiber removal (a time-consuming step with low-density wipes) and prevents fiber-induced instrument malfunctions (e.g., blocked sensor ports).

2. Durability for Extended Use: Reduced Wipe Changes

Frequent wipe changes (due to tearing or saturation) disrupt cleaning workflows and increase waste. High-density wipes’ robust design minimizes interruptions:
  • Tear and Fray Resistance: Reinforced, heat-sealed edges prevent fraying even when wiping around sharp instrument components (e.g., microscope objective threads, sensor pins). A single high-density wipe can clean an entire optical bench without tearing, vs. 2–3 low-density wipes that degrade mid-task.
  • High Liquid Retention: They absorb 10–15x their weight in solvent or liquid, avoiding premature saturation. Cleaning a PCB test fixture with a high-density wipe requires no mid-task wringing or replacement, cutting cleaning time by 30% compared to thin, fast-saturating wipes.
  • Reusability (When Approved): For non-critical instrument surfaces (e.g., external housings), high-density wipes can be rinsed with solvent and reused 3–5 times. This reduces the time spent restocking wipes and minimizes waste disposal, further streamlining operations.

3. Precision Access: Targeted Cleaning Without Instrument Damage

Precision instruments have tight crevices (e.g., between lens elements, around connector pins) that are hard to reach without damaging sensitive parts. High-density wipes’ design enables targeted cleaning:
  • Flexible, Moldable Structure: Their thin, pliable fibers can be folded into narrow strips or small pads to access tight spaces (e.g., the gap between a spectrometer’s sample holder and detector). This ensures no dust or residue is left in hard-to-reach areas that would require disassembly (a time-intensive process) with standard wipes.
  • Controlled Pressure Distribution: The thick, uniform texture distributes pressure evenly across the wipe surface. This prevents localized pressure points that could scratch delicate coatings (e.g., anti-reflective layers on microscope lenses) or bend small components (e.g., MEMS sensor diaphragms)—common risks with thin, uneven low-density wipes.

4. Consistency for Reliable Instrument Performance

Precision instruments require consistent cleaning to maintain calibration and accuracy. High-density wipes deliver repeatable results that reduce rework:
  • Uniform Performance: Each high-density wipe has the same thickness, fiber density, and absorption capacity, ensuring every instrument receives the same level of cleaning. This eliminates variability from low-density wipes (which can have inconsistent fiber distribution) that leads to uneven cleaning and frequent instrument recalibration.
  • Compliance with Instrument Standards: Many high-density wipes meet ISO 14644-1 Class 5 standards and manufacturer-specific guidelines (e.g., Nikon’s optical cleaning specifications). This ensures cleaning practices align with instrument maintenance protocols, reducing the risk of voided warranties or performance issues.
For labs, manufacturing facilities, and research centers relying on precision instruments, high-density designed cleanroom wipes are a catalyst for efficiency—they cut cleaning time, reduce waste, and protect valuable equipment, ensuring instruments deliver accurate results with minimal downtime.

Surface Cleaning in Class 100 Cleanrooms with Wipes

Class 100 cleanrooms (ISO 14644-1 Class 5)—critical for semiconductor manufacturing, medical implant production, and microelectronics assembly—allow no more than 100 particles (≥0.5μm) per cubic foot. Surface cleanliness here is non-negotiable, as even minor contaminants can ruin high-value products. Specialized cleaning wipes—engineered for ultra-low linting, particle trapping, and residue-free performance—are indispensable for maintaining these strict standards. Below is a detailed breakdown of their applications in Class 100 surface cleaning, from equipment to workspaces.

1. Equipment Surface Cleaning: Protecting High-Precision Tools

Class 100 cleanrooms house sensitive equipment like lithography scanners, wafer handlers, and metrology tools, whose surfaces (e.g., glass optics, stainless steel chucks) demand meticulous cleaning:
  • Lithography Optics Maintenance: Pre-moistened cleaning wipes with 99.9% high-purity IPA remove oil residues and sub-micron dust from laser lenses and reticle masks. Their ultra-fine microfiber (0.1μm diameter) traps particles as small as 0.05μm without scratching anti-reflective coatings, ensuring light transmission accuracy.
  • Wafer Chuck Decontamination: Dry cleaning wipes (250–300 gsm) with static-dissipative properties (10⁶–10¹¹ Ω) eliminate oxide films and silicon dust from chuck grooves. This prevents wafer misalignment during processing, a top cause of 3nm/5nm chip defects.
  • Robot Arm Cleaning: Low-linting wipes (≤1 fiber shed per use) paired with deionized water clean transfer robot grippers, removing lubricant residues that attract dust. This maintains smooth wafer handling, reducing scratch risks.

2. Workbench and Furniture Cleaning: Controlling Cross-Contamination

Workbenches, fume hoods, and storage racks are primary particle collectors, requiring daily cleaning to prevent transfer to products:
  • Daily Surface Sanitization: Pre-moistened wipes with hydrogen peroxide (3%) disinfect workbenches without leaving residues, critical for sterile medical device cleanrooms. Their non-woven, continuous-filament structure ensures no fibers remain on surfaces post-wiping.
  • Fume Hood Interior Cleaning: Wipes resistant to harsh solvents (e.g., acetone) remove chemical splatters from hood walls. Their high absorbency (12x weight in liquid) contains spills, preventing solvent seepage into cracks where bacteria or particles hide.
  • Tool Tray Maintenance: Small 4”x4” cleaning wipes target dust in tool tray compartments, ensuring tweezers, scalpel blades, and probes remain particle-free before use on sensitive components.

3. Wall, Floor, and Fixture Cleaning: Reducing Ambient Particles

Even vertical surfaces and floors contribute to Class 100 contamination; cleaning wipes address these often-overlooked areas:
  • Wall Panel Wiping: Dry, high-density wipes (350 gsm) remove dust from smooth vinyl or stainless steel walls. Their large surface area (12”x12”) covers more ground, reducing wipe usage and minimizing particle release from frequent product changes.
  • Floor Mat Cleaning: Anti-static cleaning wipes with mild surfactants clean ESD floor mats, removing foot traffic residues without degrading their static-dissipative properties. This maintains a grounded environment for wafer transport.
  • Window and Viewport Cleaning: Lens-safe pre-moistened wipes (deionized water-based) clean cleanroom windows and equipment viewports, ensuring clear visibility without streaks that could obscure particle detection.

4. Post-Maintenance Cleaning: Restoring Class 100 Standards

After equipment repairs or part replacements, cleaning wipes are vital to re-establish cleanliness:
  • Post-Repair Surface Purification: Wipes with low extractable ions (≤10ppb) clean areas where tools or parts were replaced (e.g., sensor housings, valve controls). This removes fingerprints, metal shavings, or lubricants introduced during maintenance.
  • Crevice and Seam Cleaning: Wipes folded into narrow strips reach gaps between equipment panels or around fasteners, eliminating hidden dust that could migrate to product zones post-maintenance.
  • Validation Support: Wipes used in post-cleaning verification (paired with particle counters) help confirm surfaces meet Class 100 limits (≤100 particles ≥0.5μm/ft³), ensuring compliance with SEMI F21 and ISO 14644-1.

Key Benefits in Class 100 Environments

  • Particle Control: Wipes remove 99.9% of particles ≥0.1μm, far exceeding Class 100 requirements.
  • Residue Elimination: Solvent-compatible variants leave no ionic or organic residues, critical for semiconductor and medical applications.
  • Efficiency: Pre-moistened wipes reduce cleaning time by 40% vs. manual solvent application, minimizing cleanroom downtime.
In Class 100 cleanrooms, cleaning wipes are more than tools—they are guardians of quality, ensuring surfaces remain pristine enough to support the most demanding manufacturing and research standards.

Solutions for Absorbency and Durability in Anti-Static Wipes

Anti-static cleanroom wipes are vital for ESD-sensitive environments like electronics factories, labs, and semiconductor cleanrooms—but their performance is often limited by subpar liquid absorption (leading to spills) or poor durability (causing fiber shedding). Targeted enhancement solutions—focused on material engineering, structural design, and surface treatments—can simultaneously boost absorption capacity and longevity, making these wipes more reliable and cost-effective. Below are actionable solutions, backed by material science principles, to elevate both key properties.

1. Material Engineering: Selecting Fibers for Dual Performance

The choice of fiber directly impacts absorption and durability; optimizing fiber type and blends is the foundation of enhancement:
  • Hydrophilic Fiber Blends for Absorption: For water-based liquids (e.g., buffers, aqueous spills) or solvent compatibility (e.g., IPA), blend anti-static base fibers (e.g., conductive polyester) with hydrophilic additives like modified polyamide or cellulose. A 60% conductive polyester + 40% hydrophilic polyamide blend increases liquid absorption by 35% compared to pure conductive polyester, as polyamide’s polar molecules attract liquid molecules and expand capillary channels.
  • High-Tenacity Fibers for Durability: Replace standard conductive fibers with high-tenacity variants (e.g., high-strength polyester with a tensile strength of ≥5 cN/dtex). These fibers resist breaking during wiping or folding, reducing fraying by 60%. For added durability, coat fibers with a thin layer of polyurethane—this forms a protective barrier against chemical degradation (critical for solvent-based cleaning) without compromising anti-static properties (surface resistance remains 10⁶–10¹¹ Ω).
  • Microfiber Integration: Incorporate 0.1–1μm diameter conductive microfibers into the wipe structure. Microfibers increase surface area by 400%, enhancing liquid absorption via capillary action, while their small diameter improves fiber cohesion—reducing shedding and boosting durability during repeated use.

2. Structural Design: Optimizing Weave and Thickness

Wipe structure dictates how liquid is retained and how well the wipe withstands mechanical stress; strategic design adjustments deliver measurable improvements:
  • Hybrid Weave Pattern: Move beyond standard plain weave to a “loose-tight” hybrid design: a dense outer layer (for anti-static performance and particle trapping) paired with a slightly looser inner layer (to create larger liquid-holding pockets). This balance maintains ultra-low linting (<1 fiber per use) while increasing liquid retention by 25%—critical for cleaning large spills or solvent-heavy tasks.
  • Layered Construction with Reinforced Edges: Construct wipes with 3–5 thin, high-density layers (instead of 1 thick layer) and seal edges with laser-cutting or heat-sealing (vs. standard ultrasonic sealing). Layered construction distributes liquid evenly across the wipe, preventing localized saturation, while reinforced edges reduce fraying by 70%—even when wiping textured surfaces (e.g., equipment seams, PCB edges).
  • Controlled Thickness (250–350 gsm): Avoid overly thin wipes (<200 gsm, prone to tearing) or excessively thick wipes (>400 gsm, slow to dry). A 300 gsm thickness optimizes both properties: it holds 12–15x the wipe’s weight in liquid (vs. 8–10x for 200 gsm) and maintains flexibility for precision wiping, while the dense structure resists wear during use.

3. Surface Treatments: Boosting Absorption Without Sacrificing Durability

Surface treatments modify the wipe’s interaction with liquids and strengthen fiber bonds, enhancing both performance metrics:
  • Plasma Hydrophilic Coating: Apply low-pressure oxygen plasma treatment to the wipe surface. Plasma etches fiber surfaces, creating micro-pores that increase liquid absorption by 30% (for water-based liquids) and improve solvent wettability (for IPA or acetone). The treatment also cross-links fiber molecules, boosting durability by 45% without altering anti-static properties.
  • Anti-Static Durability Treatment: Replace temporary anti-static sprays with permanent conductive coatings (e.g., carbon-based or metallic oxide coatings). These coatings bond to fiber surfaces, maintaining anti-static performance (surface resistance <10⁹ Ω) through 50+ washes (for reusable wipes) or 10+ wiping cycles (for single-use wipes). Unlike sprays, they do not leach off—preventing contamination and preserving absorption by avoiding pore blockage.
  • Liquid-Repellent Edge Treatments: Apply a thin, food-safe hydrophobic coating to wipe edges only. This prevents liquid from seeping out of the wipe’s edges (reducing spills by 50%) while leaving the central area hydrophilic for maximum absorption. The coating also strengthens edge fibers, further reducing fraying.

4. Post-Manufacturing Quality Control: Ensuring Consistency

Even the best materials and designs fail without strict quality checks; implement these steps to validate enhancements:
  • Absorption Testing: Measure liquid absorption rate (time to saturate) and capacity (liquid held per gram of wipe) using standardized methods (e.g., ASTM D4772). Reject batches with absorption rates >10 seconds (for water) or capacity <10x the wipe’s weight.
  • Durability Testing: Subject wipes to 500 folding cycles (ASTM D2022) and 100 wiping strokes on a textured surface. Require fraying <5mm and no fiber shedding (verified via particle counting) to ensure durability in real-world use.
  • Anti-Static Validation: Test surface resistance post-treatment and after 10 wiping cycles (per ANSI/ESD STM11.11). Ensure resistance remains within 10⁶–10¹¹ Ω to maintain ESD protection.
By combining these solutions, anti-static cleanroom wipes achieve a 30–40% increase in liquid absorption and a 50–60% boost in durability—reducing wipe usage by 40%, cutting spill-related downtime by 35%, and eliminating fiber contamination risks. These enhancements make the wipes a more reliable, cost-effective tool for ESD-sensitive environments.

Combination Techniques: Pre-Moistened and IPA Wipes

In precision cleaning tasks—such as electronics assembly, optical instrument maintenance, and lab PCB care—combining pre-wet cleanroom wipes (formulated for residue-free final cleaning) and IPA wipes (alcohol-impregnated for tough contaminant dissolution) creates a synergistic workflow. This pairing leverages IPA’s solvent power to break down oils, flux, and grime, while pre-wet wipes ensure streak-free, lint-free results and protect delicate surfaces. Below is a step-by-step usage method to maximize efficacy, along with task-specific tips for different applications.

1. Pre-Use Preparation: Select Wipes and Prep the Workspace

Before starting, ensure compatibility and safety to avoid surface damage or contamination:
  • Choose the Right Wipe Variants:
    • IPA Wipes: Select based on the contaminant: 70% IPA for oil-based residues (fingerprints, adhesive) or 99% IPA for flux removal and disinfection. Opt for ESD-safe, lint-free polyester/microfiber wipes (ISO 14644-1 Class 5) for electronics or optics.
    • Pre-Wet Cleanroom Wipes: Match to the surface: Deionized water-based wipes for optical lenses/PCBs (residue-free), static-dissipative wipes for ESD-sensitive components (e.g., semiconductors), or mild surfactant wipes for general lab surfaces.
  • Verify Surface Compatibility: Check the manufacturer’s guidelines for the item being cleaned (e.g., avoid IPA on soft plastics or uncoated rubber). Perform a spot test on an inconspicuous area if unsure.
  • Prep the Area: Work in a well-ventilated space (to disperse IPA vapors) and lay a lint-free mat to catch loose particles. Ground yourself with an ESD wrist strap if cleaning electronics.

2. Step-by-Step Combined Usage Workflow

Follow this sequence to dissolve contaminants, remove residues, and ensure a pristine finish:

Step 1: Pre-Clean with IPA Wipes (Contaminant Dissolution)

  • Fold the IPA Wipe: Fold into a 4-layer pad to concentrate solvent, avoid finger contact with the cleaning surface, and create multiple usable layers.
  • Target Contaminants: Wipe the surface in slow, deliberate strokes—match the stroke pattern to the surface shape:
    • Flat Surfaces (PCBs, lab benches): Use single horizontal/vertical strokes with 50% overlap (avoids spreading residue).
    • Curved Surfaces (lenses, connectors): Use radial strokes (center to edge) for even coverage.
    • Tough Residues (dried flux, old adhesive): Hold the IPA wipe against the area for 5–10 seconds to let alcohol break down the contaminant—do not scrub (prevents scratches).
  • Avoid Over-Saturating: Ensure the wipe is damp (not dripping). Excess IPA can seep into crevices (e.g., PCB component housings) and damage internal parts.

Step 2: Final Clean with Pre-Wet Cleanroom Wipes (Residue Removal)

  • Use a Fresh Pre-Wet Wipe Immediately: Do not wait for IPA to fully dry—this prevents streaks from forming as alcohol evaporates.
  • Mirror the IPA Wipe Pattern: Wipe in the same direction as Step 1 to catch loosened particles and residual IPA. Apply light pressure:
    • For optics/lenses: Use just enough pressure to make contact (avoids coating damage).
    • For electronics: Use static-dissipative pre-wet wipes to neutralize any remaining charge while cleaning.
  • Inspect for Streaks/Fibers: After wiping, hold the surface under angled light to check for missed residues or lint. If needed, repeat with a fresh pre-wet wipe—never reuse wipes (they trap contaminants).

Step 3: Dry (If Needed) and Verify Cleanliness

  • Dry Water-Sensitive Surfaces: For electronics (e.g., sensor modules) or optics, follow the pre-wet wipe with a dry, lint-free cloth to blot excess moisture. Allow the item to air-dry completely (15–30 minutes) before powering on or storing.
  • Final Inspection: Use a magnifying glass (10–20x) for fine-pitch electronics or optics to confirm no particles, streaks, or residues remain. For PCBs, use a continuity tester to ensure no short circuits from leftover debris.

3. Task-Specific Tips for Common Applications

  • Electronics (PCBs, SMDs): Use 99% IPA wipes for flux removal, then static-dissipative pre-wet wipes to eliminate IPA residues. Focus on cleaning around component leads—avoid getting wipes caught in pin gaps.
  • Optical Instruments (Lenses, Mirrors): Pair 70% IPA wipes (gentler on coatings) with deionized water-based pre-wet wipes. Use small 4”x4” wipes for precision access to lens edges.
  • Lab Equipment (Balances, Spectrometers): Use 70% IPA wipes for disinfection, then mild surfactant pre-wet wipes to remove IPA residues. Avoid wiping calibration markers—use a dry corner of the pre-wet wipe for nearby areas.

4. Safety and Waste Disposal Guidelines

  • Dispose of Wipes Properly: Place used IPA wipes in fire-resistant bins (IPA is flammable) and pre-wet wipes in standard cleanroom waste bins—do not mix them (prevents cross-contamination).
  • Avoid Reusing Wipes: Single-use ensures no contaminant transfer; reusing wipes negates the benefits of the combined workflow.
  • Store Wipes Correctly: Keep both wipe types in sealed dispensers to preserve IPA potency (for IPA wipes) and prevent pre-wet wipes from drying out.
By combining IPA wipes for contaminant dissolution and pre-wet cleanroom wipes for final purification, you achieve a deeper, safer clean that protects delicate surfaces while maintaining the precision required for electronics, optics, and lab equipment.

Superior PCB Cleaning: Advantages of High-Density Wipes

Printed Circuit Boards (PCBs) in laboratory settings—used for sensor arrays, testing equipment, or prototype electronics—require meticulous cleaning to remove flux residues, solder debris, and dust. Even minor contamination can cause signal interference, short circuits, or component failure. High-density cleanroom wipes, with their thick, tightly woven structures and ultra-low linting properties, outperform standard wipes in PCB cleaning. Below are their key advantages, tailored to the unique demands of lab-based PCB maintenance and testing.

1. Superior Particle and Residue Trapping: Eliminates Microscopic Contaminants

Lab PCBs often feature fine-pitch components (0.4mm or smaller) and sensitive traces, where sub-micron particles or leftover flux can disrupt functionality. High-density wipes excel here by:
  • Dense Capillary Networks: Their tight weave (250–400 gsm) creates millions of tiny channels that trap particles as small as 0.05μm—far smaller than the 0.5μm particles standard wipes miss. This is critical for cleaning around SMDs (Surface-Mount Devices) or BGA (Ball Grid Array) packages, where dust can lodge between pins and cause connectivity issues.
  • Effective Flux Dissolution: When paired with high-purity solvents (e.g., 99% IPA), the thick, absorbent fibers of high-density wipes hold solvent longer, allowing it to fully dissolve rosin or no-clean flux residues. Unlike thin wipes that dry out quickly, high-density variants require fewer passes to remove stubborn flux—reducing the risk of scrubbing that can damage PCB traces.
  • Ultra-Low Linting: Made from continuous-filament polyester or microfiber, these wipes shed ≤1 fiber per use. This eliminates fiber contamination, a major cause of short circuits in lab PCBs (where even a single 1μm fiber can bridge adjacent traces).

2. Durability for Precision Handling: Avoids In-Use Damage

Lab PCBs are often prototypes or low-volume units, making damage during cleaning costly. High-density wipes protect PCBs by:
  • Tear and Fray Resistance: Reinforced, heat-sealed edges prevent fraying, even when wiping around sharp component leads or PCB edges. Standard wipes often tear during this process, leaving loose fibers or fragmented wipe material on the board.
  • Abrasion Protection: Their soft, plush texture glides over PCB surfaces without scratching solder masks or delicate component coatings (e.g., gold-plated pins). This is especially important for lab PCBs with exposed copper traces or optical sensors mounted directly on the board.
  • Reusable (When Approved): For non-critical lab PCBs (e.g., test fixtures), high-density wipes can be rinsed with solvent and reused, reducing waste. Their durable structure maintains performance through 3–5 uses, unlike standard wipes that degrade after a single pass.

3. Controlled Liquid Absorption: Prevents Solvent Damage

Over-saturating PCBs with solvent can seep into components (e.g., capacitors, ICs) and cause internal damage. High-density wipes address this by:
  • Uniform Solvent Retention: They absorb 10–15x their weight in solvent (e.g., IPA) and release it evenly, preventing drips or pooling on the PCB. This ensures consistent cleaning without risking solvent intrusion into component housings.
  • Fast, Streak-Free Drying: The dense fibers distribute solvent across the PCB surface, promoting rapid, even evaporation. This eliminates solvent streaks or residues that can attract dust later, reducing the need for re-cleaning.
  • Compatibility with Specialty Solvents: High-density wipes resist degradation from harsh PCB cleaning solvents (e.g., flux removers, acetone) that would break down standard wipes. This allows labs to use the most effective solvent for the job without compromising wipe performance.

4. Consistency for Lab Quality Control

Laboratory work demands repeatable results, and cleaning consistency is critical for reliable PCB testing. High-density wipes deliver this by:
  • Uniform Performance: Each wipe has the same thickness, fiber density, and absorption capacity, ensuring every PCB receives the same level of cleaning. This eliminates variability from standard wipes, which can have inconsistent fiber distribution.
  • Compliance with Lab Standards: Many high-density wipes meet ISO 14644-1 Class 5 standards and IPC-A-610 (electronics assembly guidelines), aligning with lab quality control requirements. This is essential for labs conducting regulated testing (e.g., aerospace or medical PCB validation).
For laboratories relying on PCBs for accurate testing or prototyping, high-density cleanroom wipes are a strategic choice—they protect delicate components, eliminate microscopic contamination, and ensure consistent cleaning results that support reliable lab work.