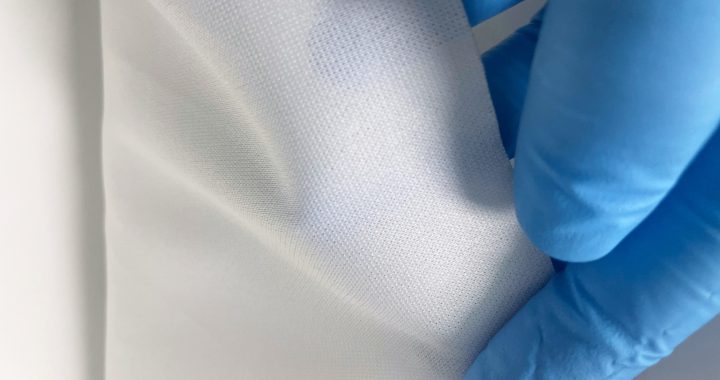
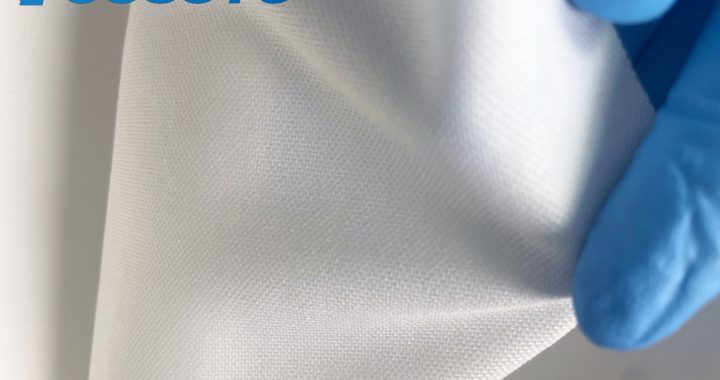
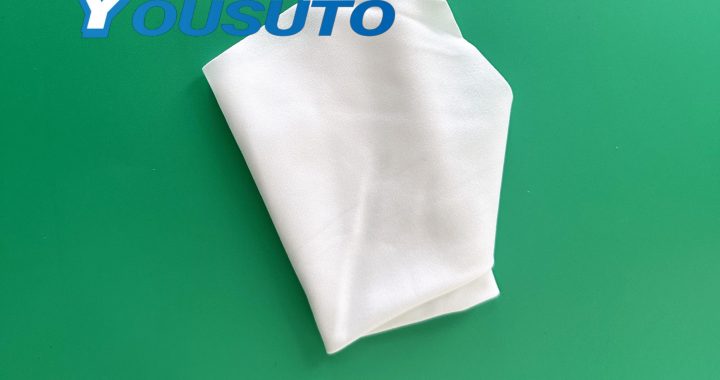
How to Use Alcohol Spray with Cleanroom Wipes Correctly

Alcohol spray combined with cleanroom wipes offers an effective way to clean sensitive surfaces, widely used in electronics, optics, medical, and precision instruments. To achieve the best results, proper usage is essential.

1. Preparation

  • Choose appropriate cleanroom wipes, typically made of polyester or microfiber with low lint.

  • Use 70%-90% isopropyl alcohol spray, ensuring purity and no contaminants.

2. Usage Steps

  1. Spray Alcohol

    • Evenly spray the alcohol onto the cleanroom wipe surface without oversaturating to avoid dripping.

  2. Gentle Wiping

    • Gently wipe the target surface in one direction or along the grain to prevent scratches. Avoid scrubbing back and forth.

  3. Air Dry

    • Let the surface air dry naturally after wiping; avoid using a dry cloth afterward to prevent recontamination.

3. Precautions

  • Avoid frequent use on materials sensitive to alcohol, such as some plastics or coatings.

  • Maintain a proper distance when spraying to control wetness.

  • Ensure good ventilation to avoid inhaling alcohol vapors.

  • Do not spray alcohol directly on hot or energized equipment.

4. Applications

  • Cleaning optical lenses, camera lenses, and smartphone screens

  • Dust removal on electronic components and circuit boards

  • Disinfecting laboratory instruments and medical devices

Is Alcohol Cleanroom Wipe an Organic Material? Composition and Application Guide

Alcohol cleanroom wipes are widely used in electronics, optics, and medical industries for efficient surface cleaning. But are they considered organic materials? This article explores their composition and classification from both chemical and functional perspectives.

1. What Is an Alcohol Cleanroom Wipe?

An alcohol cleanroom wipe is a lint-free cloth pre-saturated or used with isopropyl alcohol (commonly 70% IPA + 30% deionized water). It’s designed for cleaning sensitive surfaces in cleanrooms, laboratories, and precision manufacturing.

2. Is It an Organic Material?

Partially yes – alcohol cleanroom wipes contain organic components.

  • Alcohol Component (IPA):
    Isopropyl alcohol (IPA) is an organic solvent containing carbon and hydrogen atoms. It is classified as an organic compound due to its molecular structure.

  • Wipe Base Material:
    Most cleanroom wipes are made from polyester or microfiber, which are organic polymers (long-chain synthetic hydrocarbons). Some may include nonwoven blends or wood pulp, which are also organic-based.

Conclusion:
Both the alcohol solution and the wipe material typically fall under the category of organic substances, making alcohol cleanroom wipes generally considered an organic cleaning product.

3. Advantages and Applications

  • Fast evaporation and low residue

  • Effective removal of oils, inks, dust, and organic contaminants

  • Ideal for cleaning lenses, optical surfaces, semiconductors, and PCBs

Can Cleanroom Wipes and Alcohol Remove Ink? Methods, Effectiveness, and Precautions

Whether in industrial settings or everyday cleaning, removing ink stains from surfaces like glass, metal, or plastic can be a challenge. A commonly used method involves combining cleanroom wipes with alcohol. But does this approach really work for ink removal? Let’s explore how effective it is and how to use it properly.

1. How It Works: Cleanroom Wipes + Alcohol

  • Cleanroom Wipes: Made from polyester or microfiber, these wipes are lint-free, non-abrasive, and designed for sensitive surfaces like optical components and electronics.

  • Isopropyl Alcohol (IPA): Typically 70–100% concentration, IPA effectively dissolves organic residues such as ink, grease, and oil. It evaporates quickly without leaving residue.

2. Can It Remove Ink?
In most cases, yes, but effectiveness depends on several factors:

  • Type of Ink:

    • Water-based ink (whiteboard markers, fountain pens): Easily removed with alcohol.

    • Oil-based or permanent markers: Can be removed, though may require repeated wiping.

    • Industrial or deeply absorbed ink: Harder to remove completely.

  • Surface Material:

    • Smooth surfaces (glass, stainless steel, plastic): Excellent cleaning results.

    • Porous or textured surfaces (wood, fabric, paper): Ink soaks in and may not fully come off.

  • Application Method:

    • Apply a small amount of alcohol to the cleanroom wipe.

    • Gently wipe the ink stain. Repeat if necessary.

    • Avoid aggressive rubbing to prevent surface damage.

3. Important Tips

  • Avoid using on coated or painted surfaces—alcohol may strip coatings.

  • 70–90% IPA is ideal for ink removal; pure alcohol can evaporate too quickly.

  • Ensure proper ventilation during use to avoid inhaling alcohol fumes.

4. Recommended Products

  • Pre-saturated alcohol cleanroom wipes

  • Dry cleanroom wipes + separate IPA bottle

  • Microfiber alcohol wipes for delicate surface cleaning

Which Cleanroom Environments Are RotAdler Pharma Gloves Suitable For

Which Cleanroom Environments Are RotAdler Pharma Gloves Suitable For?

In industries such as pharmaceutical manufacturing, semiconductors, and precision optics—where cleanroom requirements are stringent—the choice of gloves not only protects operators but also directly impacts product quality and compliance. RotAdler Pharma gloves, designed specifically for high-standard environments, offer outstanding cleanliness, chemical resistance, and comfort, making them ideal for various critical cleanroom applications.

I. Cleanroom Grades Suitable for RotAdler Pharma Gloves

RotAdler Pharma gloves are manufactured under strict cleanroom processes to ensure low particle generation, minimal extractables, and low volatile residues. They are suitable for:

  • ISO Class 5–7 cleanrooms (equivalent to Class 100–10,000)

  • GMP Grade A/B/C zones, ideal for sterile manufacturing, bioreactor handling, and vaccine filling

  • EU GMP Annex 1 compliant environments, especially sterile areas in European pharmaceutical production

  • PIC/S-compliant facilities, including global CDMOs and export-oriented pharmaceutical plants

II. Key Application Industries and Scenarios

1. Biopharmaceutical and Sterile Drug Manufacturing

For sterile processes such as cell culture, aseptic filling, and filtration, RotAdler Pharma gloves provide powder-free surfaces and excellent barrier protection, reducing the risk of cross-contamination.

2. Semiconductor and Electronics Cleanrooms

In wafer handling, photolithography, and final assembly—where particles are critical—RotAdler Pharma gloves excel in electrostatic control and particulate suppression.

3. Medical Device Manufacturing and Assembly

Used in the production and inspection of implantable devices and precision catheters, these gloves minimize particulate contamination and ensure high-level cleanliness.

4. Aseptic Laboratories and Research Facilities

For applications like PCR, microbiology, and cell research, RotAdler Pharma gloves reduce contamination risk and ensure data integrity.

III. Key Product Features

  • Powder-free design: Prevents allergic reactions and particulate contamination

  • Low-linting and low particle generation: Suitable for Class 100 cleanroom environments

  • High flexibility and puncture resistance: Ensures comfort during prolonged or detailed operations

  • Excellent chemical resistance: Compatible with disinfectants and cleaning agents

  • Certified to international standards: Complies with EN 374, ASTM D6319, ISO 13485, and more

IV. Why Choose RotAdler Pharma?

Compared to conventional medical or industrial gloves, RotAdler Pharma gloves are engineered to meet higher standards of cleanliness, safety, and compliance. They are ideal for environments that demand tight contamination control, regulatory assurance, and consistent batch quality—making them a smart investment for modern cleanroom operations.

Conclusion

In critical cleanroom environments, even the smallest detail can influence product safety and performance. RotAdler Pharma gloves, with their cleanroom-grade engineering and high-performance materials, offer dependable protection while ensuring compliance and reliability. For companies that demand the highest levels of contamination control, RotAdler is the professional choice.

Video: Zebra Tabletop and Print Engine Printhead Cleaning Procedure

Video: Zebra Tabletop and Print Engine Printhead Cleaning Procedure

A dirty print head can result in poor heat transfer and a poorly printed image. White streaks can appear if elements are dirty as a result of residue or other buildup on the printhead elements. These deposits could allow heat buildup on the elements and result in premature element failure.
issue / question
This procedure details methods used for • Cleaning the printhead on a Zebra Tabletop or Pax printer • Printhead maintenance and care
applicable to
Zebra Tabletop and Print Engine printers
resolution / answer

Cleaning The Zebra Printhead


Inconsistent print quality such as voids in the bar codes or graphics may indicate a dirty Printhead. For optimum performance, the printhead should be cleaned regularly. Zebra Technologies Corporation recommends performing the cleaning procedure when installing a new Roll of Ribbon or after 3 rolls of label stock.

Note: You are not required to turn off the printer power for this procedure.   Remove all rings, watches, hanging necklaces, identification badges, or other jewelry that could touch the print head or get caught in the printer.  If you turn off the power, you will lose all temporary settings, such as label formats, and you must reload them before you resume printing.
Click here for information on extending the life of your printhead.

.

Zebra Tabletop and Print Engine Printhead Cleaning Procedure

Printhead Cleaning Procedure:

1. Open the Printhead by moving the Printhead Lever to the OPEN position.
2. Remove the media and ribbon (if present).
3. Use a cleaning swab (99.7% isopropyl alcohol) and wipe the print elements from end to end. (The print elements are the grayish/ black strip just behind the chrome strip on the underside of the Printhead.) Allow a few seconds for the solvent to evaporate.
4. Rotate the Platen Roller and clean thoroughly with a cleaning swab.
5. Brush or vacuum any accumulated paper lint and dust away from the Rollers
and the Media and Ribbon Sensors.
6. Reload ribbon and/ or media, close and latch the Printhead, restore power
(if necessary) and run the PAUSE Key self test to check print quality.
Click here for Pens and Kits information

Note: Silverline RFID printer printheads must only be cleaned using Save-A-Printhead Cleaning Film shown below.

Helpful Information

Extending the life of your printhead Read More>>

Tough or hardened printhead buildup can be removed using “Save A Printhead” Cleaning Strips  Read More>>
Part Numbers for Save-A-Printhead Cleaning Film Kits. Order kit number: For Printers with Print Widths:

  • 46902  3.0″ – 4.0″  (76 mm–102 mm)
  • 44902  4.0″ – 5.0″ (102 mm – 127 mm)
  • 48902  5.0″ – 6.0″ (127 mm – 152 mm)
  • 38902  6.0″ – 7.0″ (152 mm – 178 mm)
  • 22902  8.0″ – 9.0″ (178 mm – 229 mm)

Cleaning the Printhead

Cleaning the Printhead

Always use a new cleaning pen on the printhead. (An old pen carries contaminants from its previous uses that may damage the printhead.)
The printhead becomes hot while printing. To protect from damaging the printhead and risk of personal injury, avoid touching the printhead. Use only the cleaning pen to perform maintenance.
When you load new media, you can also clean the printhead.
  • Rub the cleaning pen across the dark area of the printhead. Clean from the middle to the outside. This will move adhesive transferred from the edges of the media to the printhead outside of the media path.
  • Wait one minute before closing the printer.
    When you clean the printer, use one of the following supplies that best suits your needs:
    Cleaning Supplies
    Cleaning Supplies
    Order Quantity
    Intended Purpose
    Cleaning pens (105950-035)
    Set of 12
    Clean printhead
    Cleaning swabs (105909-057)
    Set of 25
    Clean media path, guides and sensors
    You can obtain cleaning supplies at zebra.com/supplies.
    The cleaning process takes just a couple of minutes using the steps outlined below.
    Cleaning Process
    Printer Part
    Method
    Interval
    Printhead
    Allow the printhead to  cool for a minute, then use a new cleaning pen to swab the dark line on the printhead cleaning from the center to the outside edges of the printhead. See Cleaning the Printhead.
    After every roll of media.
    Platen roller
    Remove the platen roller to clean. Clean the roller thoroughly with 90% medical-grade alcohol and a cleaning swab or lint-free cloth. See Platen Cleaning and Replacement.
    As needed.
    Peel bar
    Clean it thoroughly with 90% medical-grade alcohol and a fiber-free cleaning swab. Let alcohol dissipate and the printer dries completely.
    Media path
    Exterior
    Use a water-dampened cloth.
    Interior
    Gently brush out the printer.
    Adhesives and media material can over time transfer onto the printer components along the media path including the platen and printhead. This build-up can accumulate dust and debris. Failure to clean the printhead, media path, and platen roller could result in inadvertent loss of labels, label jams, and possible damage to the printer.
    Using too much alcohol can result in contamination of the electronic components requiring a much longer drying time before the printer will function properly.

How to Clean a Zebra Printer with a Cleaning Card”

The following are the general steps for using a cleaning card to clean a Zebra printer:


  1. Preparation work: Ensure that the printer is powered on and in a ready state. Select a cleaning card that matches the printer model. Usually, a long T-shaped path cleaning card and a short T-shaped feeder/input slot cleaning card are included.
  2. Enter the cleaning mode: Press and hold the multifunction control button on the printer for a few seconds until “CLEAN PRINTER” is displayed on the liquid crystal screen. Follow the prompts on the liquid crystal screen, remove all the ribbons and cards from the printer, and close the printer cover.
  3. Clean the path: When “FEED LONG CLEANING CARD” is displayed on the liquid crystal screen, insert the long T-shaped path cleaning card into the card inlet at the front of the printer. The printer will automatically suck in the cleaning card and perform reciprocating cleaning to clean the internal path of the printer. After the cleaning is completed, “REMOVE LONG CLEANING CARD” will be displayed on the liquid crystal screen. At this time, take out the long cleaning card from the printer.
  4. Clean the feeder: When “INSERT FEEDER CLEANING CARD” is displayed on the liquid crystal screen, open the feeder cover, insert the short T-shaped cleaning card, close the feeder cover, and the printer will start to clean the feeder part. After the cleaning is completed, “REMOVE FEEDER CLEANING CARD” will be displayed on the liquid crystal screen. Take out the short cleaning card from the printer.
  5. Complete the cleaning: After all the cleaning cards are taken out, “Done” will be displayed on the liquid crystal screen, indicating that the cleaning process is completed. Reinstall the cards and ribbons, and the printer can be used normally.


There may be slight differences in the specific operation steps for different models of Zebra printers. In addition, in order to maintain the performance of the printer, it is recommended to use the cleaning card for cleaning regularly. The specific cleaning frequency can be determined according to the usage of the printer and changes in print quality.
✅ Food Processing Plants – Meat processing, seafood handling, fruit and vegetable sorting, frozen food production. ✅ Catering Industry – Kitchen operations, fast food preparation, food packaging. ✅ Supermarkets and Food Retail – Deli sections, bakeries, fresh food handling. ✅ Home Kitchens – Useful for handling raw meat, peeling shrimp, chopping onions, and maintaining hygiene.

Why Does the Food Processing Industry Use Blue Nitrile Gloves?

In the food processing industry, whether in food factories, restaurant kitchens, or supermarket deli sections, blue nitrile gloves are a standard requirement for workers. Compared to other glove colors and materials, why does the food industry prefer blue nitrile gloves? Today, let’s uncover the real reasons!

1. Why Does the Food Processing Industry Choose “Blue” Gloves?

🔹 High Visibility to Prevent Foreign Object Contamination
During food processing, if a glove tears and fragments fall into the food, blue is the easiest color to spot, as natural food rarely contains blue elements. This helps prevent foreign object contamination. In contrast, white, transparent, or flesh-colored gloves can blend in with food, increasing safety risks.

🔹 Complies with Food Safety Standards
Many international food safety regulations, such as HACCP, ISO 22000, and FDA, recommend using high-visibility gloves, and blue has become the industry standard for food safety.

🔹 Facilitates Food Safety Supervision
Supervisors and inspectors can easily check whether employees are wearing compliant gloves, improving hygiene management efficiency and reducing the risk of violations.

2. Why Choose Nitrile Gloves for Food Processing?

In addition to color, the material of food processing gloves must meet strict safety standards. Compared to PVC and latex gloves, nitrile gloves offer significant advantages:

Latex-Free to Prevent Allergies
Latex gloves contain natural latex proteins that may cause allergic reactions. Nitrile gloves are latex-free, making them suitable for all users without the risk of irritation.

Oil and Chemical Resistance
Food processing involves frequent contact with oils, seasonings, vinegar, alcohol, and other substances. Nitrile gloves are more resistant to chemical corrosion than PVC or latex gloves, ensuring long-lasting protection.

Powder-Free to Avoid Food Contamination
Some latex gloves contain powder, which can contaminate food. Most nitrile gloves are powder-free, ensuring no residue is left on food surfaces and meeting hygiene standards.

High Elasticity for Comfort and Flexibility
Compared to PVC gloves, nitrile gloves offer superior elasticity and a snug fit, allowing workers to perform delicate tasks such as chopping, wrapping, and sorting food without restriction.

High Puncture Resistance to Reduce Breakage Risks
Nitrile gloves are more resistant to tearing and puncturing than latex gloves, minimizing the risk of glove fragments contaminating food and improving overall food safety.

3. How to Choose the Right Gloves for Food Processing?

When selecting gloves for food processing, consider the following factors:

🔸 Compliance with food safety regulations (e.g., FDA, CE certification).
🔸 A bright, high-contrast color for easy detection.
🔸 Resistance to oils and chemicals for handling various food products.
🔸 A powder-free design to prevent food contamination.
🔸 Good elasticity and durability for comfort and protection.

Blue nitrile gloves meet all these requirements, making them the top choice in the food industry!

4. Applications of Blue Nitrile Gloves

Food Processing Plants – Meat processing, seafood handling, fruit and vegetable sorting, frozen food production.
Catering Industry – Kitchen operations, fast food preparation, food packaging.
Supermarkets and Food Retail – Deli sections, bakeries, fresh food handling.
Home Kitchens – Useful for handling raw meat, peeling shrimp, chopping onions, and maintaining hygiene.

5. Conclusion

The food industry prefers blue nitrile gloves for multiple reasons:

Bright color enhances visibility, ensuring food safety.
Latex-free, preventing allergic reactions.
Resistant to oils and chemicals, ideal for food handling.
Powder-free to avoid food contamination.
Elastic, puncture-resistant, and comfortable for extended use.

With increasing food safety regulations, blue nitrile gloves have become the industry standard, protecting both food and workers.

70/30 IPA polyester dust-free wipes | Isopropyl alcohol pre-moistened wipes

How to choose dust-free cloth for wiping and cleaning machines

When cleaning machine equipment (such as automation equipment, precision instruments, production lines, etc.), choosing the appropriate weight (g/m²) of lint-free wipes is crucial, as it directly affects cleaning effectiveness, durability, and operational convenience. Different equipment and cleaning needs require different lint-free wipe weights. Below are common recommended weight ranges and types:

1. Lighter Lint-Free Wipes (60-100g/㎡)

Applicable scenarios: Cleaning smaller, precision machinery, electronic components, optical instruments, etc.

  • Advantages:
    • Good adaptability: Lighter wipes can better conform to machine surfaces, especially small parts and complex shapes.
    • Flexibility: Easier to wipe in narrow areas and on fine surfaces, reducing cleaning inconvenience caused by thicker materials.
    • Ease of use: The lighter material makes the cleaning process more flexible, without the hindrance of thick cloth.
  • Recommended types: Suitable for wiping fine surfaces that don’t require high absorbency.

2. Medium Weight Lint-Free Wipes (100-150g/㎡)

Applicable scenarios: Cleaning larger surfaces, industrial equipment, or machines that require a moderate level of absorbency (such as CNC machines, large production lines, etc.).

  • Advantages:
    • Good absorbency: Provides moderate absorbency, effectively cleaning oil, dust, and liquids from surfaces.
    • Durability: More durable and tear-resistant, making it suitable for long-term use.
    • Surface protection: Does not easily damage the surface of machinery while providing effective cleaning.
  • Recommended types: Suitable for routine cleaning tasks, particularly in industrial environments.

3. Heavier Lint-Free Wipes (150-200g/㎡)

Applicable scenarios: Machines or equipment that require high absorbency, such as large production lines, liquid removal, oil stain cleaning, etc.

  • Advantages:
    • High absorbency: Excellent for removing liquids and oil stains, especially for tougher cleaning tasks.
    • Enhanced durability: Suitable for frequent cleaning tasks, as the material lasts longer and maintains high cleaning performance.
    • Long-lasting performance: Thicker material offers better durability and longer cleaning effect.
  • Recommended types: Suitable for cleaning tasks with high absorbency and durability requirements.

Recommended Lint-Free Wipe Types:

  1. Polyester Lint-Free Wipes:
    • Ideal for cleaning electronic devices and precision instruments. Polyester has a low friction coefficient, preventing surface scratches, and is excellent for high-precision machine cleaning.
  2. Polyester/Nylon Blend Lint-Free Wipes:
    • These wipes are ideal for industrial equipment cleaning, where high absorbency and long-lasting durability are needed. The blend combines the durability of polyester and the absorbency of nylon, making them suitable for most industrial cleaning tasks.
  3. Lint-Free Paper or Paper-Based Wipes:
    • Suitable for cleaning more delicate or simple surfaces. While paper-based wipes perform well for light cleaning tasks, fiber-based wipes are generally better suited for high-precision machine cleaning.

Conclusion:

Choosing the right weight for lint-free wipes is essential for cleaning machine equipment. Generally, 100-150g/㎡ lint-free wipes are suitable for most machines and industrial equipment, offering good absorbency without being overly thick, making them ideal for a variety of surface cleaning tasks. For tasks that involve more liquid or heavy oil stains, 150-200g/㎡ heavier wipes may be more appropriate to ensure effective cleaning and durability.

By selecting the right weight of lint-free wipes based on specific cleaning tasks and working environments, you can enhance cleaning efficiency, protect equipment from damage, and extend the lifespan of machinery, achieving effective and cost-efficient cleaning results.

Anti-static storage plastic pallets, made from conductive polypropylene (PP) material with a surface resistance of 104-109Ω, effectively prevent static damage to electronic components. Available in sizes of 12001000145mm and 1200800145mm, ideal for use in the electronics, semiconductor, and optoelectronics industries.

What is an anti-static blister tray?

Antistatic Blister Tray is an antistatic packaging material used for storing, transporting, and protecting electronic components, precision parts, and other items susceptible to static damage. It is produced using thermoforming technology and typically made from antistatic plastic materials, such as antistatic PVC, antistatic PET, and antistatic PS, ensuring that the tray’s surface does not accumulate static electricity, thus protecting sensitive electronic devices from electrostatic discharge (ESD).

Performance of Antistatic Blister Trays:

  • Antistatic Properties: The core feature of antistatic blister trays is their ability to effectively prevent static accumulation and discharge. They have conductive or static dissipative properties, with surface resistivity typically ranging from 10^6 to 10^9 ohms, effectively neutralizing static electricity and preventing damage to electronic products.
  • Durability: Antistatic blister trays are highly durable and impact-resistant, able to withstand daily use and the impacts that occur during transportation.
  • UV Resistance: Some antistatic trays are designed with UV resistance to withstand prolonged exposure to sunlight.
  • Dust Resistance: The smooth surface of the thermoformed tray helps reduce the attachment of dust and particles, aiding in protecting the products from contamination.
  • Customizability: Antistatic blister trays can be customized in size, shape, and slot configuration to accommodate the storage and transport needs of different products.
  • Eco-Friendly: Most antistatic blister trays are made from recyclable, eco-friendly materials, meeting sustainability requirements.

Classification of Antistatic Blister Trays:

By Material:

  • Antistatic PVC Trays: Made from antistatic polyvinyl chloride material, widely used for the packaging and transportation of everyday electronic components.
  • Antistatic PET Trays: Made from polyethylene terephthalate (PET) material, typically offering higher temperature resistance and strength, suitable for packaging precision equipment.
  • Antistatic PS Trays: Made from antistatic polystyrene (PS) material, suitable for short-term storage and transportation of electronic products.

By Function:

  • Static Dissipative Trays: Surface resistivity between 10^6 and 10^9 ohms, suitable for protecting standard electronic components from static electricity.
  • Conductive Trays: Surface resistivity below 10^6 ohms, suitable for devices with extreme sensitivity to static, such as integrated circuits, chips, semiconductors, etc.

By Shape:

  • Standard Blister Trays: Typically rectangular or square with regular slots, suitable for storing common electronic components.
  • Custom Blister Trays: Custom shapes and slots designed according to specific requirements, accommodating products of special sizes and shapes.

By Use Scenario:

  • Laboratory Grade Antistatic Trays: Used in laboratories or production lines to provide high-level static protection.
  • Industrial Grade Antistatic Trays: Used in large-scale production environments, typically durable and adaptable.
  • Transportation Grade Antistatic Trays: Used during transportation to ensure that products are protected from static damage during shipping.

Antistatic blister trays are widely used in industries such as semiconductors, electronics, LEDs, optics, and precision machinery, playing an essential role in ensuring product quality and safety during storage, transport, and handling.