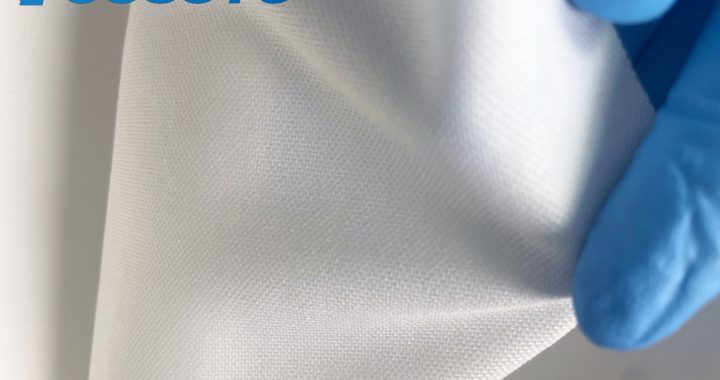
Laboratory optical instruments—including microscopes, spectrometers, laser systems, and imaging cameras—rely on pristine lenses, mirrors, and detectors to deliver accurate, high-resolution results. Even minute dust particles, fingerprint oils, or cleaning residues can scatter light, blur images, or damage delicate anti-reflective (AR) coatings. High-density cleanroom wipes, with their thick, ultra-low-linting structures and gentle fiber compositions, are uniquely suited to clean these sensitive components. Below is a detailed guide to their use, covering key steps, best practices, and benefits for lab optical maintenance.
1. Key Advantages of High-Density Wipes for Optical Instruments
Before diving into usage steps, it’s critical to understand why high-density wipes outperform standard low-density alternatives for optics:
- Ultra-Low Linting: Constructed from continuous-filament polyester or microfiber (0.1–1μm diameter), high-density wipes shed ≤1 fiber per use. This eliminates fiber contamination— a major risk for optics, where even a single 1μm fiber can block light or create artifacts in imaging.
- Gentle on Coatings: Their plush, dense texture distributes pressure evenly across surfaces, avoiding scratches on fragile AR, IR, or UV coatings (common with thin, uneven low-density wipes that create localized pressure points).
- Superior Particle Trapping: The tight weave (250–400 gsm) creates millions of capillary channels that capture sub-micron dust (0.05μm) without rubbing it into lens surfaces—critical for precision instruments like confocal microscopes, where dust disrupts laser focus.
- Controlled Solvent Retention: When paired with lens-safe solvents (e.g., 70% IPA, deionized water), high-density wipes hold liquid evenly, preventing drips that could pool on optics or seep into instrument housings.
2. Step-by-Step Usage for Common Laboratory Optical Instruments
A. Microscope Objective Lenses (4x to 100x Oil-Immersion)
Microscope objectives are among the most sensitive optical components, often contaminated with immersion oil, dust, or sample residues (e.g., cell culture media):
- Pre-Clean: Remove Loose Dust: Use a bulb blower (not compressed air, which can force dust into lens crevices) to gently blow away loose particles from the objective lens. Hold the objective vertically to prevent dust from falling onto other components.
- Wipe Preparation: Fold a dry high-density wipe into a 4-layer pad. For oil-immersion lenses, lightly dampen one corner of the pad with 70% IPA (avoid saturating the wipe—excess solvent can dissolve lens cement).
- Wiping Technique:
- Grip the objective barrel firmly to stabilize it.
- Wipe the lens surface in slow, radial strokes (center to edge) with light pressure (<1 psi). Do not scrub—this risks removing AR coatings.
- For oil residues, hold the IPA-dampened corner against the lens for 2–3 seconds to dissolve oil, then wipe once gently.
- Final Polish: Use a dry corner of the folded wipe to buff the lens and remove any remaining solvent streaks.
B. Spectrometer Detector Windows and Cuvette Holders
Spectrometers rely on clear detector windows and clean cuvette holders to measure light accurately—contamination here skews absorbance or emission readings:
- Power Down and Access: Turn off the spectrometer and open the detector compartment (follow the manufacturer’s guidelines to avoid damaging internal optics).
- Dry Cleaning: Use a small, dry high-density wipe (4”x4”) folded into a thin strip to reach the detector window. Wipe in a single horizontal stroke (avoid back-and-forth motions, which spread dust).
- Remove Residues: If the window has stubborn residues (e.g., dried cuvette leaks), dampen the wipe strip with deionized water (safer than IPA for some detector coatings). Wipe once, then immediately follow with a dry strip to prevent water spots.
- Cuvette Holder Cleaning: Use the same dry wipe strip to clean the holder’s interior—focus on slots where cuvettes sit, as these trap dust and residue that can misalign cuvettes.
C. Laser System Optics (Beam Splitters, Mirrors)
Laser optics are highly sensitive to scratches and residue—even small imperfections can cause beam distortion or power loss:
- Safety First: Ensure the laser is in “standby” mode and the beam path is blocked to prevent eye injury.
- Wipe Selection: Choose a high-density microfiber wipe (300+ gsm) specifically labeled “laser-safe” (these have extra-pure fibers to avoid laser-induced damage).
- Solvent Use (If Needed): For grease or fingerprint residues, use a minimal amount of lens-grade isopropyl alcohol (99.9% purity—lower grades leave residues). Apply 1–2 drops to the wipe (not directly to the optic) and wipe in a single, slow stroke.
- Inspection: After cleaning, use a flashlight at a 45° angle to check for streaks or scratches. If streaks remain, repeat with a fresh dry wipe.
3. Critical Do’s and Don’ts for Optical Cleaning
- Do: Use only lens-safe solvents (70% IPA, deionized water, or manufacturer-recommended cleaners). Avoid acetone, ethanol, or harsh detergents—these damage AR coatings.
- Don’t: Reuse high-density wipes for optics. Used wipes trap dust and residues that will recontaminate surfaces.
- Do: Store unused wipes in a sealed, dust-free container. Exposure to lab air causes dust buildup on wipes, which defeats their purpose.
- Don’t: Use high-density wipes on hot optics (e.g., laser mirrors immediately after use). Thermal shock from the wipe can crack glass or delaminate coatings—wait for optics to cool to room temperature.
By using high-density cleanroom wipes correctly, laboratories preserve the performance and lifespan of their optical instruments—reducing calibration frequency, eliminating image artifacts, and ensuring reliable, reproducible results for research and testing.
